CCLab Mini Project 7: Sketch Gallery
Links
Github Link: https://github.com/AndyHyprillion/CCLabProjects/tree/main/Andy_website
Website Link: https://andyhyprillion.github.io/CCLabProjects/Andy_website/
Introduction
A sample website of a p5.js project.

Features
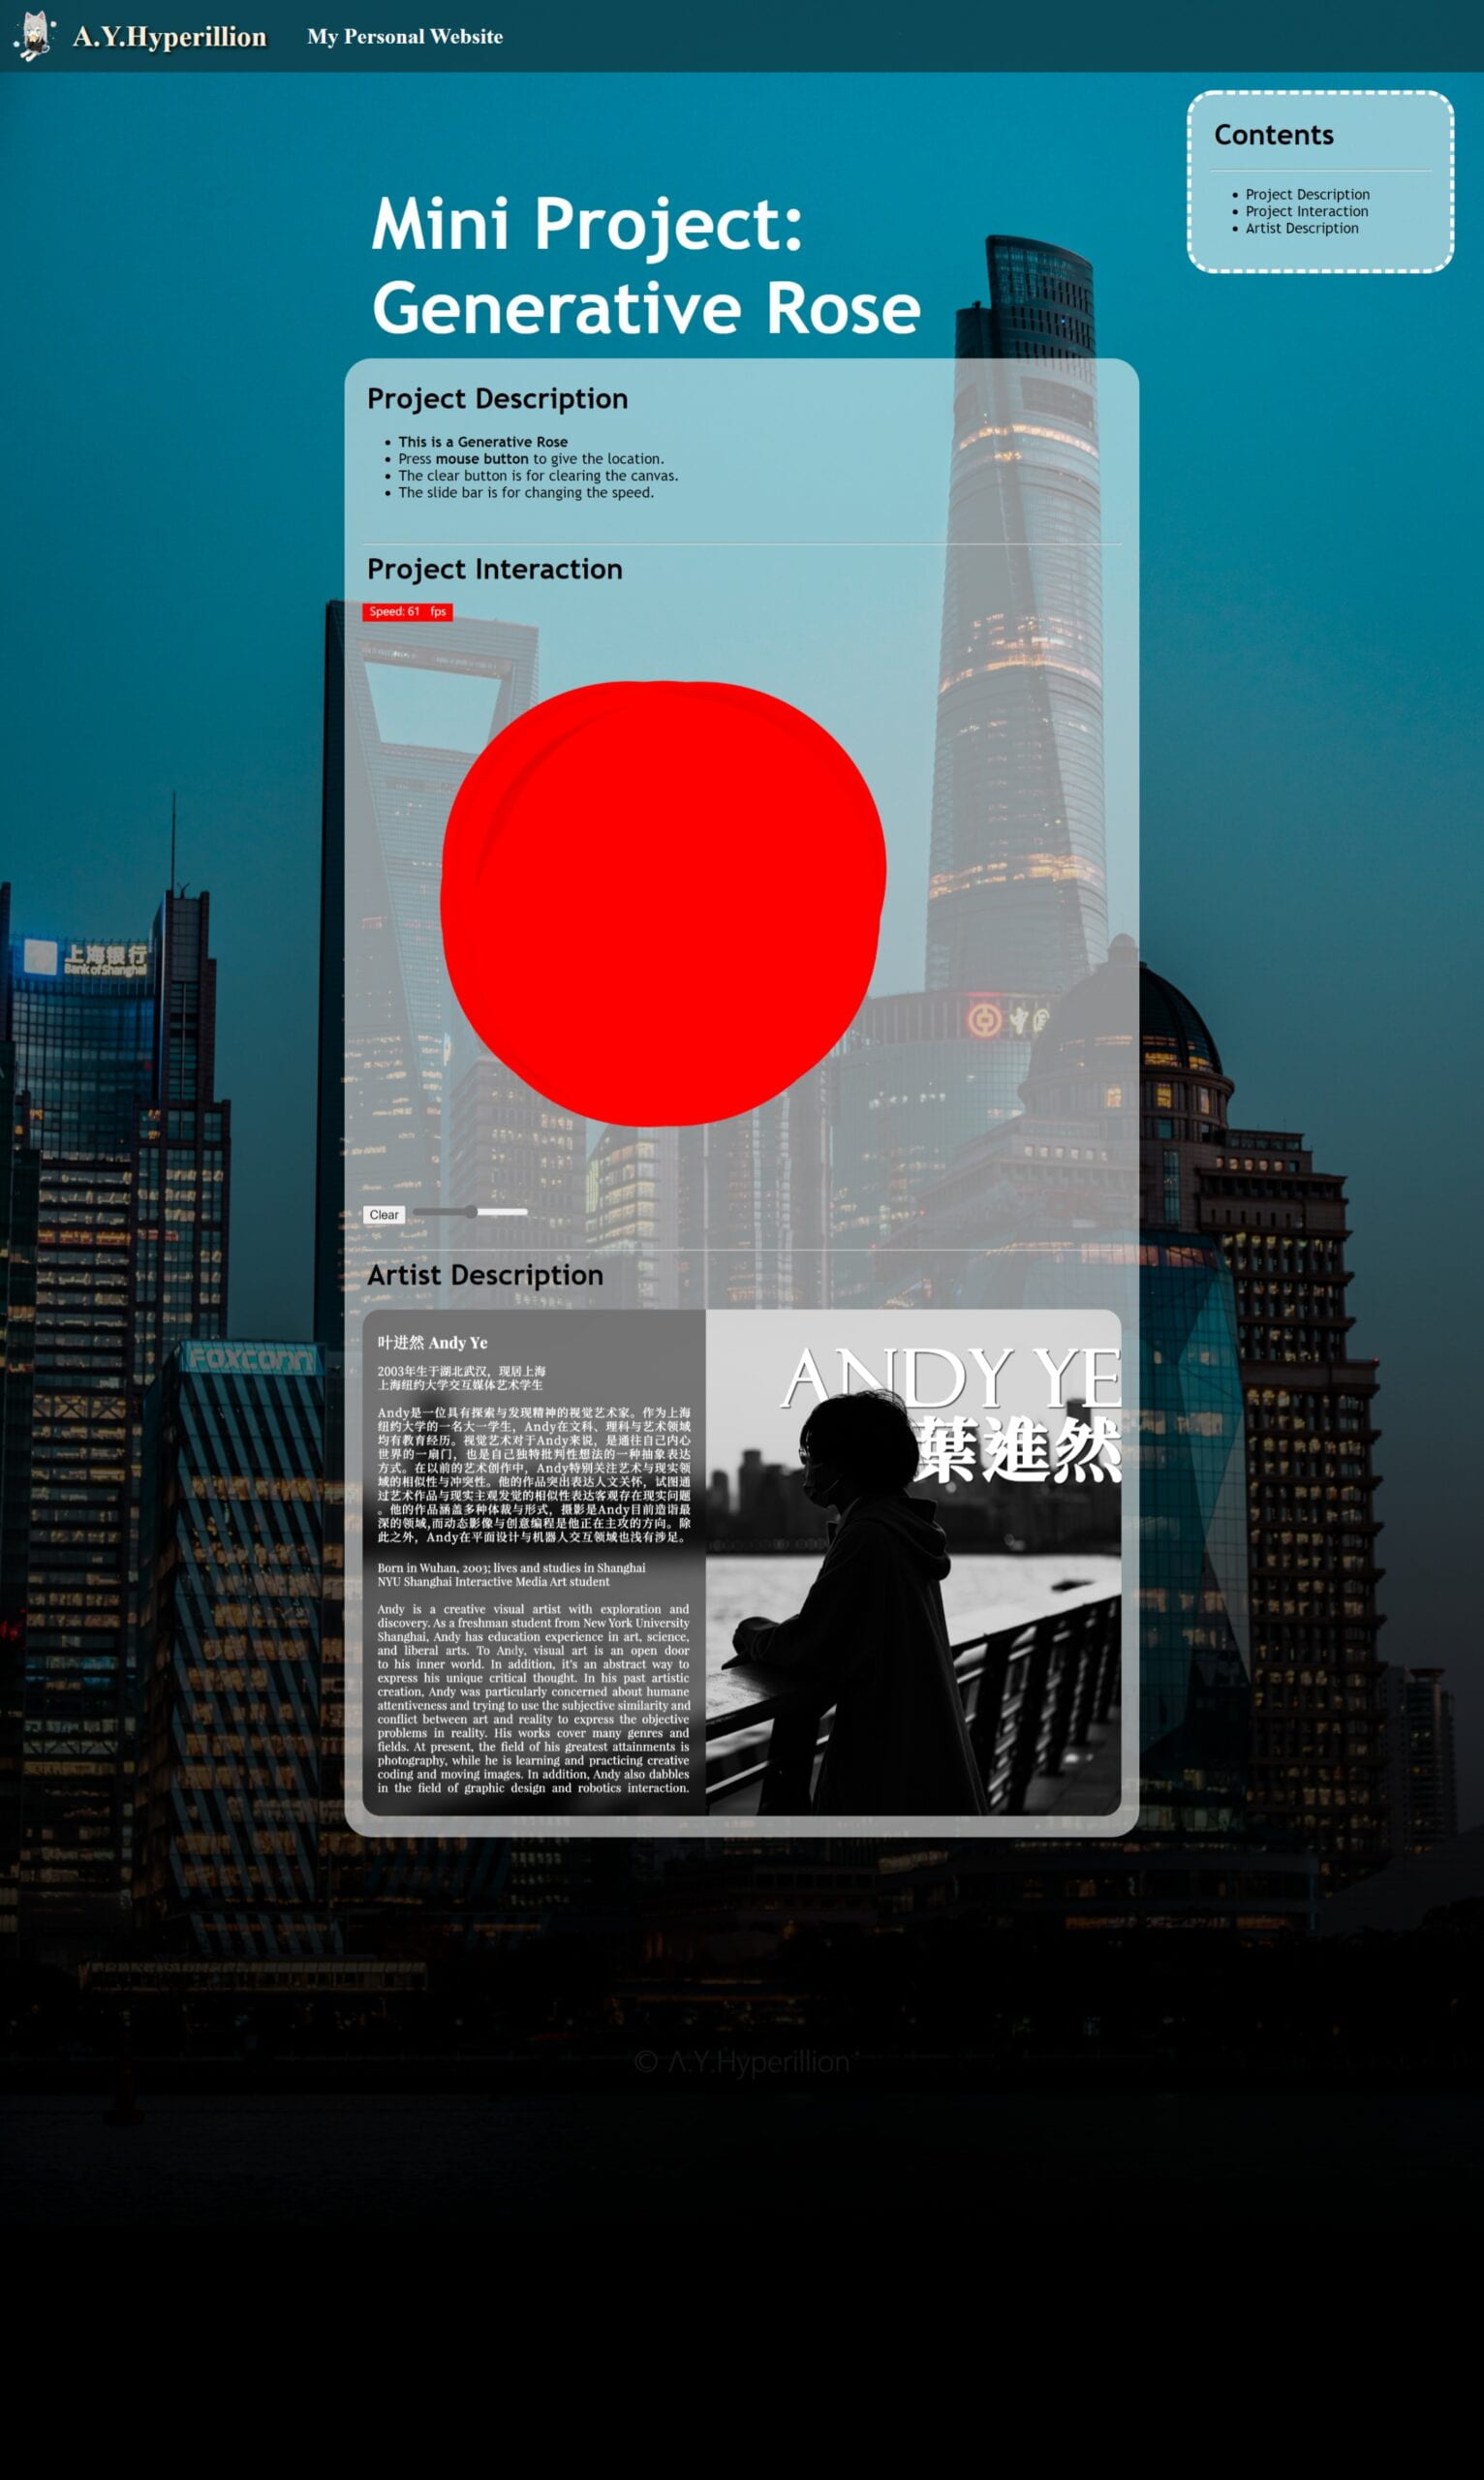
This website consists of many different elements including pictures and p5 projects, and various texts and boxes.
The background is a picture with a linear-gradient mask.
The p5 project has a button and slide bar to receive the return value from the user.
At the top of this website, there’s a link to another website.
Analysis
To set the exact of the navigation bar and sidebar, I used the fixed position to make these elements keep still when sliding the page.
.rBox1 { position: fixed; font-family: 'Trebuchet MS'; background-color: rgba(255, 255, 255, 0.562); border-color: rgb(255, 255, 255); border-style: dashed; border-radius: 30px; border-width: 5px; top: 100px; left: 80%; right: 2%; padding: 20px;function setup() { let cnv = createCanvas(windowWidth * 0.4, windowWidth * 0.4); cnv.parent('myContainer'); <div class="picBg"></div> <div class="linerBg"></div>.picBg { width: 100%; height: 300%; background: url(assets/DSC09564.jpg); background-size: contain; background-repeat: no-repeat; position: absolute;}.linerBg { background: linear-gradient(rgba(255, 255, 255, 0), rgb(0, 0, 0)); background-size: cover; background-repeat: no-repeat; position: absolute; width: 100%; height: 2500px; margin: 0px;}a:link { color: rgb(255, 255, 255); text-decoration: none;}a:visited { color: white;}a:hover { color: #ffffff; text-decoration: underline;}a:active { color: rgba(14, 62, 75, 0.824); text-decoration: underline;} <input type="button" id="clear" value="Clear"> <input type="range" id="speed" min="1" max="120"> let speed = select('#speed').value()function clear() { background(0, 0)}Reflections
During the procedure of coding HTML and CSS, I found it quite difficult at first since all of the code is totally new to me and I need to search for the meaning and how to use the code on the internet. I also faced several problems since was the first time that I need to cooperate different codes together. Like, use CSS to indicate the HTML and use HTML to give the value to JavaScript. It’s quite a unique experience to let various codes cooperate together. It’s exactly like a web that connects everything together.
There are still many things that I cannot figure out at this time. The principles of HTML and CSS are far more difficult than I thought. In addition, the adaptation of different screen resolutions is still quite hard for me. But I’m trying to figure it out and do my best.
——————————————-More Info——————————————
Links
Github Link: https://github.com/AndyHyprillion/CCLabProjects/tree/main/Andy_website
Website Link: https://andyhyprillion.github.io/CCLabProjects/Andy_website/

