TASK 1
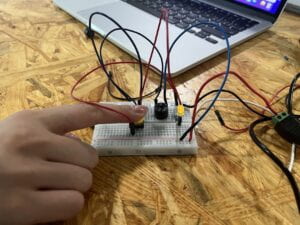
Basically all the circuits in these three steps transmit the electricity and make the functions in need able to realize. The things we need to do are arranging all the elements in the right order and right side(positive and negative), letting electricity flow through every part of the circuit.
Our process of building up the circuit was not very fluent.
At first, we got a breadboard which couldn’t work well. So we were so confused when we finished connecting every part and nothing happened. At that moment, the academic assistant Iris came and noticed that our buzzer was extremely hot, then we knew there must be a short circuit or something else “destroyed” our poor buzzer.
With a new-and-good breadboard as well as a buzzer, we built up that circuit again and finally heard the sound!
Relatively speaking, step two was done much more successfully. After we lightened up the LED and tried to recheck our circuit, we found it was so hard to make it because of our random way of arranging the wires. So we rearranged the circuit, which is one of the most important lessons I learnt from this process: do things in good order to help yourself in the future.
However we were stuck again when trying to manage step 3. LED 1 couldn’t be lightened up however we tried, while the LED 2 and buzzer functioned as usual.
In order to find out where the problem is, LED 1, R1 and the POT were picked out and consisted of a new circuit. In this situation, the LED was so faint but still working! I tried to switch the POT and the LED finally got brighter(however still fainter than the other one and I don’t know why)
My partner and I worked together well because both of us were not familiar with the electricity-related-things and were not confident about our movement (sad to say so) . We discussed consistently and tried to find mistakes together, which I think a good manner to cooperate.
TASK 2
I got one cardboard, used a wire cutter to cut the outer layer of the wire and attached copper tape on it to fix the wire. Then I used soldering stations for the first time to make sure the wires are in good contact. Finally, my partner Tina and I connected the two cardboards together to make it a paddle.
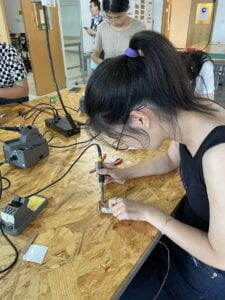
At first, when professor Gottfried was explaining the process, I didn’t catch the word “tin”. So I was so confused why we can melt a length of copper wire so easily… After got the explanation in Chinese with Tina’s help, I knew I learnt a new word (just kidding).
The process of doing some handcraft is so interesting and unforgettable. I love to explore new material and equipment to accomplish interesting things, although the handmade switch was so rough, I still felt fulfilled to see it work.
TASK 3
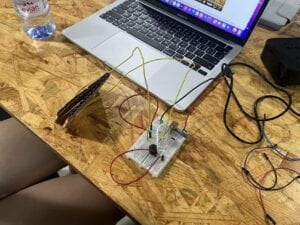
In task 3, we only switched the button with the cardboard switch, and didn’t have time to send the morse code. We will try that next time if we have time!
ADDITIONAL QUESTIONS
- What is the function of the resistor R1? We need R1 to provide a minimum resistance so that it can protect our LED from burning out no matter how much resistance POT provides.
- Looking at the following circuit, draw its diagram by yourself.
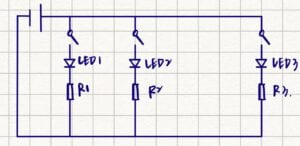
- After reading The Art of Interactive Design, in what way do you think that the circuit you built today includes interactivity? Which degree of interactivity does it possess? Please explain your answer. I’m actually not sure if <The Art of Interactive Design> really said something about the interaction we are talking about now… But I do think the circuit I built includes interactivity to some extent. We can interact with this circuit by pressing the button and hearing the voice, or by lighting the LED up and sending specific messages with morse code. Then maybe we can say the circuit can “speak”. Of course the degree of interactivity is low because it can’t listen and think.
- How can Interaction Design and Physical Computing be used to create Interactive Art? In Zack Lieberman’s work, he and his fellows used interaction Design and Physical Computing techniques to help an artist to create art. And I do believe that this process itself can be called “interactive art”. These techniques are so powerful to support us to realize unrealistic, incredible but interesting or even helpful and meaningful ideas, showing that even lifeless existence can also “bring life back”.