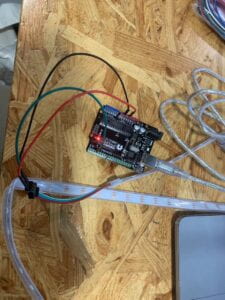
1. this time, our recitation is about how to link the sound with the light strap as well as connect the light strap with the computer. first, we are asked to link the computer with the light strap and make sure the program works. then we are asked to use the computer and the mouse to control the light strap so that it was more interactive. also, it is required that we should make the circle change as the music goes on. lastly, the requirement is to blend the two codes and make the light strap change as the music goes on as well as make the music interact with the shape on the screen.
2. the whole process is fairly successful. however, there was something wrong with the Arduino part, because I opened two pages on one Arduino so it doesn’t know which one to run. I asked one of the learning assistants and found out about this question. finally, I manage to solve this problem with their help. also, I forgot to close all serial monitors so I wasn’t able to run it. also, when blending the two codes, I first determine the direction of wanting to change the color of the lights as the music plays. so I use the map function to make the color correspond with the volume. but I forget to insert the import part into the code as well as define the sound. after some help from learning assistant Christine, I managed to mend those mistakes and successfully made my whole code works.
3. I have achieved what I was set to do. what I learned is how to make Arduino and Processing work together. also, I learned how to insert an audio file into the Processing. I have also learned the lesson that always first define something before using it. also, we should know the logic of different loops and put them in the right order.
4. here are my project’s videos, pictures, and code.

/* This is a code example for Processing, to be used on Recitation 7
 You need to have installed the SerialRecord library.

 Interaction Lab
 IMA NYU Shanghai
 2022 Fall
 */

import processing.serial.*;
import osteele.processing.SerialRecord.*;
import processing.sound.*;

Serial serialPort;
SerialRecord serialRecord;

int W;         //width of the tiles
int NUM = 60;  //amount of pixels
int[] r = new int[NUM]; //red of each tile
int[] g = new int[NUM]; //red of each tile
int[] b = new int[NUM]; //red of each tile


SoundFile sample;
Amplitude analysis;

void setup() {
  size(600, 200);
  W = width/NUM;


  // You can use this syntax and change COM3 for your serial port
  // printArray(Serial.list());
  // serialPort = new Serial(this, "COM3", 9600);
  // in MacOS it looks like "/dev/cu.usbmodem1101"
  //or you can try to use this instead:

  String serialPortName = SerialUtils.findArduinoPort();
  serialPort = new Serial(this, serialPortName, 9600);
  serialRecord = new SerialRecord(this, serialPort, 4);
  serialRecord.logToCanvas(false);
  rectMode(CENTER);

  // load and play a sound file in a loop
  sample = new SoundFile(this, "qian.aiff");
  sample.loop();

  // create the Amplitude analysis object
  analysis = new Amplitude(this);
  // analyze the playing sound file
  analysis.input(sample);
}

void draw() {
  println(analysis.analyze());
  background(66, 118, 227);
  noStroke();
  fill(245, 236, 54);

  // analyze the audio for its volume level
  float volume = analysis.analyze();

  // volume is a number between 0.0 and 1.0
  // map the volume value to a useful scale
  float diameter = map(volume, 0, 1, 0, width);
  // draw a circle based on the microphone amplitude (volume)
  circle(width/2, height/2, diameter);

int n = floor(map(volume, 0, 1, 0, 60));
  r[n] = floor(map(volume, 0, 1, 0, 255));
  g[n] = floor(random(map(volume, 0, 1, 0, 255)));
  b[n] = floor(random(map(volume, 0, 1, 0, 255)));

  serialRecord.values[0] = n;     // which pixel we change (0-59)
  serialRecord.values[1] = r[n];  // how much red (0-255)
  serialRecord.values[2] = g[n];  // how much green (0-255)
  serialRecord.values[3] = b[n];  // how much blue (0-255)
  serialRecord.send();            // send it!
}