Amelia’s Ninth Documentation Blog

1. in today’s recitation, we are asked to make a turning wheel by laser cutting. we should be making the wheel using a specific website so that we can exercise the ability to make laser-cutting things. 

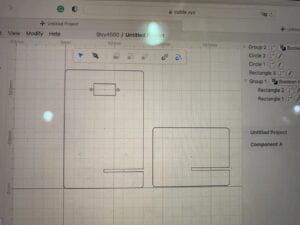
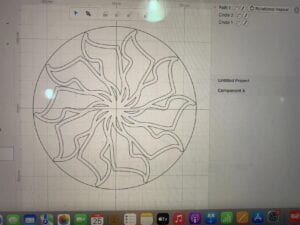
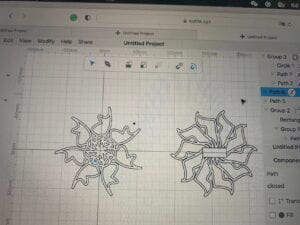
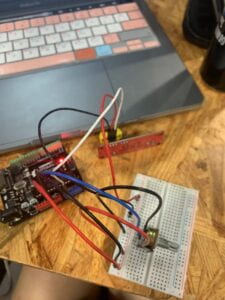
2. first, I grouped up with Joy and divided the work, she was student A and I was student B. after a few minutes, we succeeded in making both of the boards, and she copy the website link of her work to me on weChat and I put our works together. I designed the still part of the turning wheel and Joy designed the moving wheel and we made their turning direction differently. then came the part of watching the laser cutting. we both come to 823 to learn things about laser cutting. and watched our wheels being cut. however, one of the wheels which is the still one should have a hole in it. but instead, the whole was not being cut. after consulting with professor Rudi, we know how to design it. we need to first make a bigger rectangle and then put the rectangle we need inside it and made the whole. after some time, we manage to cut out the piece we need. and the part of putting them together is rather simple. and after installing the program on Arduino, we successfully made the wheel spring. 

3. the process generally goes as planned except for the part where the hole was not cut through. what we have learned is how to draw things using the website. also, we know how to make a perfect hole in our works without making it fall apart. in addition, we learn that in order to make our shape after rotation beautiful, we should make the original shape strange. what we also learned is how to make the two shapes into one website. 

Final-Project-Essay

1. the name of my project is “Memory”

2. the problem it is addressing is Alzheimer’s. according to WHO, there are over 15.2 million people with Alzheimer’s making this disease deserve serious attention. however, most people still regard this disease as a bad memory and of no importance.  my project will allow users to experience the day of a patient with Alzheimer’s; by doing so, people will understand the patients’ difficulties. thus more attention will be given to this kind of disease. the targeted audience is not the patients but those young people who thought this disease is far away from them. by interacting with this project, people will be able to understand Alzheimer’s is just around the corner in our life so they can pay extra care to those with Alzheimer’s.

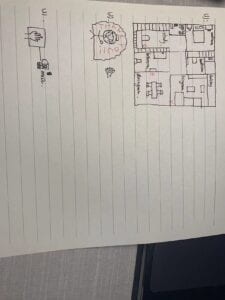
3. first, my partner and I will make a big maze in the shape of a house with all the furniture inside it. then I will put some light sensors in the place where people will usually go in their daily routine. and the light was shed on the sensors, then a piece of animation will be played showing pieces of memory with music. what the audience should do is use two turners to control the light and explore the whole house. if they have succeeded in going around the house in the right order which is the order of a person’s daily routine then the whole house will light up with full music instead of only pieces of music. 

4. I think this project is a typical interaction project in which the person moves something on the computer and the computer will react. this accord with my definition of interaction. the computer doesn’t know what the movement of people means but it can still react accordingly.  

Amelia’s Eighth Documentation Blog

1. I didn’t know what we were doing after watching the video. so I consulted a learning assistant who told me that it is using the potentiometers to draw pictures. so I first downloaded the initial code successfully can found it worked. the ball can move as my potentiometers move. then the question is how to make the trace materialize because now we can not see its trace. so I asked professor Rudi how to do it and he told me to define a line from the previous position of the ball to the current position of the ball. that’s exactly what I did but still, I couldn’t see the trace. then Christine the learning assistant told me the reason which is the problem of background. because my previous setup made the black background cover the trace once it is drawn because it is outside the loop. so I move the setup of the background inside the loop and then I can see the traces. 

2. what I have learned is that we should check what is inside the loop and what is not before running the whole process. the whole process mainly go as planned and I succeeded on my second try. the interaction involved is using the potentiometers and there will be patterns on the screen. after seeing what we have drawn, we can then decide our next step in drawing which is interactive.

3. here are the pictures and videos

4. here are the codes 

/**
 * Example sketch for the SerialRecord library for Processing.
 *
 * Receives two integers from the serial port, and uses them to control the x
 * and y position of a circle on the canvas.
 */

import processing.serial.*;
import osteele.processing.SerialRecord.*;

Serial serialPort;
SerialRecord serialRecord;

float prex;
float prey;


void setup() {

  size(500, 500);
  prex = 0;
  prey = 0;
  background(0);
  String serialPortName = SerialUtils.findArduinoPort();
  serialPort = new Serial(this, serialPortName, 9600);

  // If the Arduino sketch sends a different number of values, modify the number
  // `2` on the next line to match the number of values that it sends.
  serialRecord = new SerialRecord(this, serialPort, 2);
}

void draw() {


  serialRecord.read();
  int value1 = serialRecord.values[0];
  int value2 = serialRecord.values[1];

  float x = map(value1, 0, 1024, 0, width);
  float y = map(value2, 0, 1024, 0, height);
  //circle(x, y, 20);
  stroke(255);
  strokeWeight(10);
  line(prex, prey, x, y);

  prex = x;
  prey = y;
} 

/*
  SendMultipleValues

  Reads an analog input on pin 0, and sends a record that contains two values:

  1. Value of `millis()`, modulo 1024.
  2. The analog value that is read from pin 0.

  If you attach a potentiometer to pin 0, you can control this value by moving
  the pot.

  This sketch pairs well with the RecieveMultipleValues example from the
  Processing SerialRecord library
  <https://osteele.github.io/Processing_SerialRecord/>.

  Things to try:
  - Connect a second potentiometer to the Arduino, and send the values from both
    potentiometers, instead of send a value that is based on `millis()`.
  - Send the value from another sensor, such as temperature or proximity.

  by Oliver Steele, 2020-2022

  This example code is in the public domain.
*/

#include "SerialRecord.h"

// Change this number to send a different number of values
SerialRecord writer(2);

void setup() {
  Serial.begin(9600);
}

void loop() {
  int sensorValue = analogRead(A0);
  int sensorValue1 = analogRead(A1);

  writer[0] = sensorValue1;
  writer[1] = sensorValue;
  writer.send();

  // This delay slows down the loop, so that it runs less frequently. This can
  // make it easier to debug the sketch, because new values are printed at a
  // slower rate.
  delay(10);
}
 

5. the second project goes rather roughly because I couldn’t get the signal passed from Arduino to Processing. the name of my teammate is Joy. almost everything didn’t go well. we first download the initial two codes and then we are stuck on how to make the ball bounce. so we approached the learning assistant Iris and she assist us in making the ball bounce. we first fail to understand the mathematical theory behind the code so our ball will bounce beforehand. after some math calculations concerning radius and diameter, we successfully made the ball bounce as is shown. then comes the problem of transmitting the information to the procession and making the motor move. after consulting professors and other classmates, we succeeded in making our code right. but still, the motors do not move or move just once and stopped moving ever since. after consulting Iris the learning assistant, we found we open the Processing before Arduino which made all the problems. after adjusting the sequence we succeed. 

6. what we have learned from this project is to smartly use the resources on the internet and make it the prototype of our code. also, we know how to send signals from Arduino to Processing. the interaction in this project is between the motors and the balls. the two objects do not have consciousness but they can still interact with each other without needing to understand the other’s meaning. 

7. here are the videos. 

8. here are the codes

/*
ReceiveMultipleValues
This sketch repeatedly receives a record that contains a single value, and
uses it to control the builtin LED. The value should be 0 or 1.
This sketch pairs well with the SendSingleValue example from the Processing
SerialRecord library <https://osteele.github.io/Processing_SerialRecord/>.
You can also interact with this sketch from the Serial Monitor. Enter
`100,200` into the text area at the top, and press "Send". Then enter `!e` to
ask the Arduino to send back the last values it received.
by Oliver Steele, 2020-2022
This example code is in the public domain.
*/
#include "SerialRecord.h"
// Change this number to the number of values you want to receive
SerialRecord reader(1);
#include 
Servo myservo1; // create servo object to control a servo
Servo myservo2;
int potpin = 0; // analog pin used to connect the potentiometer
int val; // variable to read the value from the analog pin
void setup() {
Serial.begin(9600);
myservo1.attach(8); // attaches the servo on pin 8 to the servo object
myservo2.attach(5); // attaches the servo on pin 5 to the servo object
}
void loop() {
if(reader.read()){
if(reader[0] == 0){
// do one movement here
myservo1.write(180); // sets the servo position according to the scaled value
delay(200);
myservo1.write(0);
}elseif(reader[0] == 1){
myservo2.write(180); // sets the servo position according to the scaled value
delay(200);
myservo2.write(0);
// do another movement there
  }
 }
}
 
 /**
 * Example sketch for the SerialRecord library for Processing.
 *
 * Maps the horizontal and vertical position of the mouse on the canvas to the
 * range 0…1023, and sends them to the serial port.
 */

import processing.serial.*;
import osteele.processing.SerialRecord.*;

Serial serialPort;
SerialRecord serialRecord;

int rad = 60;        // Width of the shape
float xpos, ypos;    // Starting position of shape    

float xspeed = 2.8;  // Speed of the shape
int xdirection = 1;  // Left or Right


void setup() {
  size(500, 500);

ypos = 250;

xpos = 61;

  String serialPortName = SerialUtils.findArduinoPort();
  serialPort = new Serial(this, serialPortName, 9600);

  // In order to send a different number of values, modify the number `2` on the
  // next line to the number values to send. In this case, the corresponding
  // number in the Arduino sketch should be modified as well.
  serialRecord = new SerialRecord(this, serialPort, 1);
}

void draw() {
  background(0);
  // Update the position of the shape
  xpos = xpos + ( xspeed * xdirection );


  if (xpos > width - rad/2 || xpos < rad/2) { xdirection *= -1; if (xpos > width - rad/2) {
      serialRecord.values[0] = 0;
      serialRecord.send();
    
    } else {
      serialRecord.values[0] = 1;
      serialRecord.send();
    
    }


  }
   // Draw the shape
  ellipse(xpos, ypos, rad, rad);
} 

Fina-Project-Proposals

1. the first project’s name is “Lost Memory”. the topic of the program is  Alzheimer’s Disease. it focused on the patient’s experience and make people understand what it was like to lose memory and make clear a point that only a complete memory can bring love and hope. the form of the project is a maze. the maze is made by 3D printing and is covered with a black cloth. the audience will use the computer to control a laser light to lighten up a part of the maze. they need to memorize the way they have gone through to know where they are going. the maze will be arranged as the home of an Alzheimer’s patient. and inside the maze, there are four letters L, O, V, E. if the laser light found one of the four letters, a piece of music will be played. only when four letters are all found and the audience will find the four pieces of music can be arranged into a whole musical piece. only then, the whole maze will lighten up. this project is meant to make the audience realize the meaning of losing memory. but in this project, we also wanted to show that everyone has a light, even if you have lost your memory and need to work hard to memorize the layout of your home. once you have found love or experienced love, then your world will lighten up. 

2. the second project is called “behind the mask”. this project focuses on a special kind of depression. the patient with this depression will not look depressed. instead, they look very happy. but inside they are very sad. the whole program is presented by a man with a smiling mask on him and the lights behind him will shine happily with happy music. but if someone ripped off his mask, then you can see his face with tears and wounds. all lights will go off and start to play sad music. you will wear a device and if you patted his head the light will light up a bit, if you hold his hand then the light will light up a bit. only when the lights all light up, you will find it will form thank you on the screen. this project is meant to raise awareness of the so-called smiling depression. people need others to find out that they are not happy actually and need warmth. if you can give them some comfort, they will be very happy.

3. the third project is about knowing a person. we may be able to see and hear a mother person who is very far away from us using modern technology, but we can’t see them emotionally. this project is about transforming the heartbeat of someone into music and then transforming music into a drawing. heartbeat at different frequencies will correspond to different music and we will use different shapes to draw that music out. this project is meant to let people not only see and hear the other person but also see and hear their heartbeat. so that the distance between people and people is closer. 

4. here are the sketches for my projects.

Final-Project-Research and Analysis

1 now I think the definition of interaction is that more than two participants involving in one project and jointly make efforts for that project with or without intention. my explanation for this definition is that according to Ernest Edmonds,  “Dynamic-Interactive: All of the conditions of the dynamic passive category apply with the added factor that the human ‘viewer’ has an active role in influencing the changes in the art object. ” this means that it can be called as interactive if one just walks across a project and that project reacts in response. in that sense, the intention of interacting is useless and the response from the other party is not intended to be intentional. the response only needs to exist. 

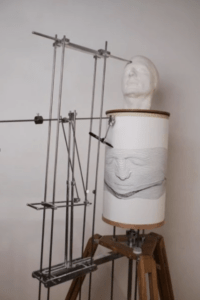
2. the first project I use to prove my point is the “Drawing Machine” by Balint Bolygo. in this project, one pen will automatically draw what was felt on the other end of the pole. in this project, the two participants are the pen and the object being painted. the object being painted doesn’t have the intention of interacting with the pen but its existence is enough to assist this project from completing. it is interactive in my definition in this sense. also, the pen’s interaction with the object is very obvious. 

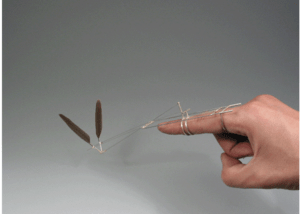
3. another project I was going to use to illustrate my definition of interaction is “Flying Machine for Your Hand” by Dukno Yoon. in this project, a person will use his or her hand to make a device flap its wings so that it looks as if it is flying. the two participants in this project are the hand and the machines. again, the machine doesn’t have the intention of participating in the project but its existence is to promote the project. and the reaction of the machine is not intentional, it’s mechanical but this project is still interactive. 

Amelia’s Seventh Documentation Blog

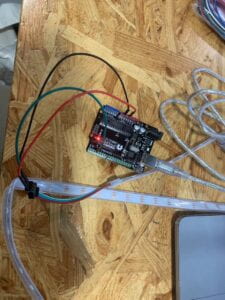
1. this time, our recitation is about how to link the sound with the light strap as well as connect the light strap with the computer. first, we are asked to link the computer with the light strap and make sure the program works. then we are asked to use the computer and the mouse to control the light strap so that it was more interactive. also, it is required that we should make the circle change as the music goes on. lastly, the requirement is to blend the two codes and make the light strap change as the music goes on as well as make the music interact with the shape on the screen. 

2. the whole process is fairly successful. however, there was something wrong with the Arduino part, because I opened two pages on one Arduino so it doesn’t know which one to run. I asked one of the learning assistants and found out about this question. finally, I manage to solve this problem with their help. also, I forgot to close all serial monitors so I wasn’t able to run it. also, when blending the two codes, I first determine the direction of wanting to change the color of the lights as the music plays. so I use the map function to make the color correspond with the volume. but I forget to insert the import part into the code as well as define the sound. after some help from learning assistant Christine, I managed to mend those mistakes and successfully made my whole code works. 

3. I have achieved what I was set to do. what I learned is how to make Arduino and Processing work together. also, I learned how to insert an audio file into the Processing. I have also learned the lesson that always first define something before using it. also, we should know the logic of different loops and put them in the right order. 

4. here are my project’s videos, pictures, and code. 

/* This is a code example for Processing, to be used on Recitation 7
 You need to have installed the SerialRecord library.
 
 Interaction Lab
 IMA NYU Shanghai
 2022 Fall
 */

import processing.serial.*;
import osteele.processing.SerialRecord.*;
import processing.sound.*;

Serial serialPort;
SerialRecord serialRecord;

int W;         //width of the tiles
int NUM = 60;  //amount of pixels
int[] r = new int[NUM]; //red of each tile
int[] g = new int[NUM]; //red of each tile
int[] b = new int[NUM]; //red of each tile


SoundFile sample;
Amplitude analysis;

void setup() {
  size(600, 200);
  W = width/NUM;


  // You can use this syntax and change COM3 for your serial port
  // printArray(Serial.list());
  // serialPort = new Serial(this, "COM3", 9600);
  // in MacOS it looks like "/dev/cu.usbmodem1101"
  //or you can try to use this instead:

  String serialPortName = SerialUtils.findArduinoPort();
  serialPort = new Serial(this, serialPortName, 9600);
  serialRecord = new SerialRecord(this, serialPort, 4);
  serialRecord.logToCanvas(false);
  rectMode(CENTER);

  // load and play a sound file in a loop
  sample = new SoundFile(this, "qian.aiff");
  sample.loop();

  // create the Amplitude analysis object
  analysis = new Amplitude(this);
  // analyze the playing sound file
  analysis.input(sample);
}

void draw() {
  println(analysis.analyze());
  background(66, 118, 227);
  noStroke();
  fill(245, 236, 54);

  // analyze the audio for its volume level
  float volume = analysis.analyze();

  // volume is a number between 0.0 and 1.0
  // map the volume value to a useful scale
  float diameter = map(volume, 0, 1, 0, width);
  // draw a circle based on the microphone amplitude (volume)
  circle(width/2, height/2, diameter);

int n = floor(map(volume, 0, 1, 0, 60));
  r[n] = floor(map(volume, 0, 1, 0, 255));
  g[n] = floor(random(map(volume, 0, 1, 0, 255)));
  b[n] = floor(random(map(volume, 0, 1, 0, 255)));

  serialRecord.values[0] = n;     // which pixel we change (0-59)
  serialRecord.values[1] = r[n];  // how much red (0-255)
  serialRecord.values[2] = g[n];  // how much green (0-255)
  serialRecord.values[3] = b[n];  // how much blue (0-255)
  serialRecord.send();            // send it!
} 

Amelia’s Sixth Documentation Blog

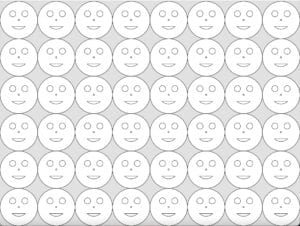
1. this assignment is about letting us draw our own poster about an IMA activity that has an animation in it. we also need to make a picture full of one single pattern and make them interact with the user. we hope to achieve a moving image that can both interact with people and have practical use. my homework piece was inspired by the smiling flowers.

2. for the poster. I first put in the words IMA and repeat it and every time made it smaller with a different color. then, I write about the Fall 22 End-Of-Semester Show below the words “IMA” in yellow. and write 6 pm-8 pm at the top of the words “IMA” while making “IMA” blinks. after that, I write a huge L, and above it, I write the location of this event. at last, comes the animation part. I first draw a circle and then draw two triangles on top of it. then the problem is how to make the combination move. I first use random coordinates for the triangles but then I found it was too much work to make the triangles move so I use one variable to represent the whole triangles and the circle and use millis to make the whole pattern move up and down. for the homework, I first make a single smile and then make the image print every time it moves to the right and below. after that, I make one smile appear at a random place in the background. at last, I make the mouth turn right and left with the move of my mouse. 

3. the plan didn’t go as planned because I was planning to make a beautiful poster but it turned out very extremely ugly. I think the problem is that I was trying to put too many things inside one poster and made everything too big and important. if I can make it again, I would make emphasis a single thing instead of making everything important. I learned from this project that we should always try to use as few variables as possible to represent the shapes so that it will be easier to move them. also, I learned how to use the function of “map”. the homework piece went as planned, although if time allowed, I would make them colorful. but because I don’t have enough time, so I didn’t do that. 
void setup() {
  size(1024,768);
}
void draw() {
  background(225);
  for (int i = 64; i< width; i += 128){
    for (int j = 64; j < height; j += 128){
      smile(i, j);
    }
  }
  
  //println(mouseX, mouseY);
}
void smile(float a,float b){
  circle(a,b,128);
  circle(a,b,5);
  float value = mouseY;
  float c = map(value, 0, 768, PI/2, PI);
  float d = map(value, 0, 768, 0, PI/2);
  arc(a,b,64,64,d,c,CHORD);
  circle(a-64/3,b-64/3,64/3);
  circle(a+64/3,b-64/3,64/3);
  
} 
void setup() {
  size(1024,768);
}
void draw(){
  background(225);
  
      float a = random(64,960);
      float b = random(64,704);
      smile(a, b);


}
void smile(float a,float b){
  circle(a,b,128);
  circle(a,b,5);
  arc(a,b,64,64,PI/4,3*PI/4,CHORD);
  circle(a-64/3,b-64/3,64/3);
  circle(a+64/3,b-64/3,64/3);
  
} 
void setup() {
  size(1024,768);
}
void draw() {
  background(225);
  for (int i = 64; i< width; i += 128){
    for (int j = 64; j < height; j += 128){
      smile(i, j);
    }
  }
  
  //println(mouseX, mouseY);
}
void smile(float a,float b){
  circle(a,b,128);
  circle(a,b,5);
  arc(a,b,64,64,PI/4,3*PI/4,CHORD);
  circle(a-64/3,b-64/3,64/3);
  circle(a+64/3,b-64/3,64/3);
  
} 
void setup() {
  size(1024, 768);
}
void draw() {
  background(225);
  float h = millis()%3000;
  float h1 = map(h, 0, 2999, 360, 768);
  circle(860, h1, 180);
  triangle(860, h1-112, 735, h1+81, 983, h1+81);
  triangle(739, h1-56, 998, h1-50, 859, h1+81);
  
  textSize(250);
  text("IMA", 320, 300, -120);
  fill(98, 118, 227);
  textSize(200);
  text("IMA", 360, 400, -240);
  fill(226, 98, 227);
  textSize(150);
  text("IMA", 400, 470, -360);
  fill(98, 227, 121);
  textSize(100);
  text("IMA", 430, 520, -480);
  fill(245, 231, 79);
  textSize(50);
  text("IMA", 460, 540, -600);
  String s = "Fall 22 End-Of- Semester Show. ";
  textSize(30);
  text(s, 460, 550, 120, 320);
  textSize(300);
  text("6-------8", 20, 200);
  textSize(30);
  text("pm", 190, 190);
  text("pm", 970, 190);
  textSize(100);
  text("Friday Dec 16th", 180, 110);
  textSize(700);
  text("L", 0, 730);
  textSize(50);
  text("ocation", 124, 680);
  textSize(100);
  String s2="8th Floor";
  text(s2, 120, 340, 230, 320);
  noStroke();
  
  int m = millis();
  noStroke();
  fill(m % 255);
  println(mouseX, mouseY);
}