Final Project Update (Steven & Mari)

Up until now, I’d say Steven and I are about 3/4 of the way in. This post will break down the hardware and software progress we have been able to do!

Hardware

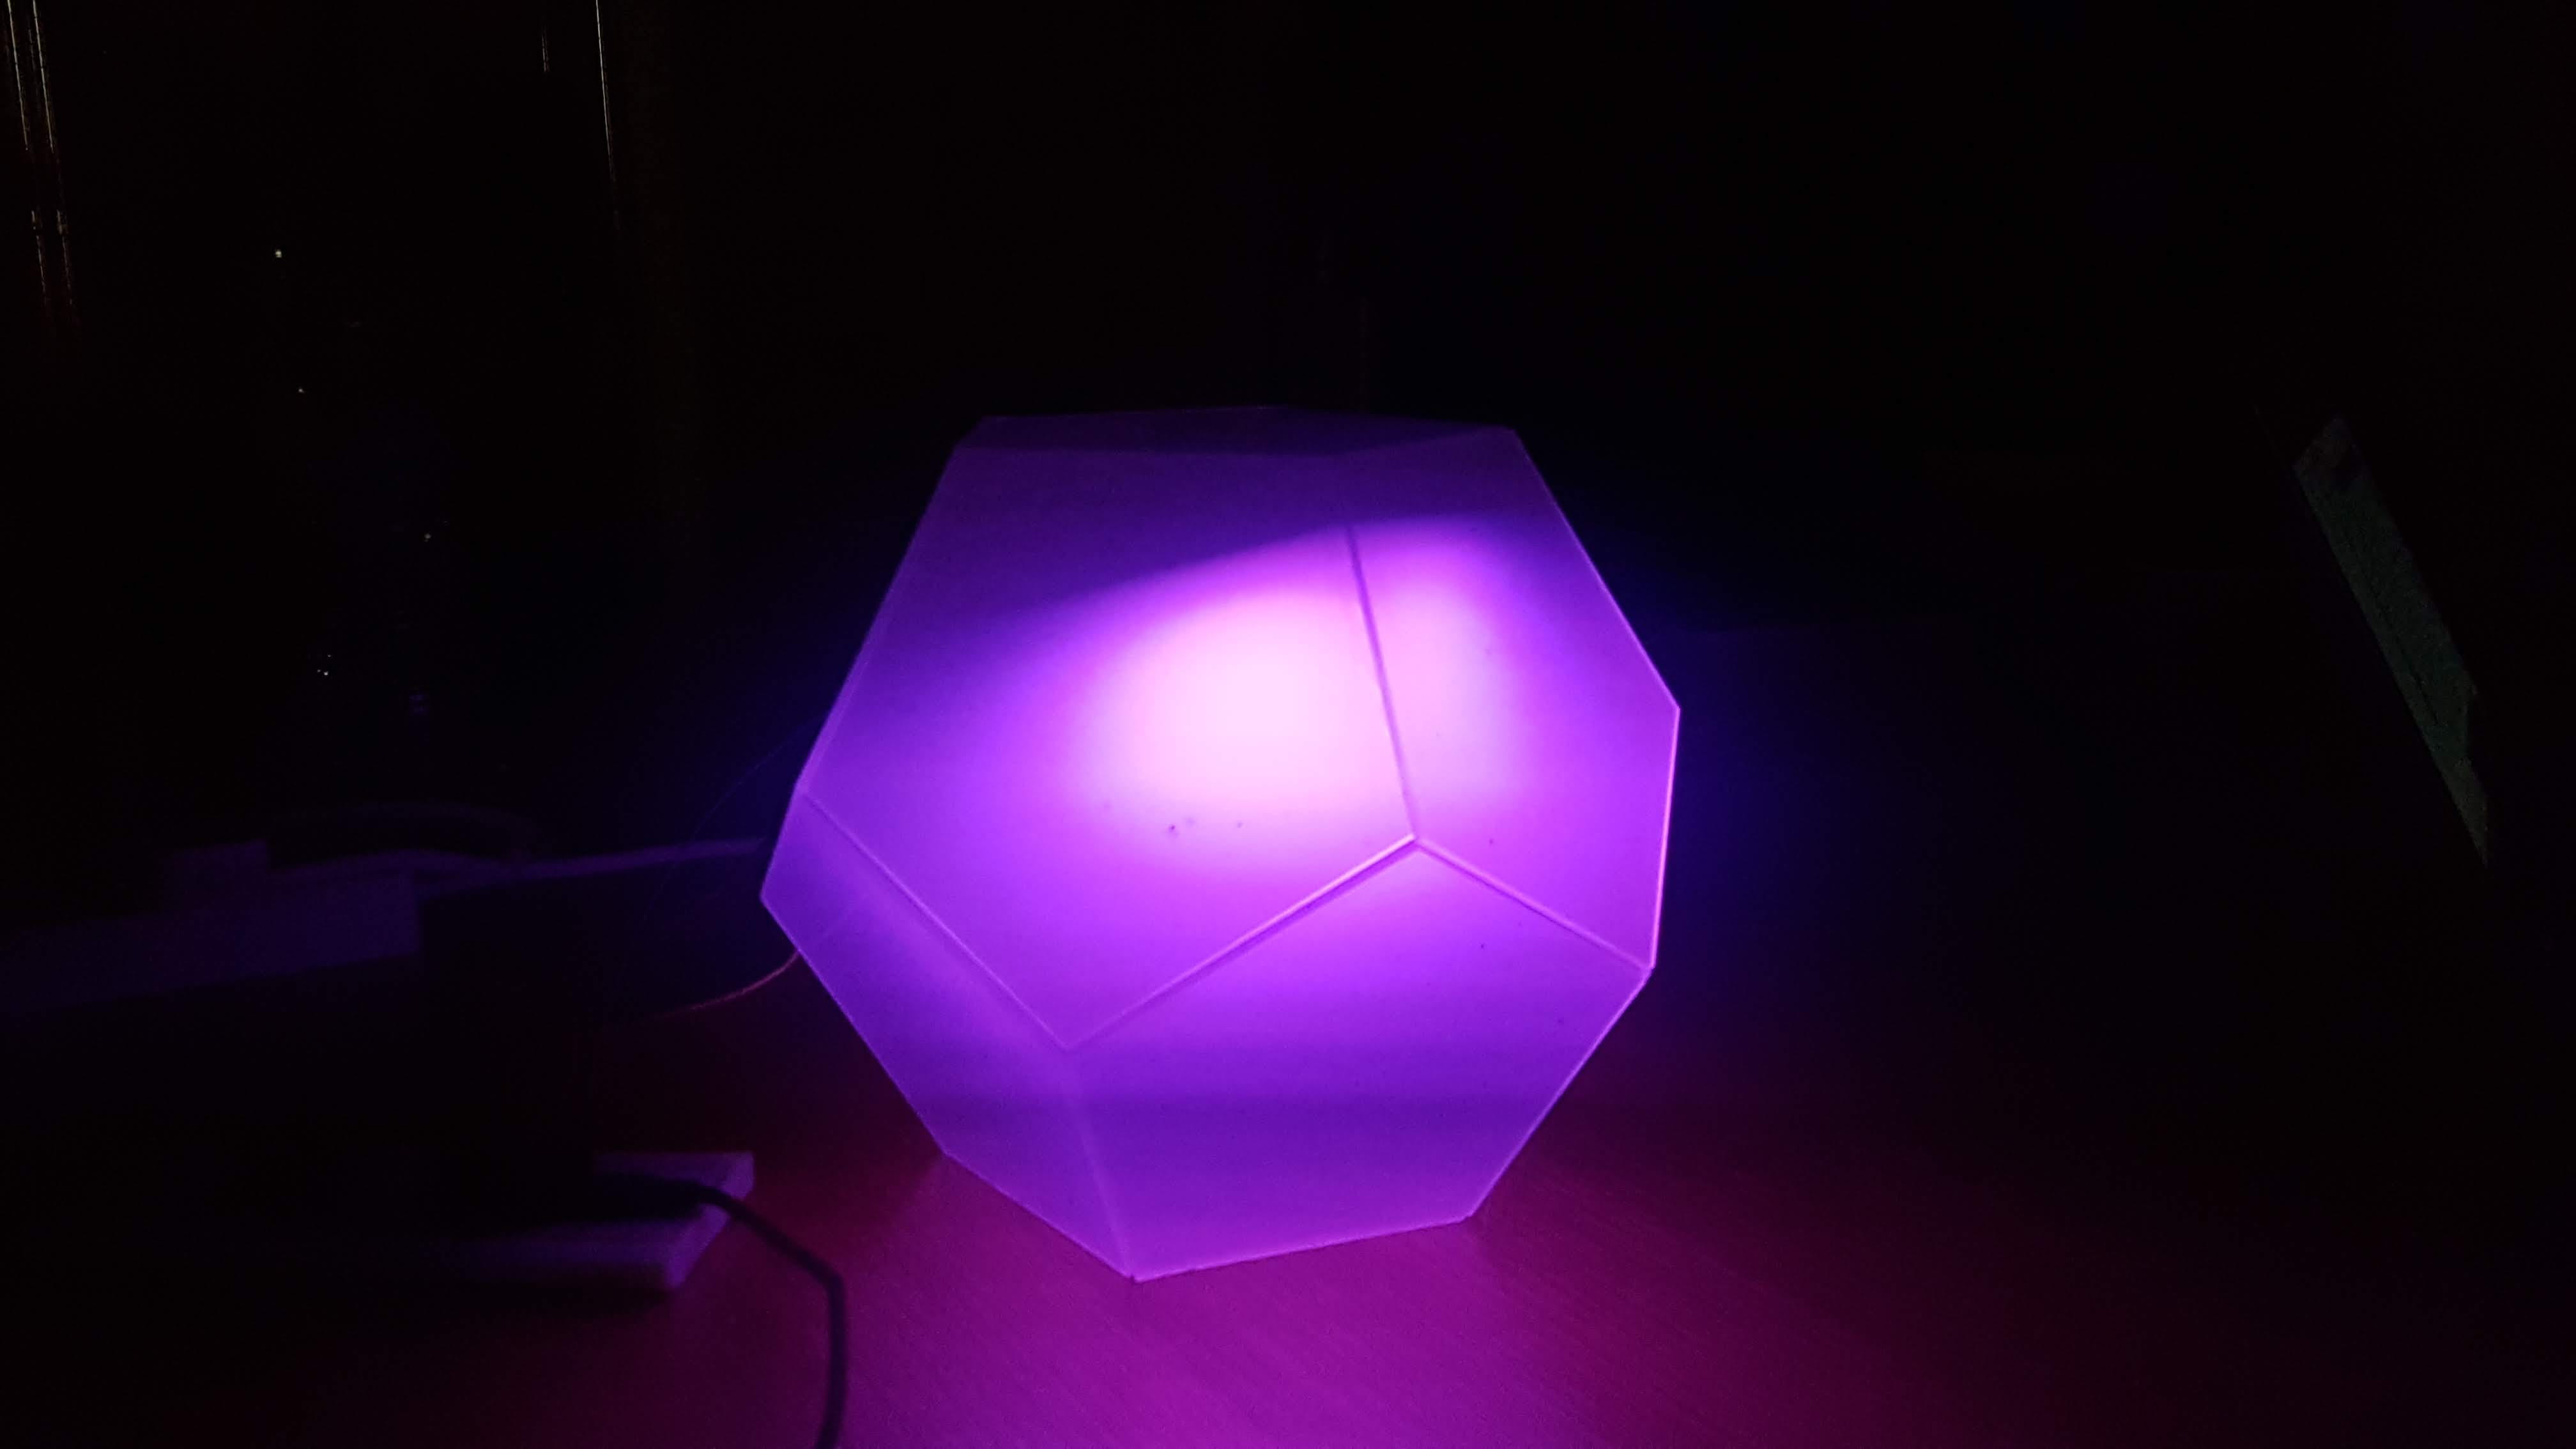
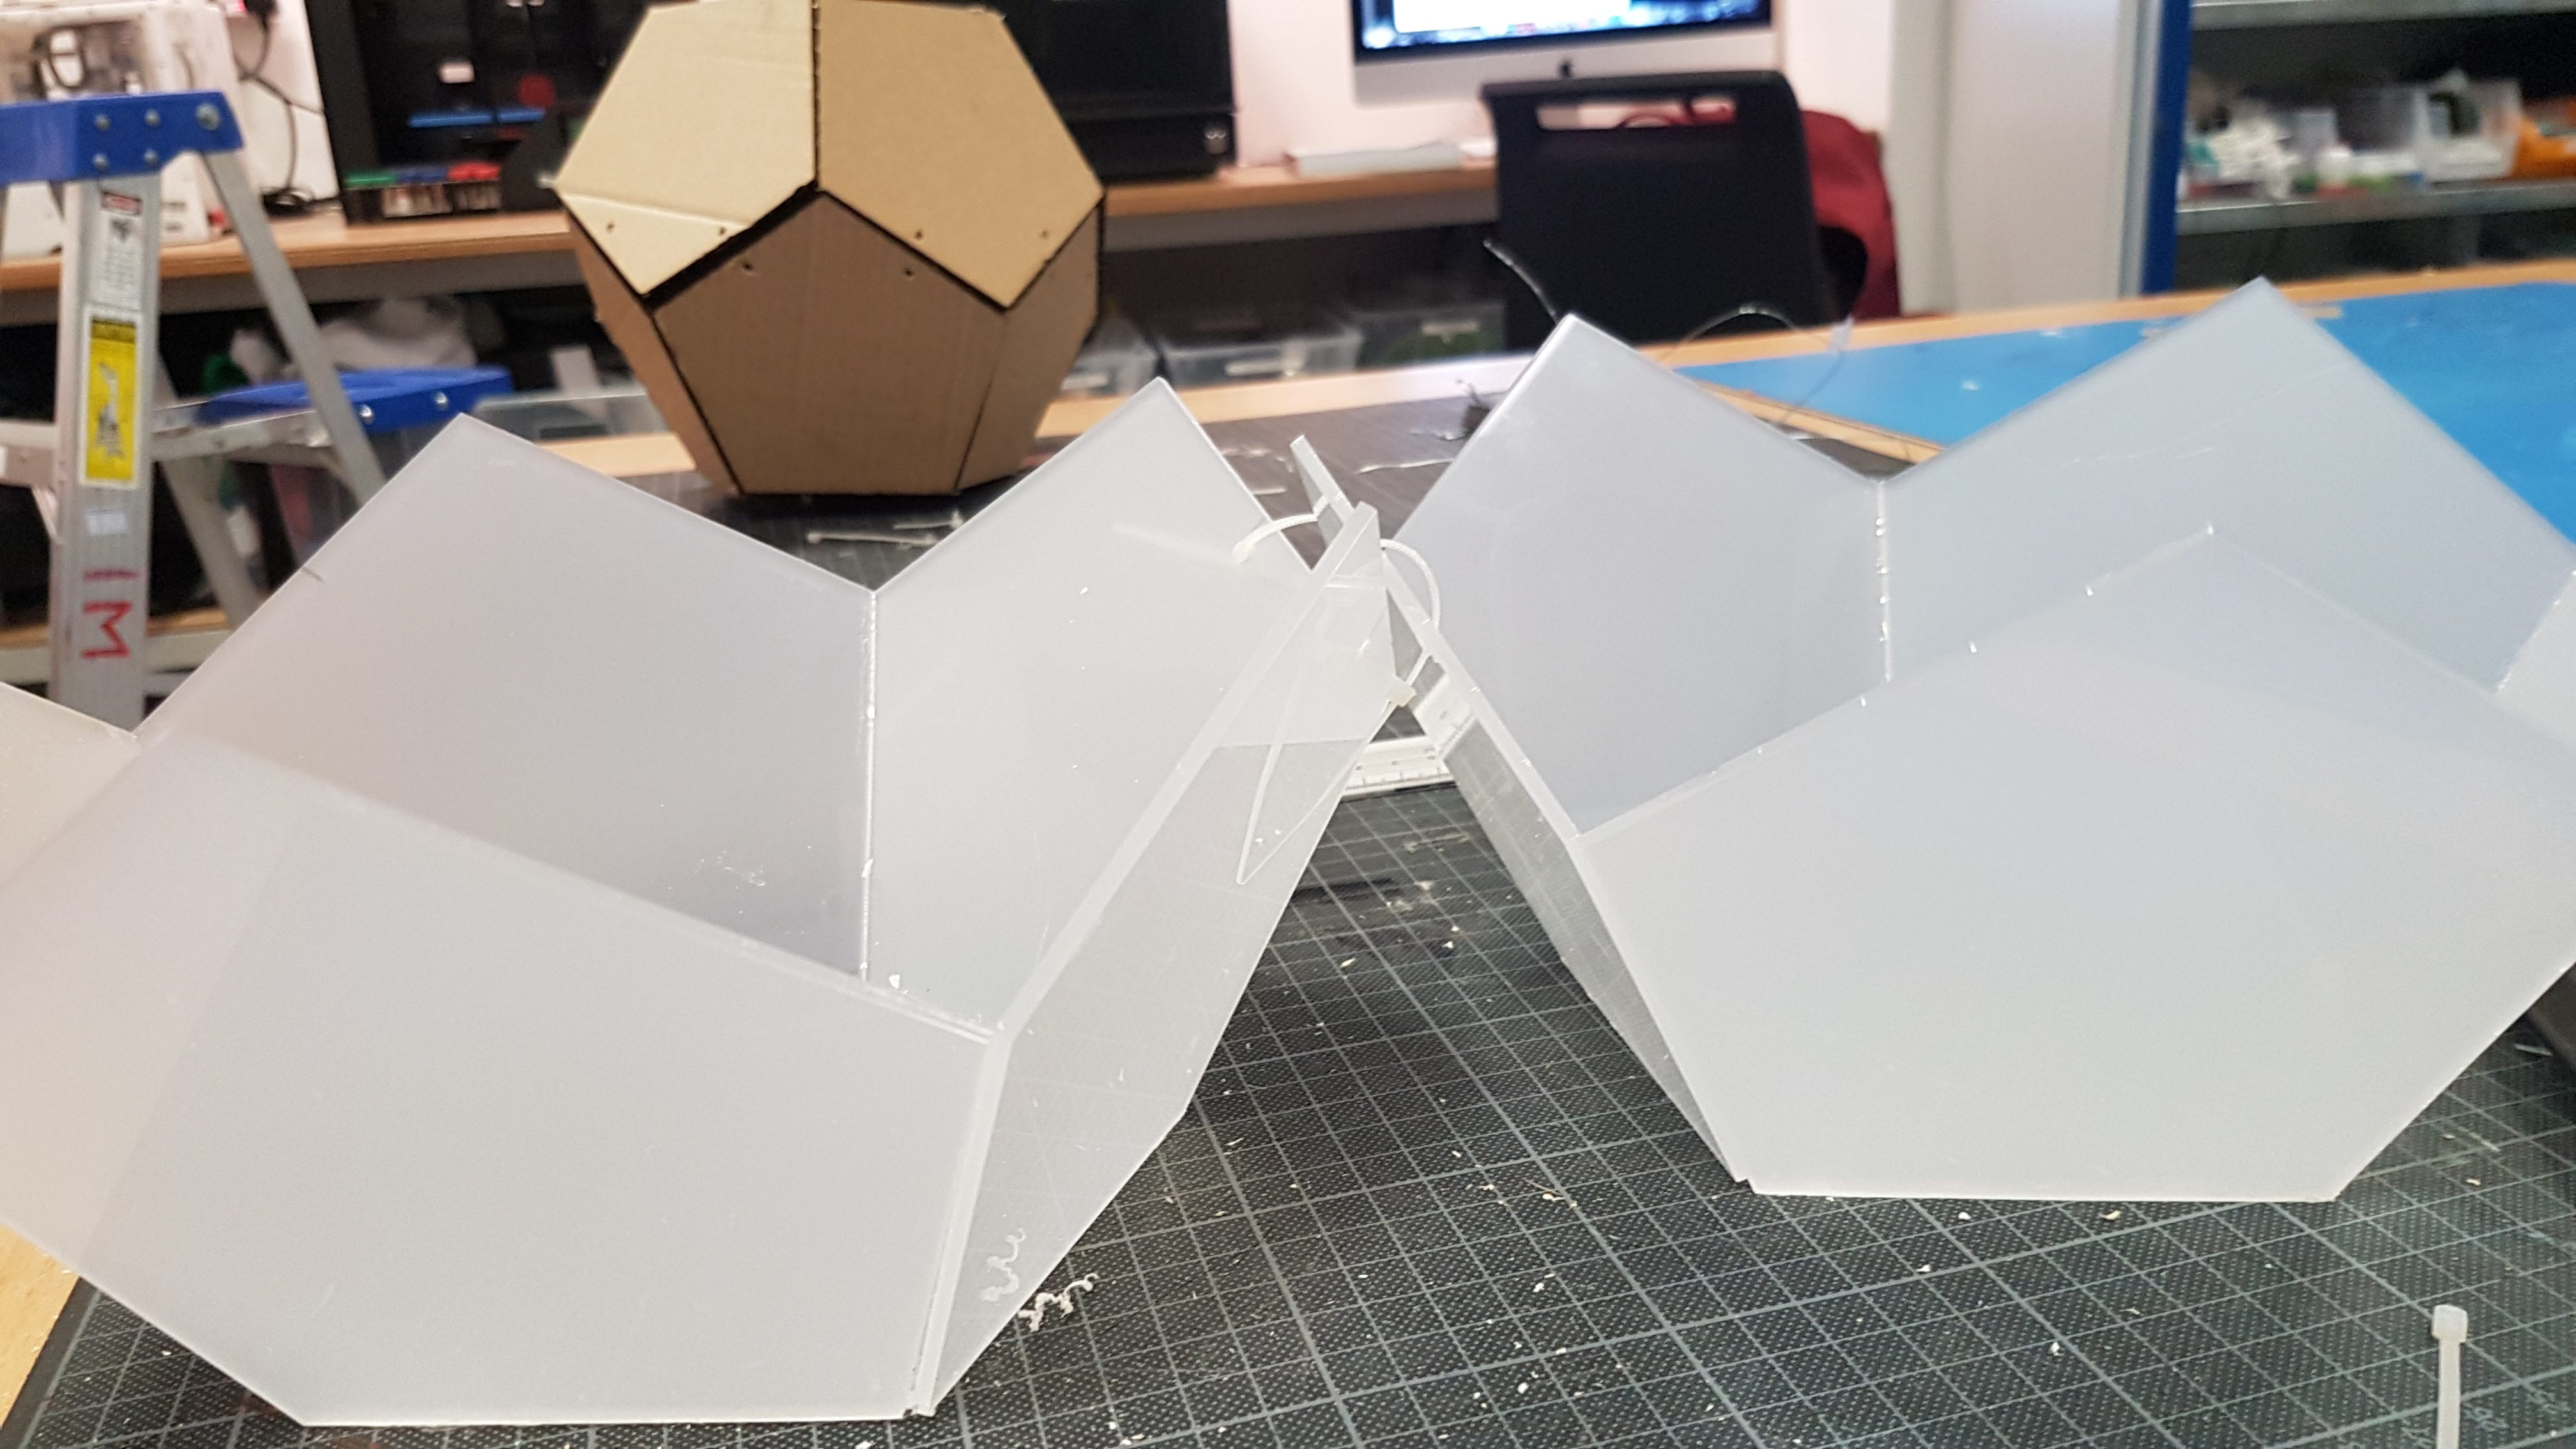
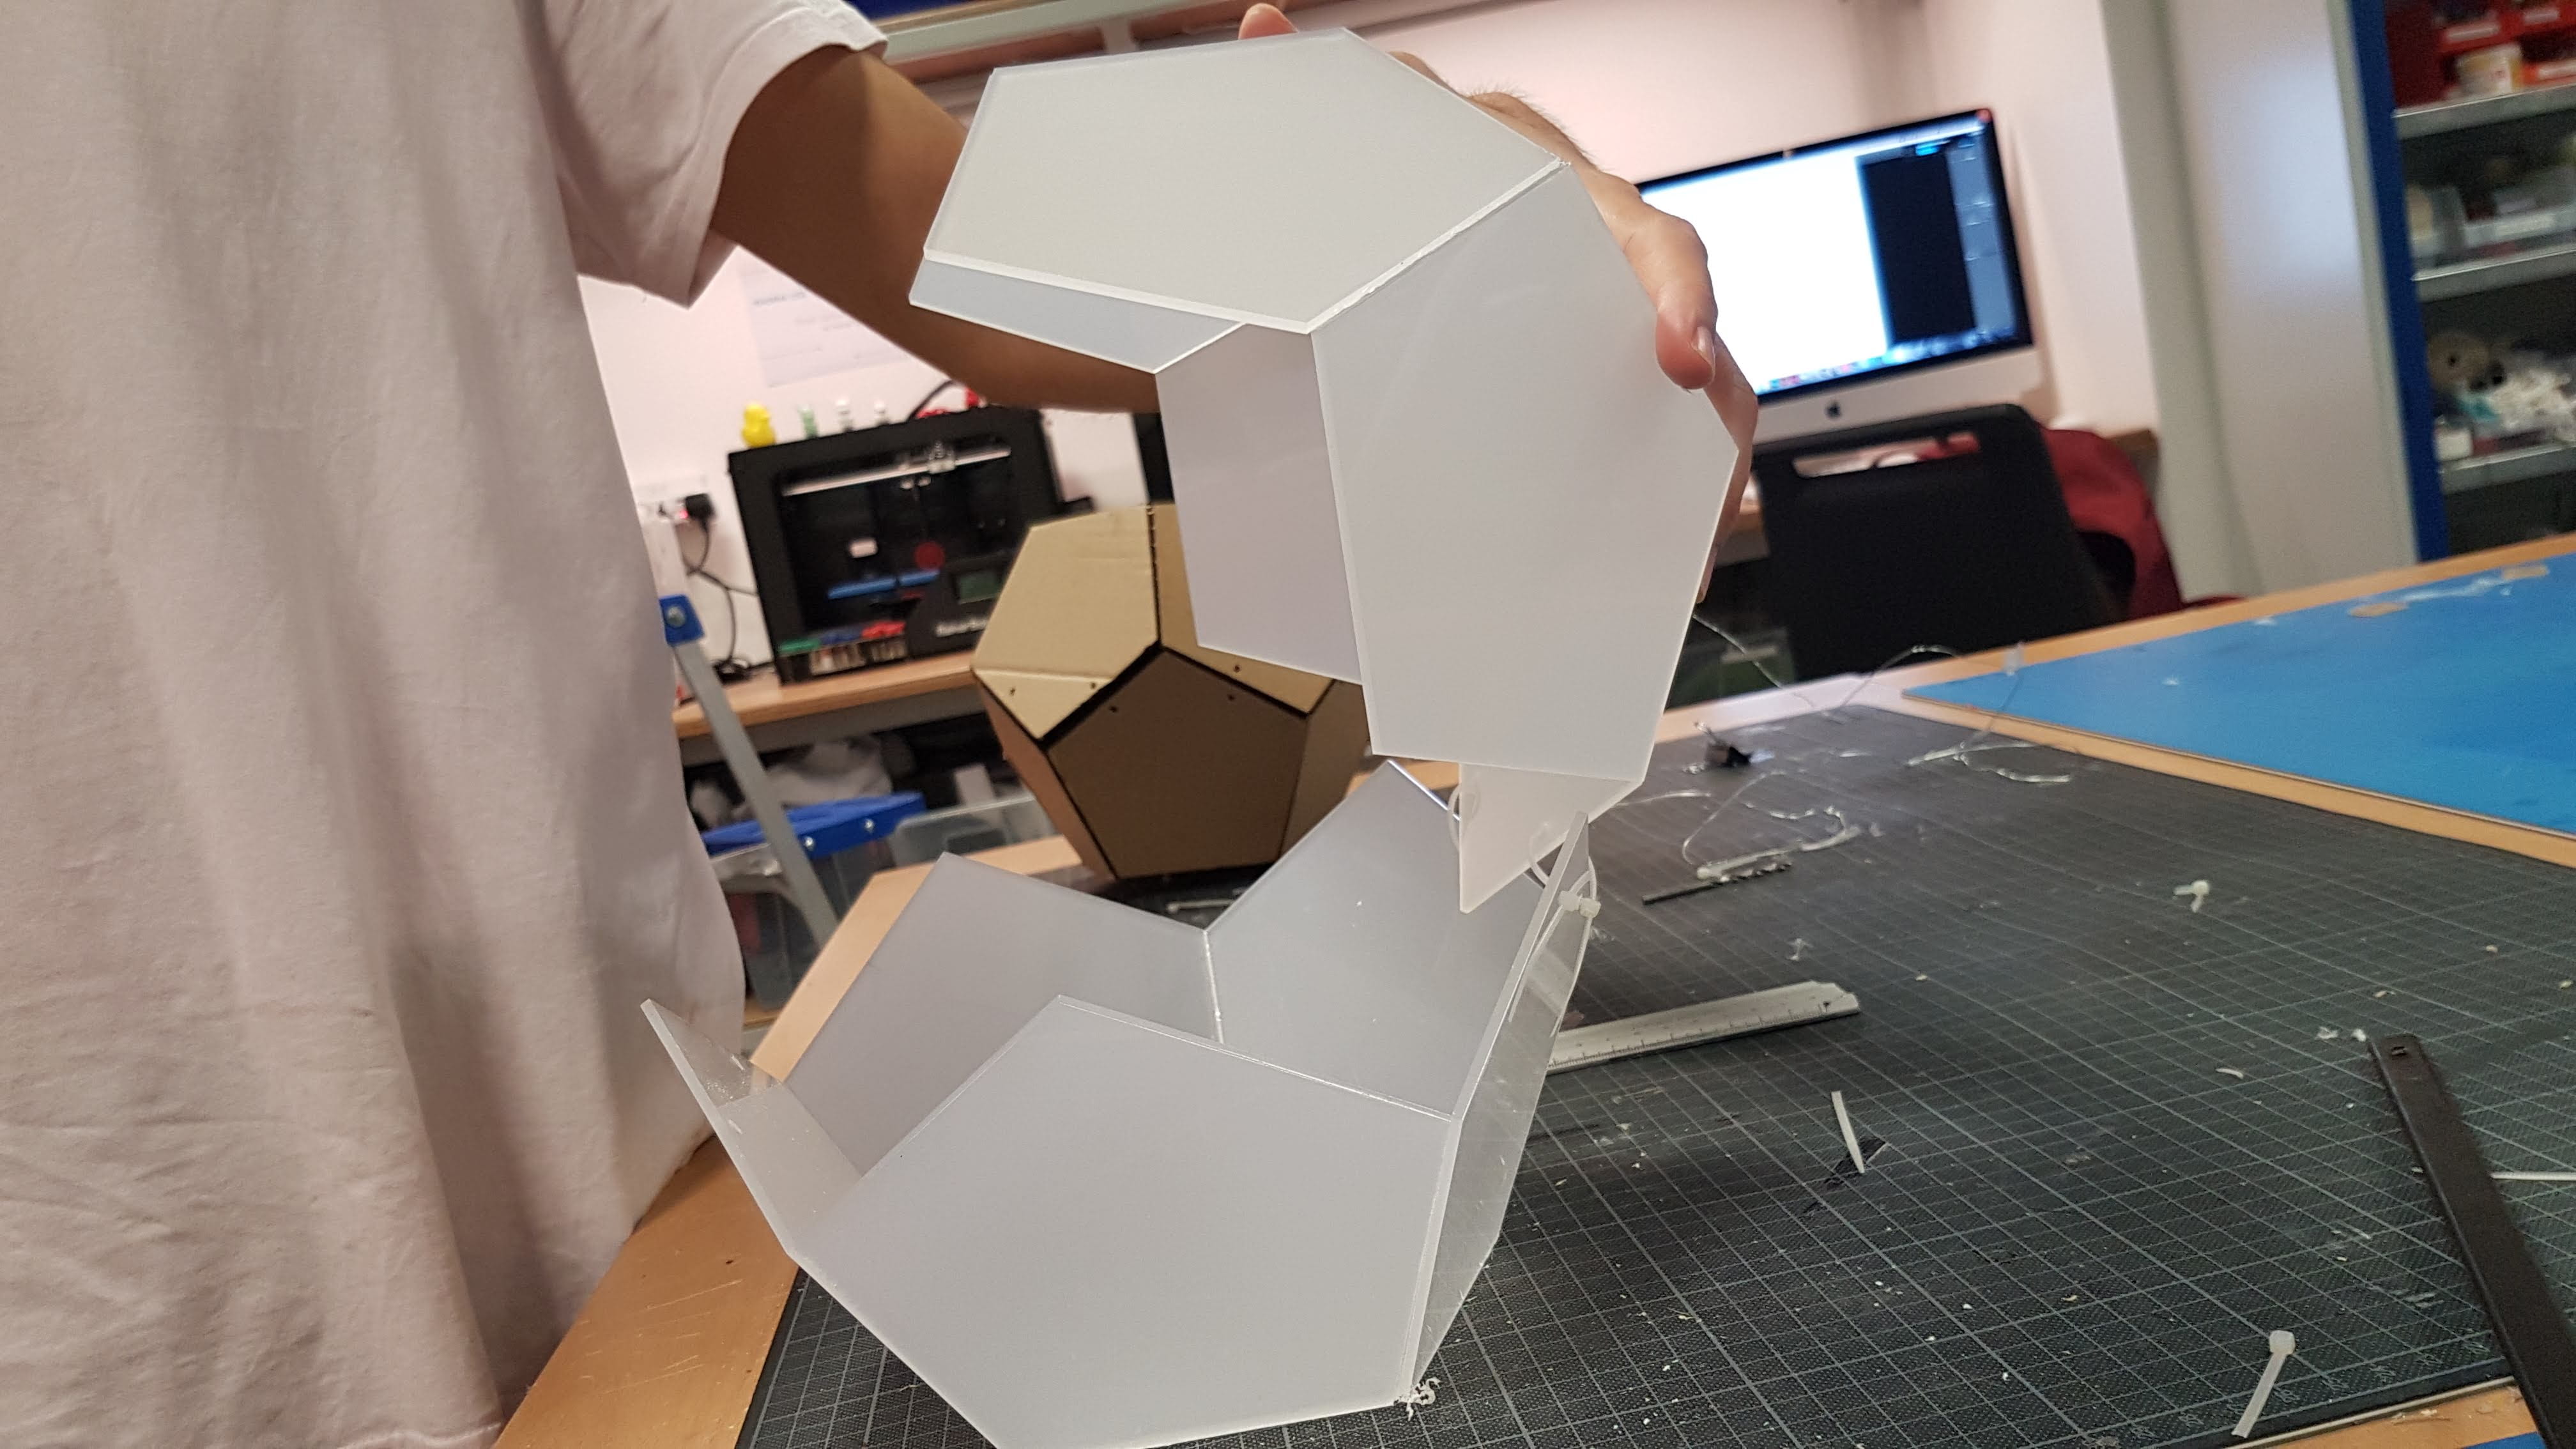
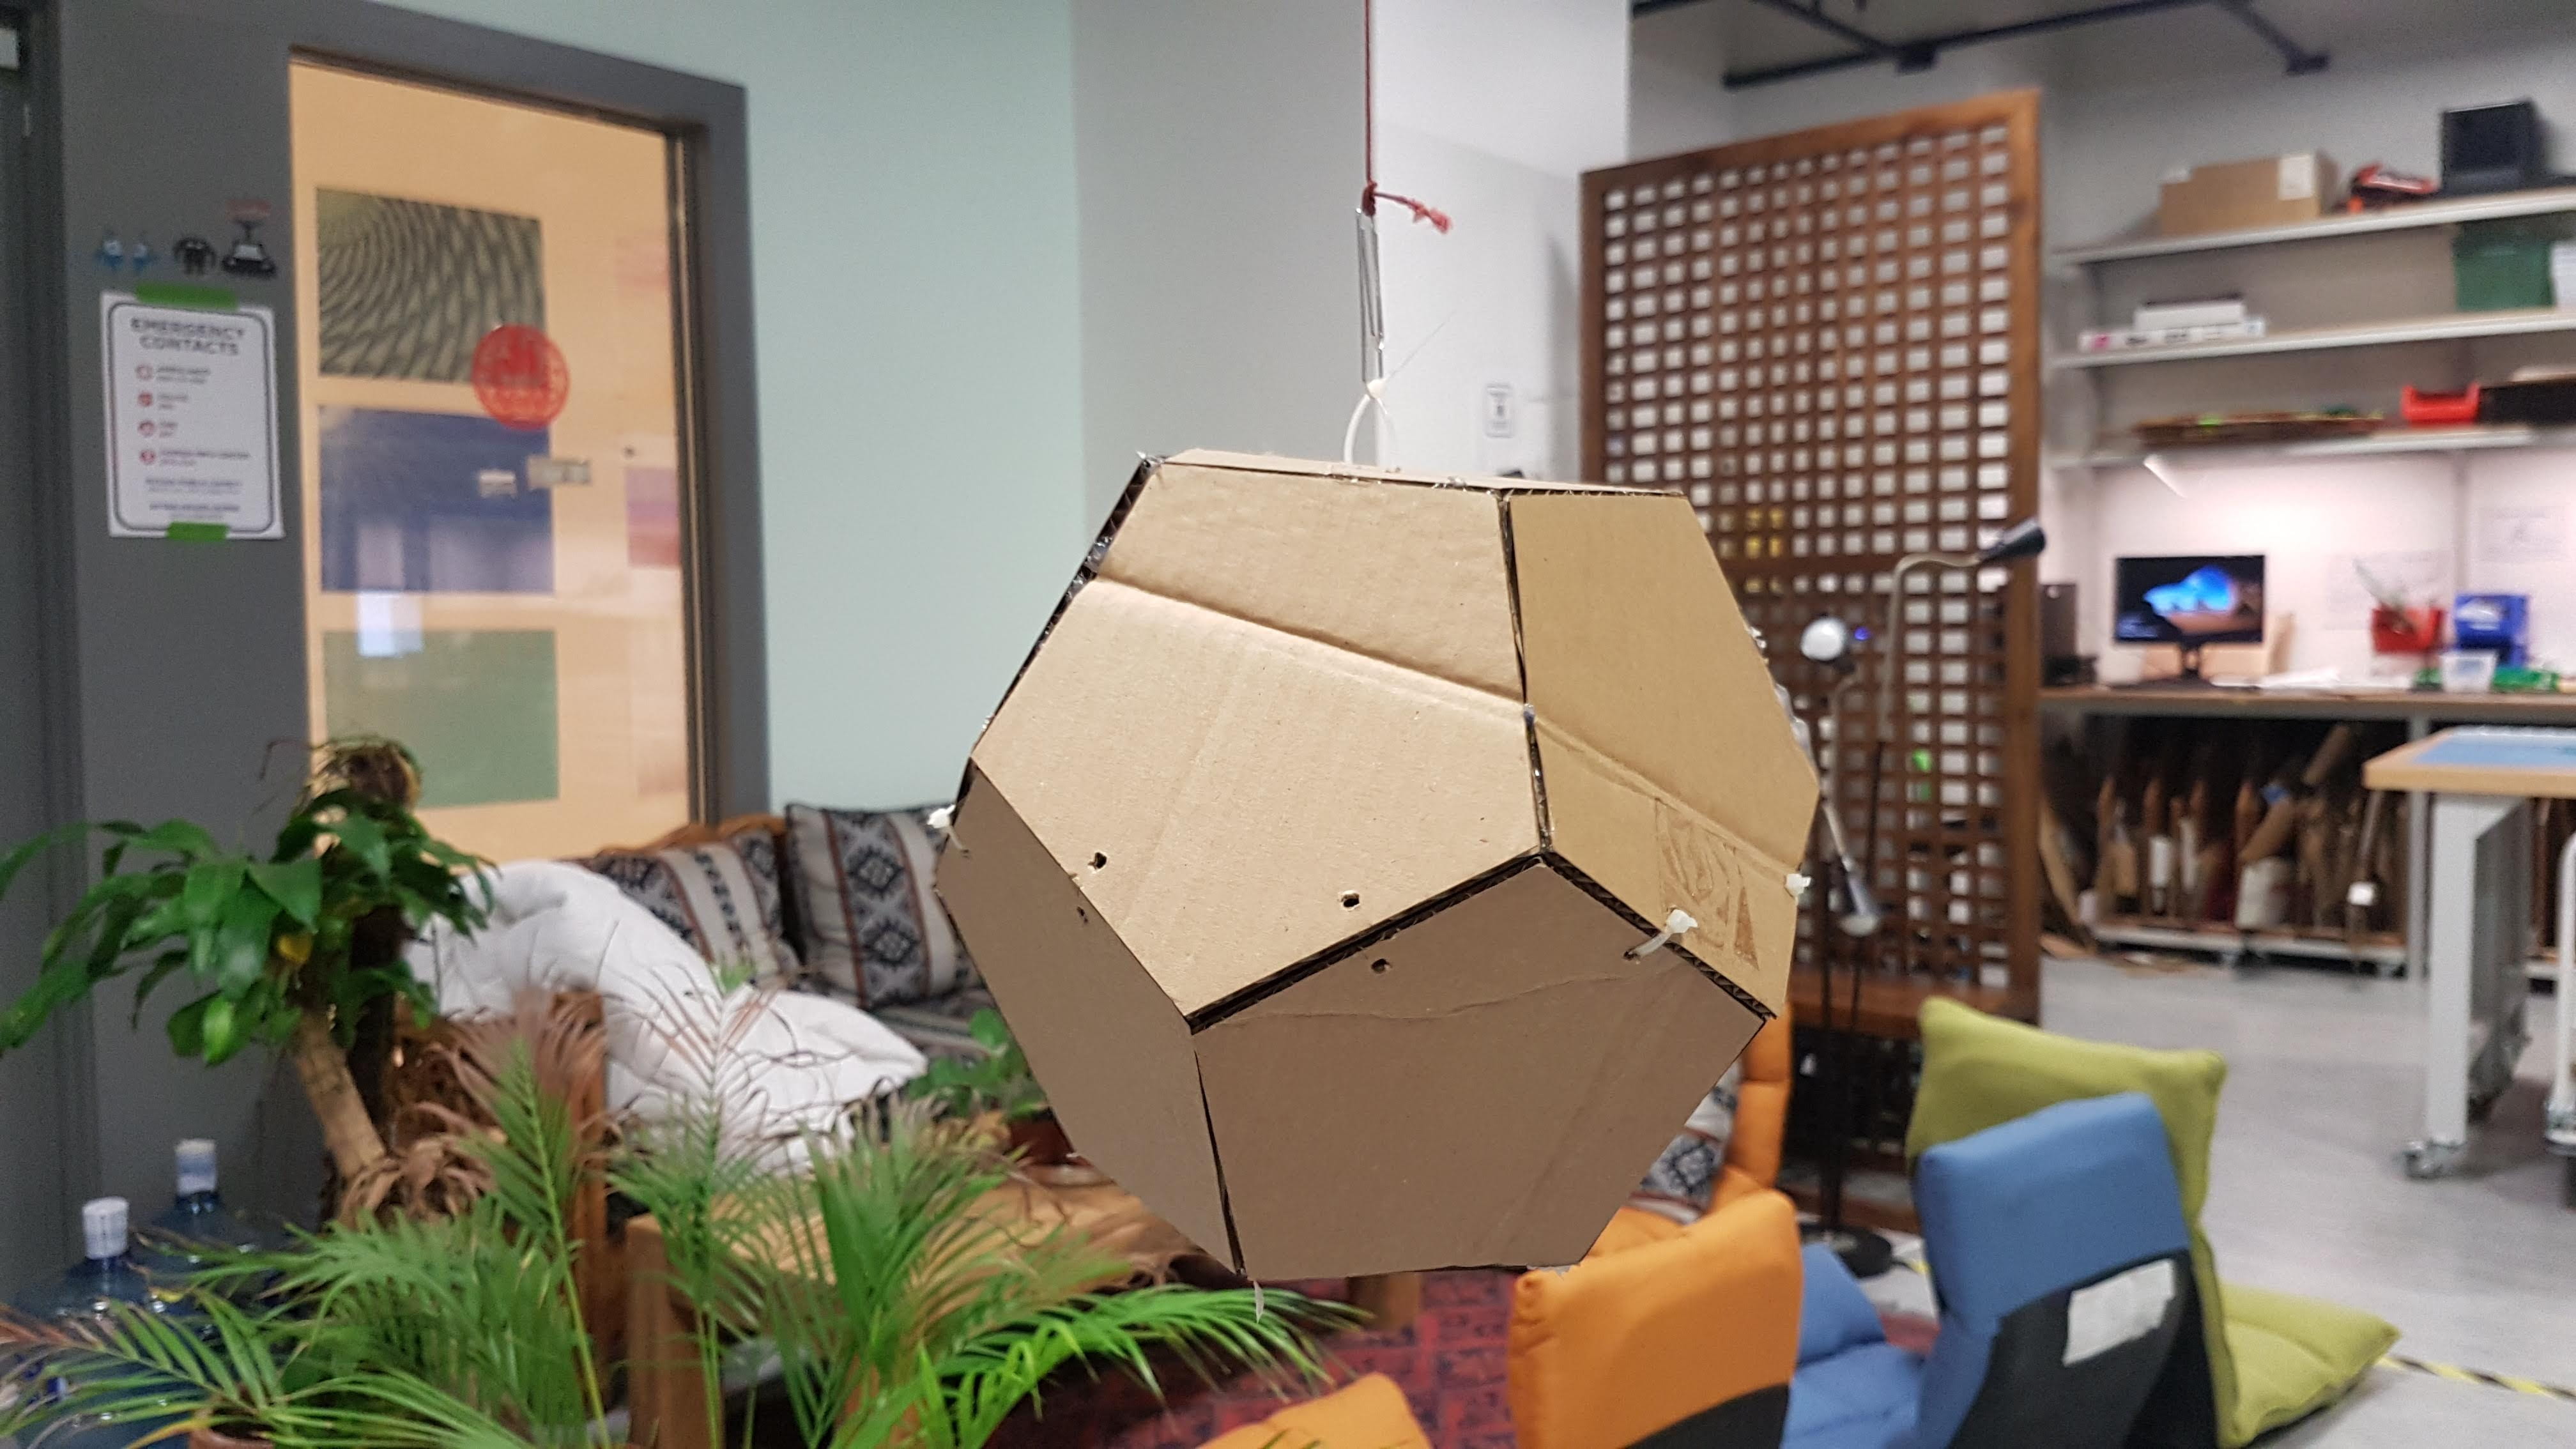
In the end, we decided to laser cut a dodecahedron on frosted acrylic instead of buying or ordering an acrylic ball. We decided to do our own since this would give us more flexibility in terms of size options and it would be easier to cut into 2 halves and then attach together before the performance, rather than working through the acrylic ball’s hole. After many hours of applying acrylic glue and making sure we were placing each face at the proper angle, this was the result: 
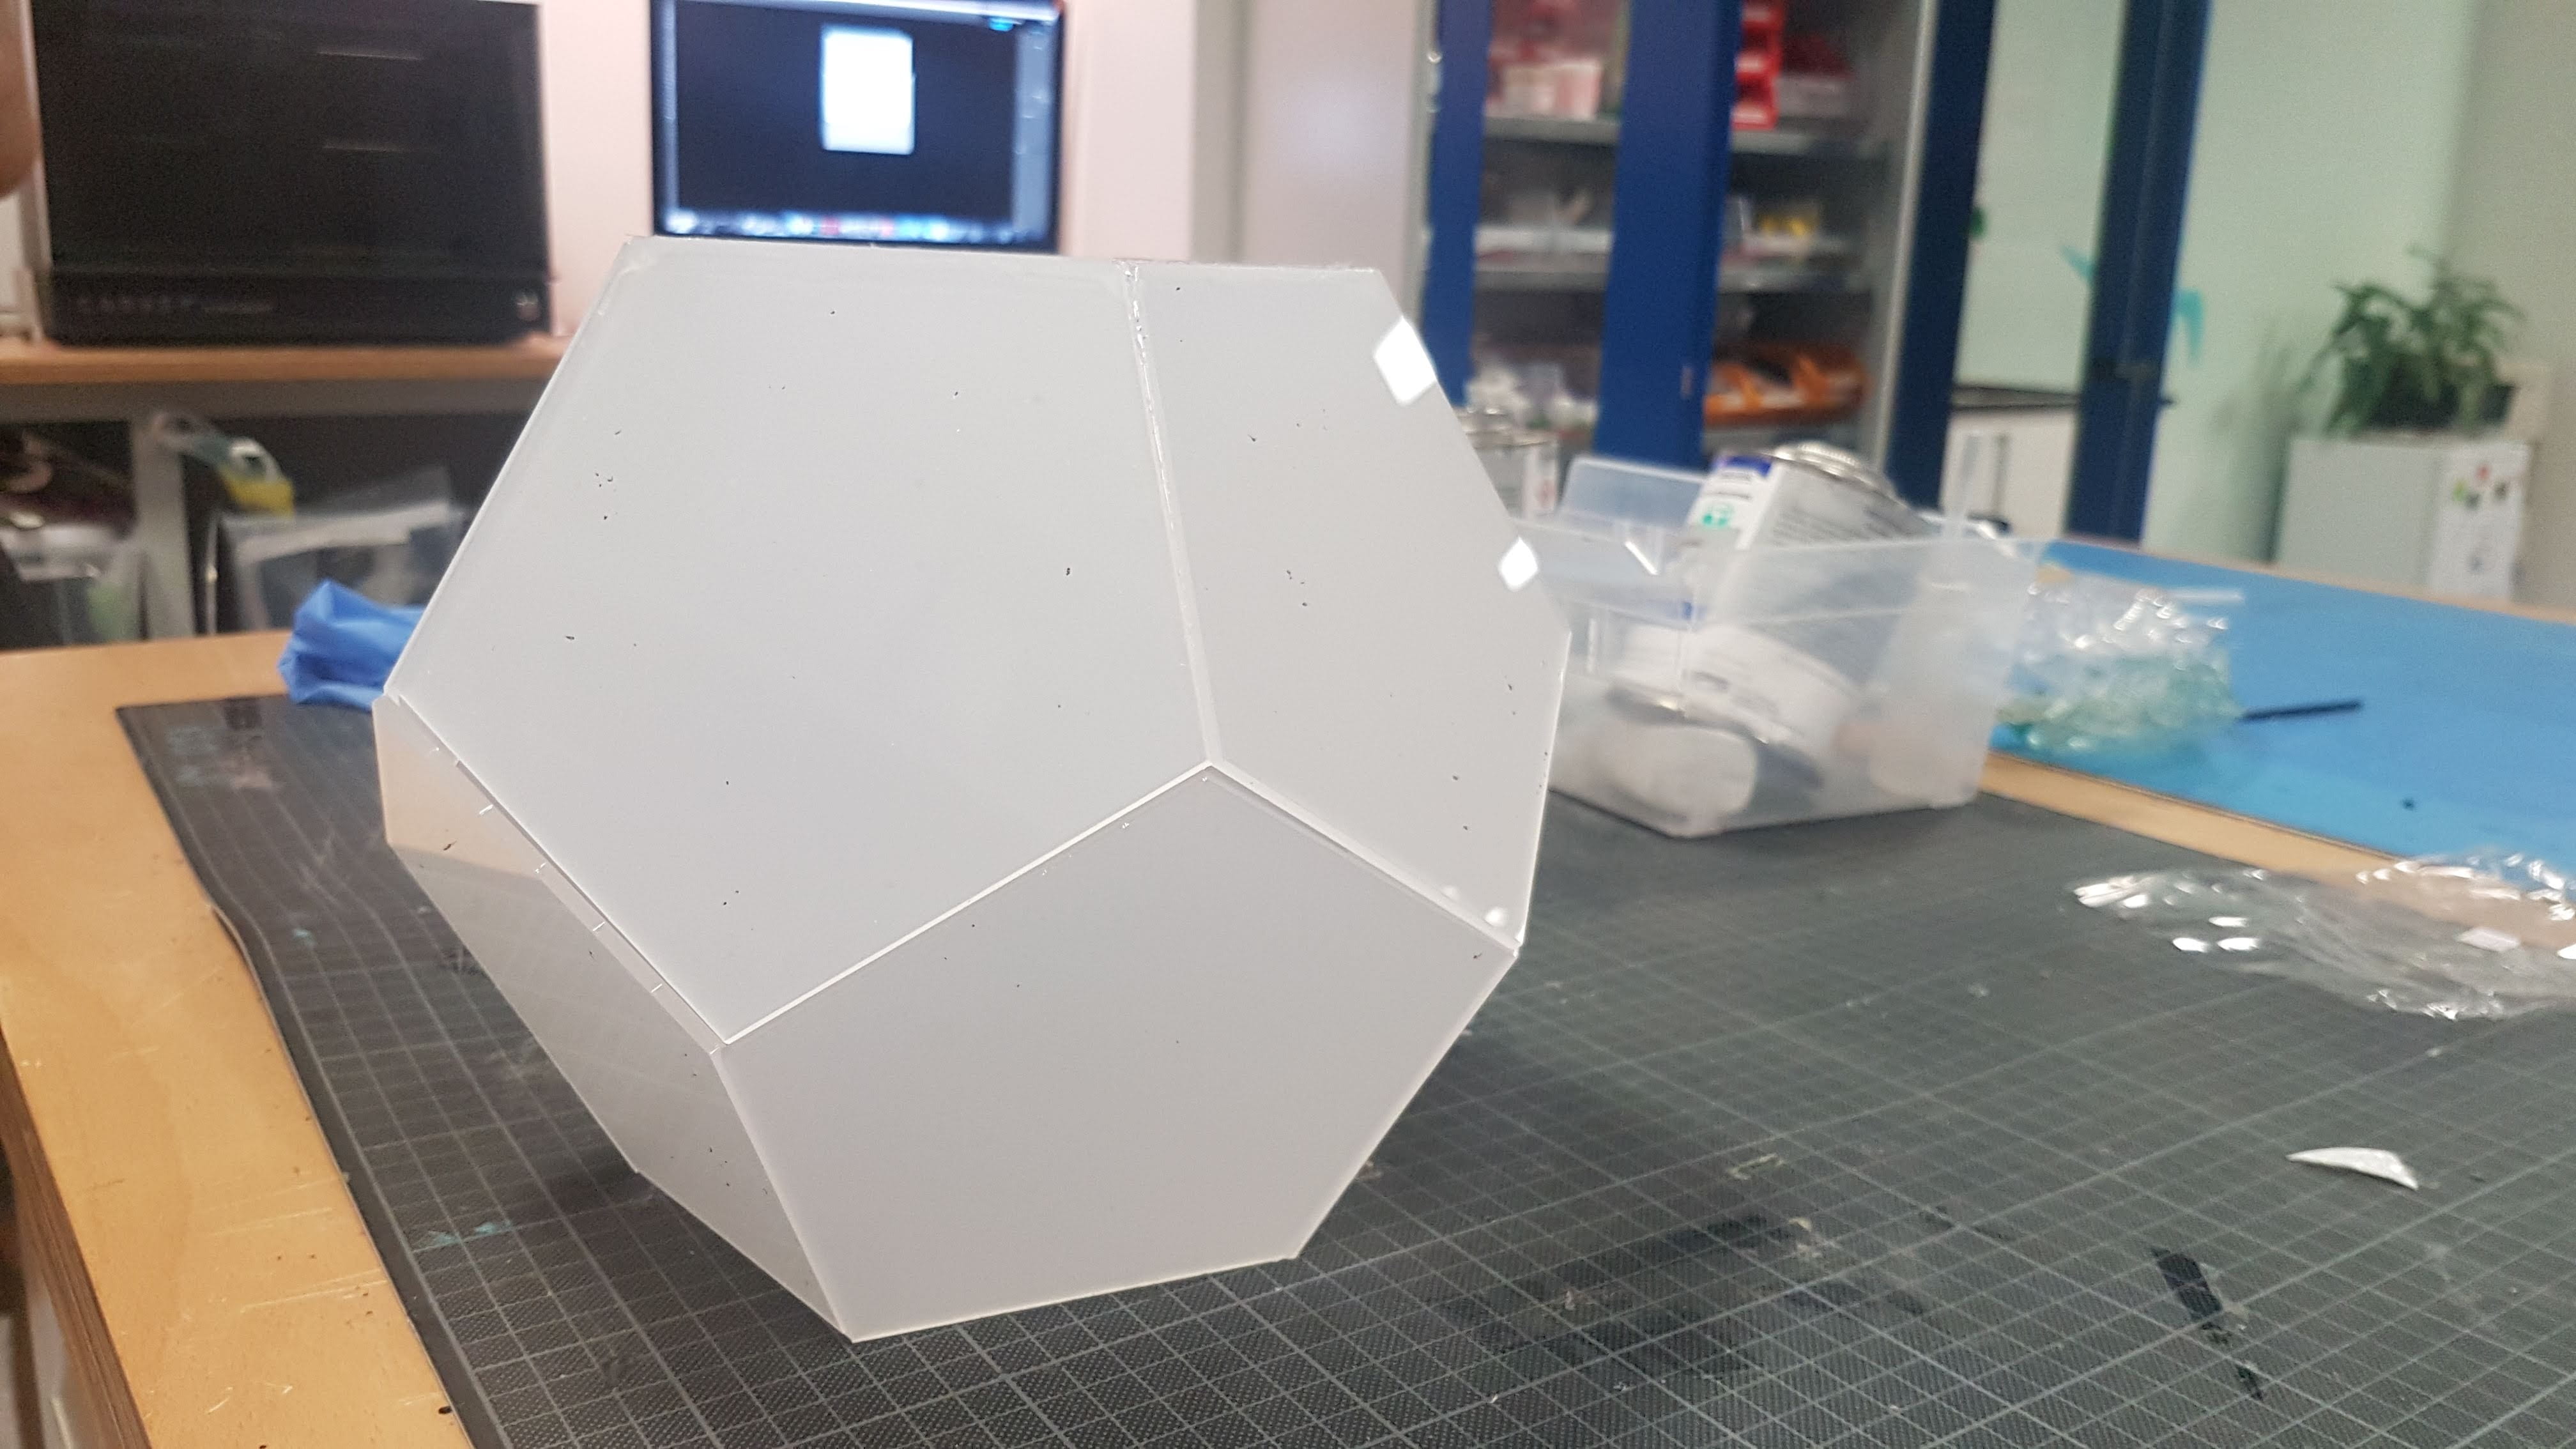
This is how it looks with one neopixel ring inside. We are planning on putting 3 inside: two facing the sides, and one facing the bottom. They will change colors throughout the performance with the Bluefruit LE. 
We put zip ties on one side of the dodecahedron so we can easily open and close it (thanks Lateefa for the suggestion šŸ™‚ 
For mounting and testing, we’ll simply put zip ties on the other end, and then cut them open again if we need to retouch other things
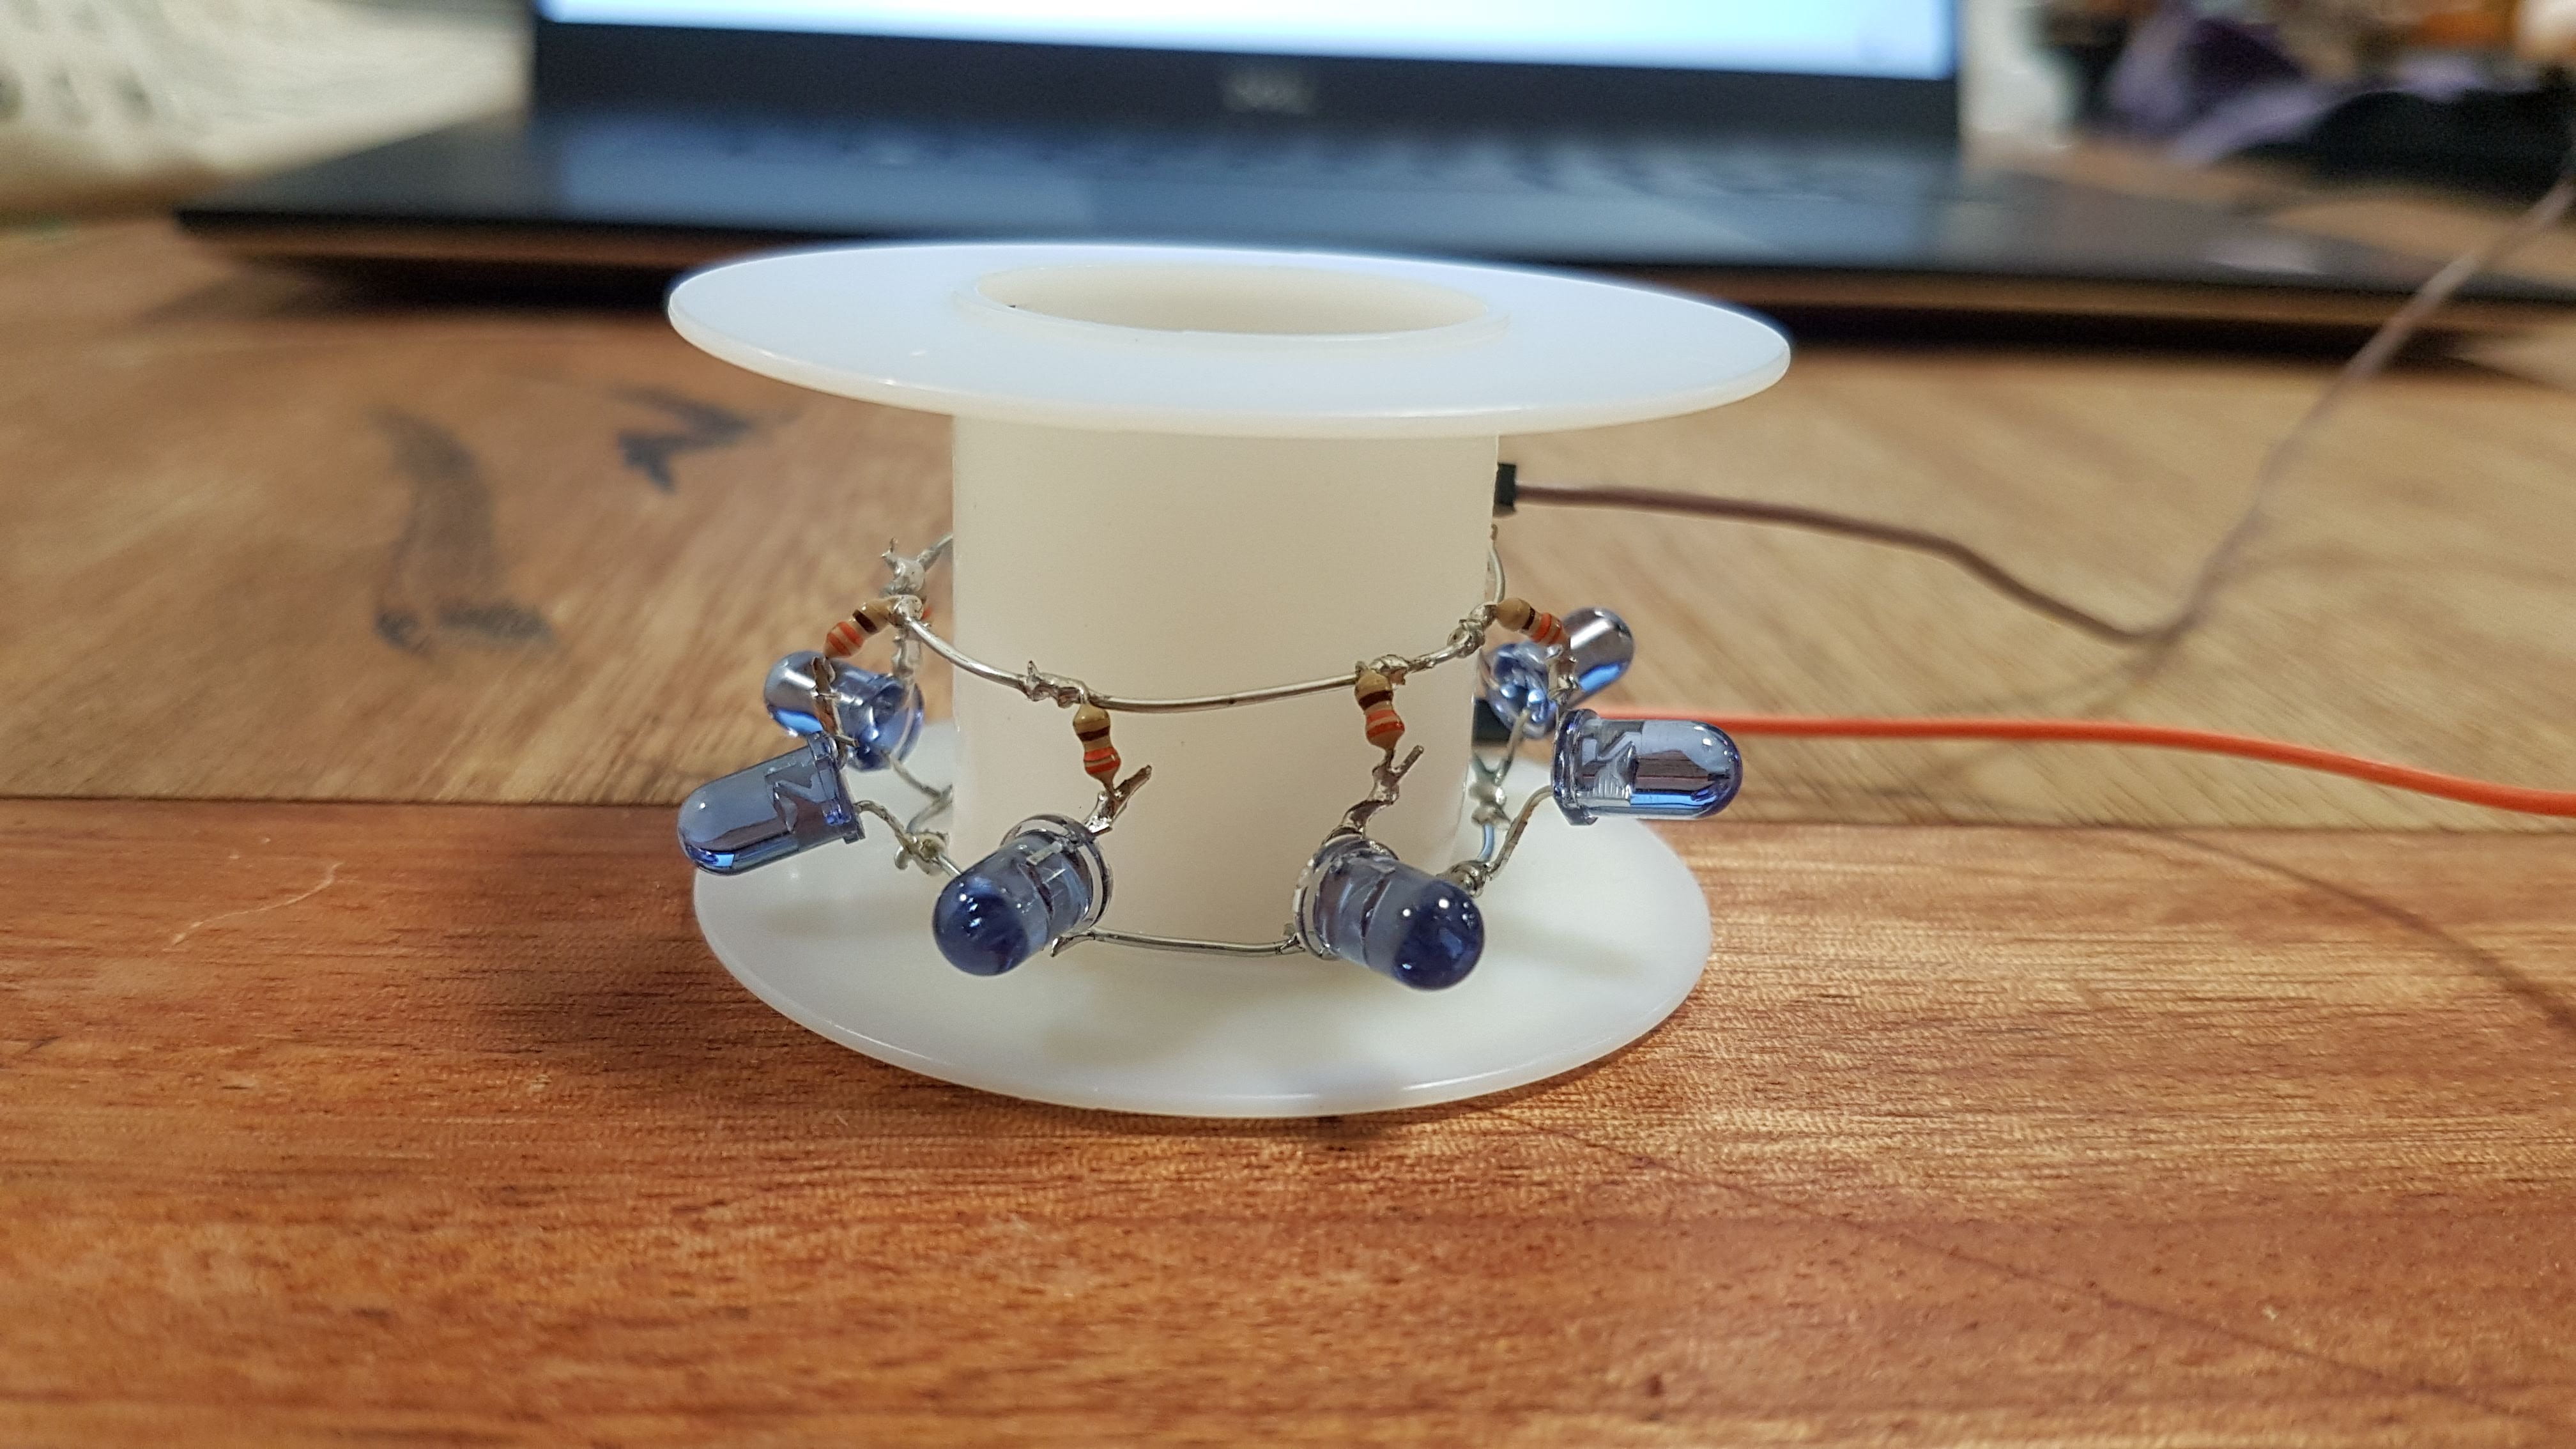
This IR ring will be inside the dodecahedron. Even with the acrylic surrounding it, the camera can still track it.
We also made 2 holes on the top, so the structure will be attached as in the picture.

Software 

In terms of the actual code/performance, we’ve established the visuals for the first 2 parts of the performance (out of 3).  This is how they look: 

Part 1: Erica (our dancer) is curious about the glowing “thing” in the middle and slowly approaches and gently nudges it.

Part 2: Erica will detach the ball and start “drawing” with it. 

The particles will eventually form a preset shape/text (we still need to decide on this) 

Sound 

Things we still need to do:

Overall, we think we’re in a pretty good spot! We’ll do the following before doing rehearsals during the weekend:

Hardware:
Check out 2 more neopixel rings 
Set IR LEDs and Neopixel rings on place
Control neopixels with Bluetooth LE

Software:
Get attractors & particles drawing image sketch working
Finalize 3rd part – get attractors sketch working
Put all separate parts into the same code
Test all parts with IR and ball
Test IR with camera on the floor (possibly image warp)
Program saves previous locations in case it doesn’t identify an IR light
Capacitive touch Key Presses

Sound:
Choose specific sound times
Choose sound effects for last part

Image:
Decide image/text to display in part 2

Chidori! (Steven & Mari)

For this week’s homework, Steven and I decided to make use of the Prop Shield’s motion sensors to enhance a childhood nostalgia/dream we both had: to properly do the hand gestures in the Naruto anime by playing the iconic sound effects that accompany the character’s hand gestures. Matching up different sounds to different hand gestures would also be an interesting challenge to properly calibrate and distinguish between the different hand movements. 

For those who are not familiar with the hand gestures used to summon certain jutsus (or a certain ninja technique according to the show), here’s a video showing the one we were trying to recreate: 

Steven and I decided to simplify the whole action in general, and instead chose 2 hand gestures, leading up to the electricity sound. We used this image as a guide as well:

Image result for chidori hand gestures

The aspect that took the longest time was first making sure that the sounds wouldn’t continuously play on top of each other. We solved this by creating booleans that would not allow the same sound to trigger again and again, once it was already triggered once. Another step we had to take was to determine the heading, roll, and pitch values that each specific hand gesture usually stayed on, so we could successfully trigger the proper sounds each time. 

In the end, this was the final outcome, which we’re quite happy about šŸ™‚ 

The code can also be found here


Real Sense Exercise

Overall, the difficulty of this exercise increased exponentially simply due to the multiple errors we kept getting in openFrameworks (several of these were due to the Real Sense library, but somehow we kept on getting other errors which also took their time to figure out and fix). Integrating the image warp and the projection mapping into our original code was not a problem at all, but rather having to maneuver between the errors that appeared in between is what really took time and felt rather demotivating, as the software (and not the difficulty of the code) really felt like the biggest deterrent in this exercise. Having to jump between each other’s computers every time we got an error is a small proof of the additional problem this was šŸ™ . 

On Saturday, since the IM ladder was locked in storage, we weren’t able to install. However, then we were able to integrate all the parts into our code. We got everything mounted properly (mostly thanks to Tori!) and tested the code properly (thankfully, the keys that increase or decrease the threshold are really useful in this case), and this was our final result (we made it pink to look pretty)

We originally wanted to have the Princess Mononoke creatures in several parts of the sketch looking towards the user, however, it ended up looking very creepy, and the outcome did not really do justice to how good the previous sketches looked, which is why after some time, we decided to go back and use the original Generative Design sketch. 

Final Project: Potential Ideas

Here are some potential topics/mechanisms I’ve been considering for the final performance: 

  1. Human & creature story following the narrative of the Little Prince and the Fox (meeting, gradual domestication, goodbye)

A performer interacts with a creature that appears projection mapped between different surfaces along the screen. 

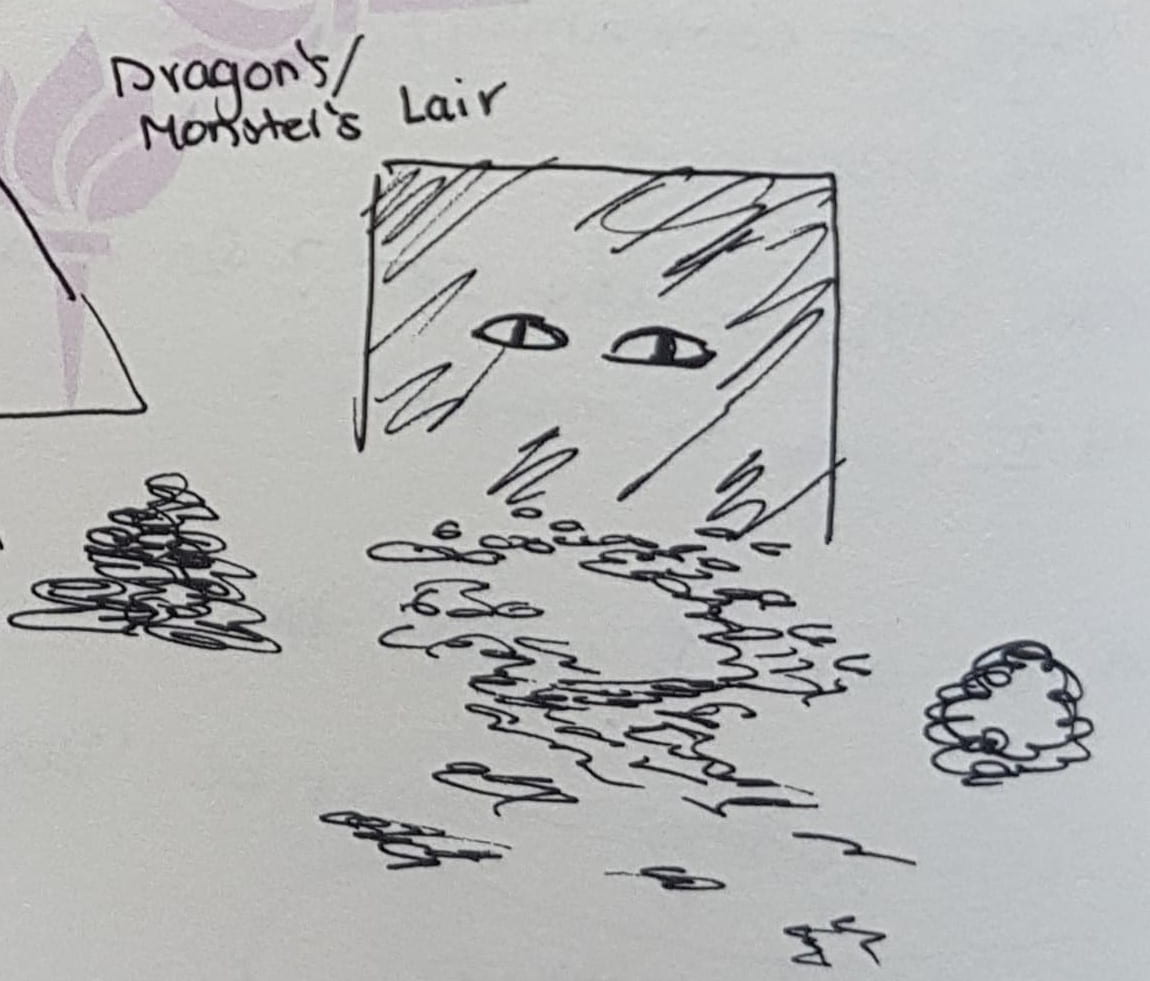
2. Performance based on interactions with piles of gravel/pebbles on the ground 

Performer moves/dances and interacts with the piles of pebbles around them. These pebbles are projection mapped, and their color/look changes according to how they are grouped. Possibility: perhaps lurking eyes on the background, progressively building tension.  

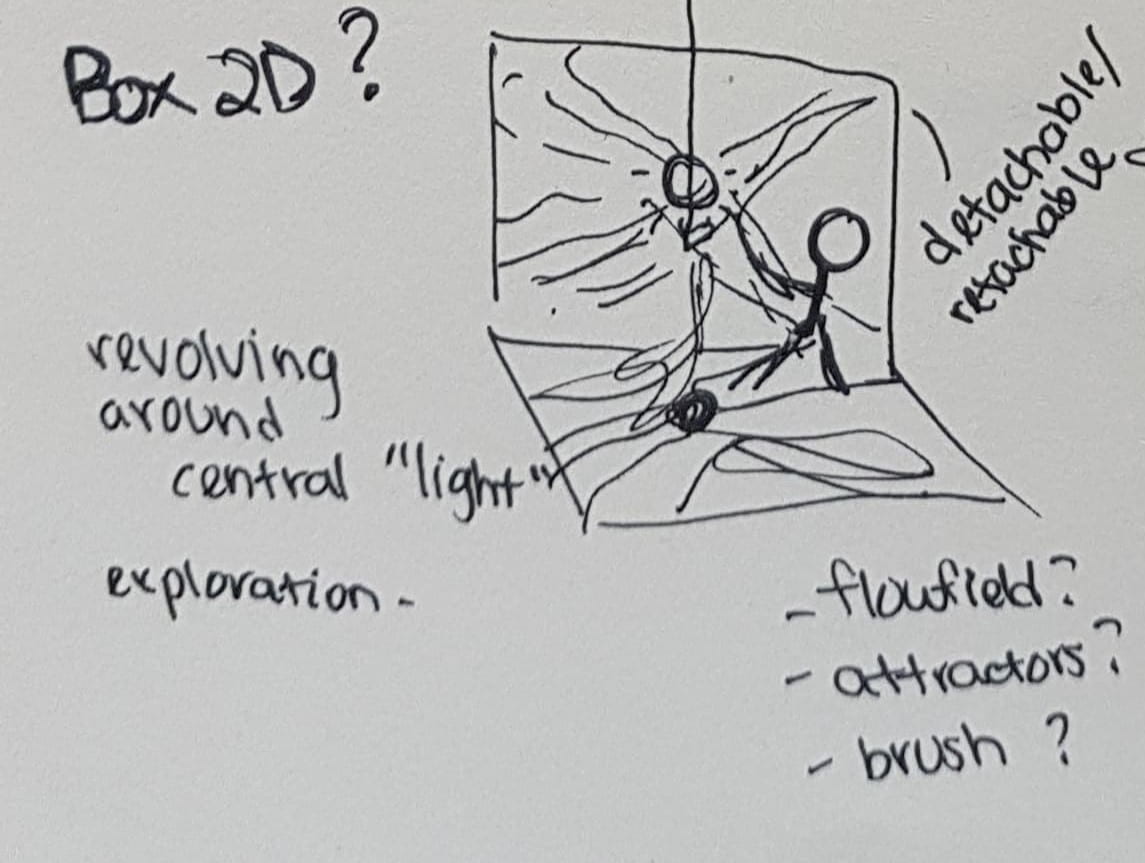
3. Performance revolving around a spherical light object hung on the ceiling

A dancer performs and moves while interacting with a light sphere hung on the ceiling from a flexible fabric/thread. The movement and swaying of the sphere causes changes on the visualizations on stage (on the wall, floor, or on both). Possible technical implementations include creating an interactive flowfield, using attractors, or creating different brushes. 

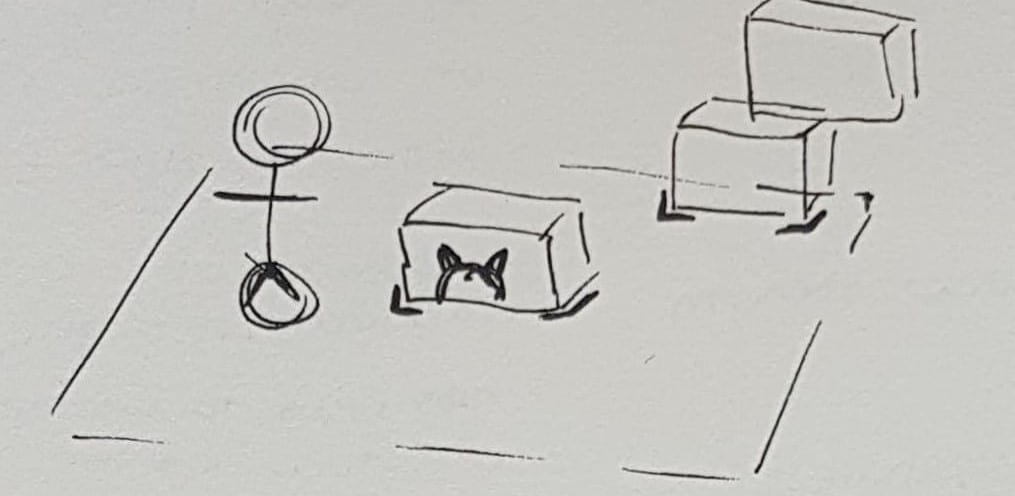
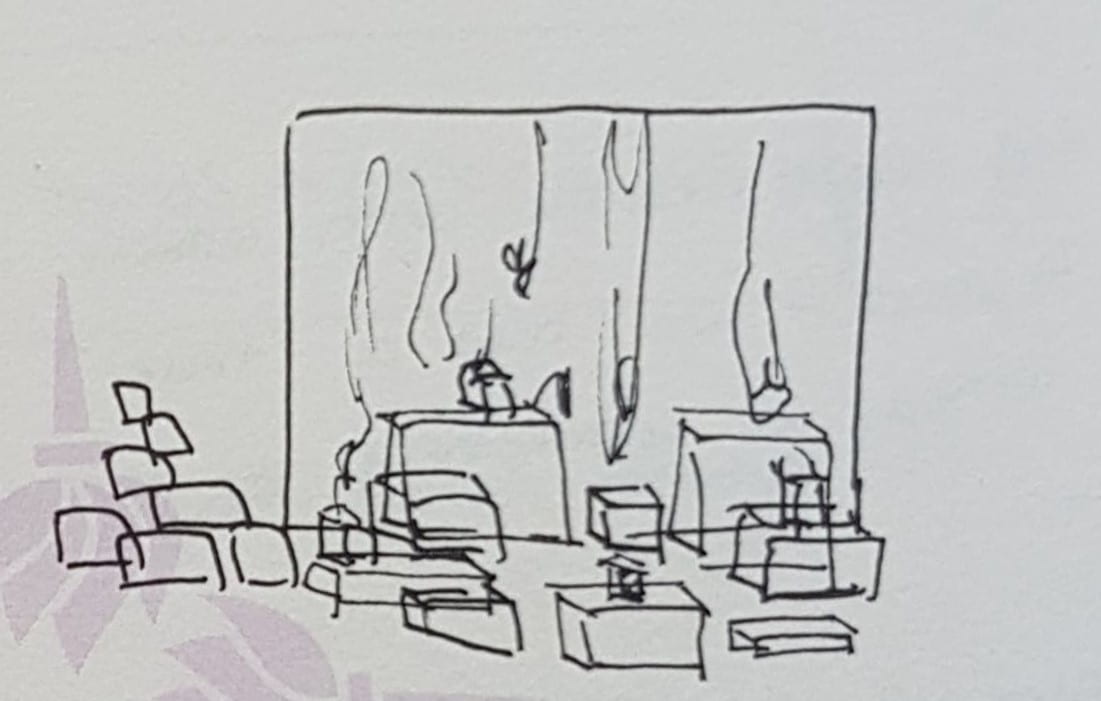
4. Performance based on interaction with cubes of variable sizes scattered throughout the stage

As can be seen on the photo, this performance would entail a dancer or performer interacting and moving different cubes, triggering different reactions on the wall and on the projected cubes themselves.

On the Implicit Body Framework

ā€œA Critical Framework for Interactive Artā€ delves into what Stern describes as the implicit body framework, which presents a series of four essential ā€œstepsā€ to critically analyzing and responding to an interactive artwork. Through his framework, Stern advocates for moving beyond mere descriptions and observations about interactive art, and instead invites us to follow the implicit body framework to ā€œname and unpack the (unnamable) ā€˜sensible conceptsā€™ of a work, the physical experience of ideas, and the being and becoming that is virtually felt as we interactā€ (90). 

The first two parts of the implicit body framework, artistic inquiry and artwork description, are quite direct and self-explanatory. These two are crucial in understanding the artistā€™s intentions and motivations, and understanding the key components that work together to frame the experience. The final two parts, which Stern describes as the aspects that are usually missing in critical theory of interactive art, consist of inter-activity and relationality. The former deals with exploring how bodies and actors move when responding and playing with an interactive piece. It invites us to ask ourselves, ā€œwhat materials and bodies and sensible concepts emerge from this moving-thinking-feeling, in and of the relation? How might this work deepen our understandings and experiences of embodiment, materialization, and articulation?ā€ (97). The latter aspect, relationality, then delves into the further implications the art piece represents, on the questions it raises and the effect it has on the way we think and perceive the world. In theory, the implicit body framework sounds spectacular: it provides a guideline to go beyond the initial spectacle and glimmer most IM pieces have. However, when actually trying to apply it, I can see how most critical theorists donā€™t delve into inter-activity and relationality. If someone were to ask me how my midterm project ā€œdeepens our understanding and experiences of embodiment, materialization, and articulationā€, I would be speechless; I wouldnā€™t know what to think of or even say. Perhaps reading more critical theory on art and theatre would help inform my answer, maybe taking Understanding IM will be what solves this for me, but for now, Iā€™m still struggling to understand how to think about Stern’s “inter-activity”

On another note, Iā€™d like to end with a phrase that really stood out to me: 

ā€œHow we move, sense, and thing-feel, and even more importantly, what this highlights in doing and  making, how we relate and perform, the work of the art, the inter-activities that are integral to it, and how they attune us to embodiment, can never be sufficiently captured and presented...It is precisely interactive artā€™s resistance to representation that the implicit body framework demands we address as staged" (96)

After 3 years in IM, I can attest that no amount of proper documentation will give justice to the actual experience of playing and interacting with an IM piece. These projectsā€™ essence is their interactivity, and definitely too much is lost after their de-installation.

Musical Stairs – Documentation

Musical Stairs enhances the experience of taking the stairs in the Arts Center through spontaneous and collaborative music-creation. Simply walk up or down the stairs and enjoy the sounds!

The Idea 

While brainstorming different approaches for this midterm, I realized that I wanted to create a project that would make the most out of the location I would choose in the Arts Center. Initially, I thought about creating interactive tiles that would produce some sort of output (either sound, or visuals) according to where people walked. However, as I realized how technically hard it would be to accurately sense where and at what precise moment people were to step on a tile, I decided that the best approach would be to switch to stairs. With this new location, it would then be easier to have sensors on each step. The short length of the stairs would also make it easier to track peopleā€™s steps more accurately. Instead of using visuals, I wanted to explore the use of sound. It would be an interesting challenge for me as I had never done an entirely sound-based piece before, and it would also be fun to look into different sound possibilities.

After deciding on the overall idea, I set the following goals for my project. These would then inform my choices throughout the development process: 

  1. To encourage the collaboration between people by sound-making through movement.
  2. To amplify the experience of walking up the stairs in the arts center.
  3. To establish the stairs as a dynamic location for potential interaction between passersby.
The Process 

The following are the overall steps I took to complete the project. 

  1. Test and identify the optimum sensor to use (between a capacitive touch sensor, an infrared proximity sensor, and an ultrasonic range finder)
    • In the end, I chose the ultrasonic range finder for this project since it was the sensor that obtained the most accurate readings, had a library (NewPing library) that provided easy ways to construct and instantiate multiple sensors, and because the lab had the quantity that I needed. Thinking back, I might have instead chosen the infrared proximity sensor, since it might have worked better than the ultrasonic range finder.
  2. Figure out how to trigger sound files based on sensor input
    • Initially, I planned on using the Teensy 3.2 Prop Shield to play audio, and followed these steps to load sound onto the Teensy and have it play using a speaker. After my Teensy and Prop Shield (unfortunately along with Aaronā€™s and Lateefaā€™s as well) got corrupted, I switched to using an Arduino Mega with an mp3 Player Shield. After realizing I could not play multiple sounds simultaneously with it, I finally decided to use serial communication between the Teensy and openFrameworks. After figuring out how to successfully do a handshake between the two through the proper bit shifting of 2 bytes, I then followed to do an initial prototype and connect 10 ultrasonic sensors onto a breadboard to see if they could all effectively work and play sound simultaneously. 
  3. Do an initial prototype to test the proper functioning of all components.
    • This step took a long period of time, as I had to wire 10 sensors and corresponding LEDs to make sure they were working properly. In various steps of the process I had to switch sensors and obtain new ones, as some would just not receive proper readings. Once all the sensors were all connected and working properly, I then moved out of the prototyping phase and into the development phase. 
    • Testing up to 7 sensors before wiring everything properly
  4. Wire, solder, and prepare everything for the month-long installation.
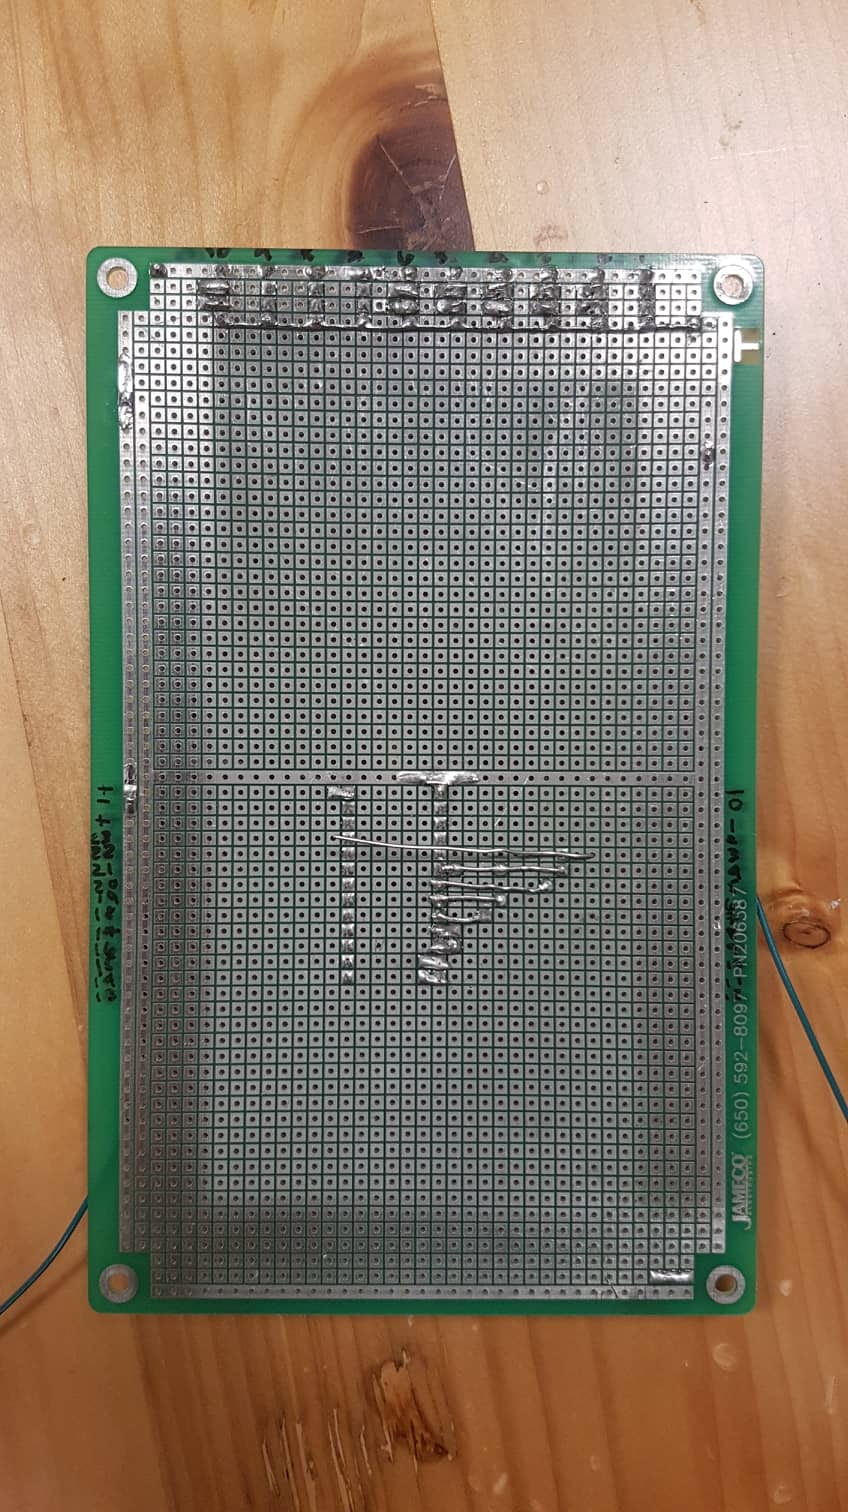
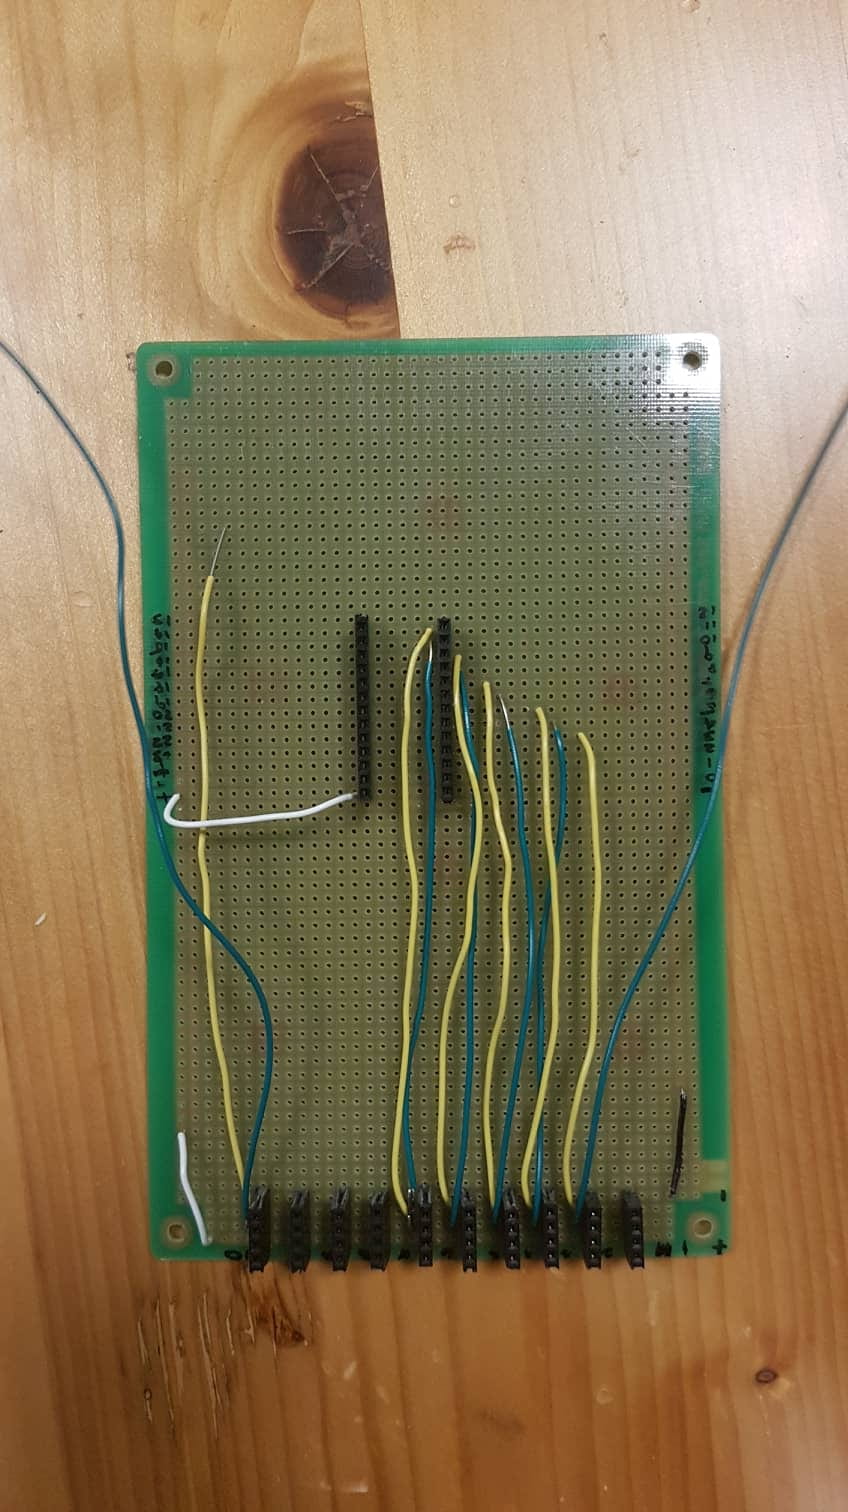
    • Preparing the perfboard: After talking to Michael, I realized the best way to ensure the wiring would be as stable as possible would be by using a perfboard and connecting the components to soldered female headers. This process also took a lot of time as I had to plan how the circuitry would work before actually soldering everything together and I also had some difficulty soldering parts of it together.
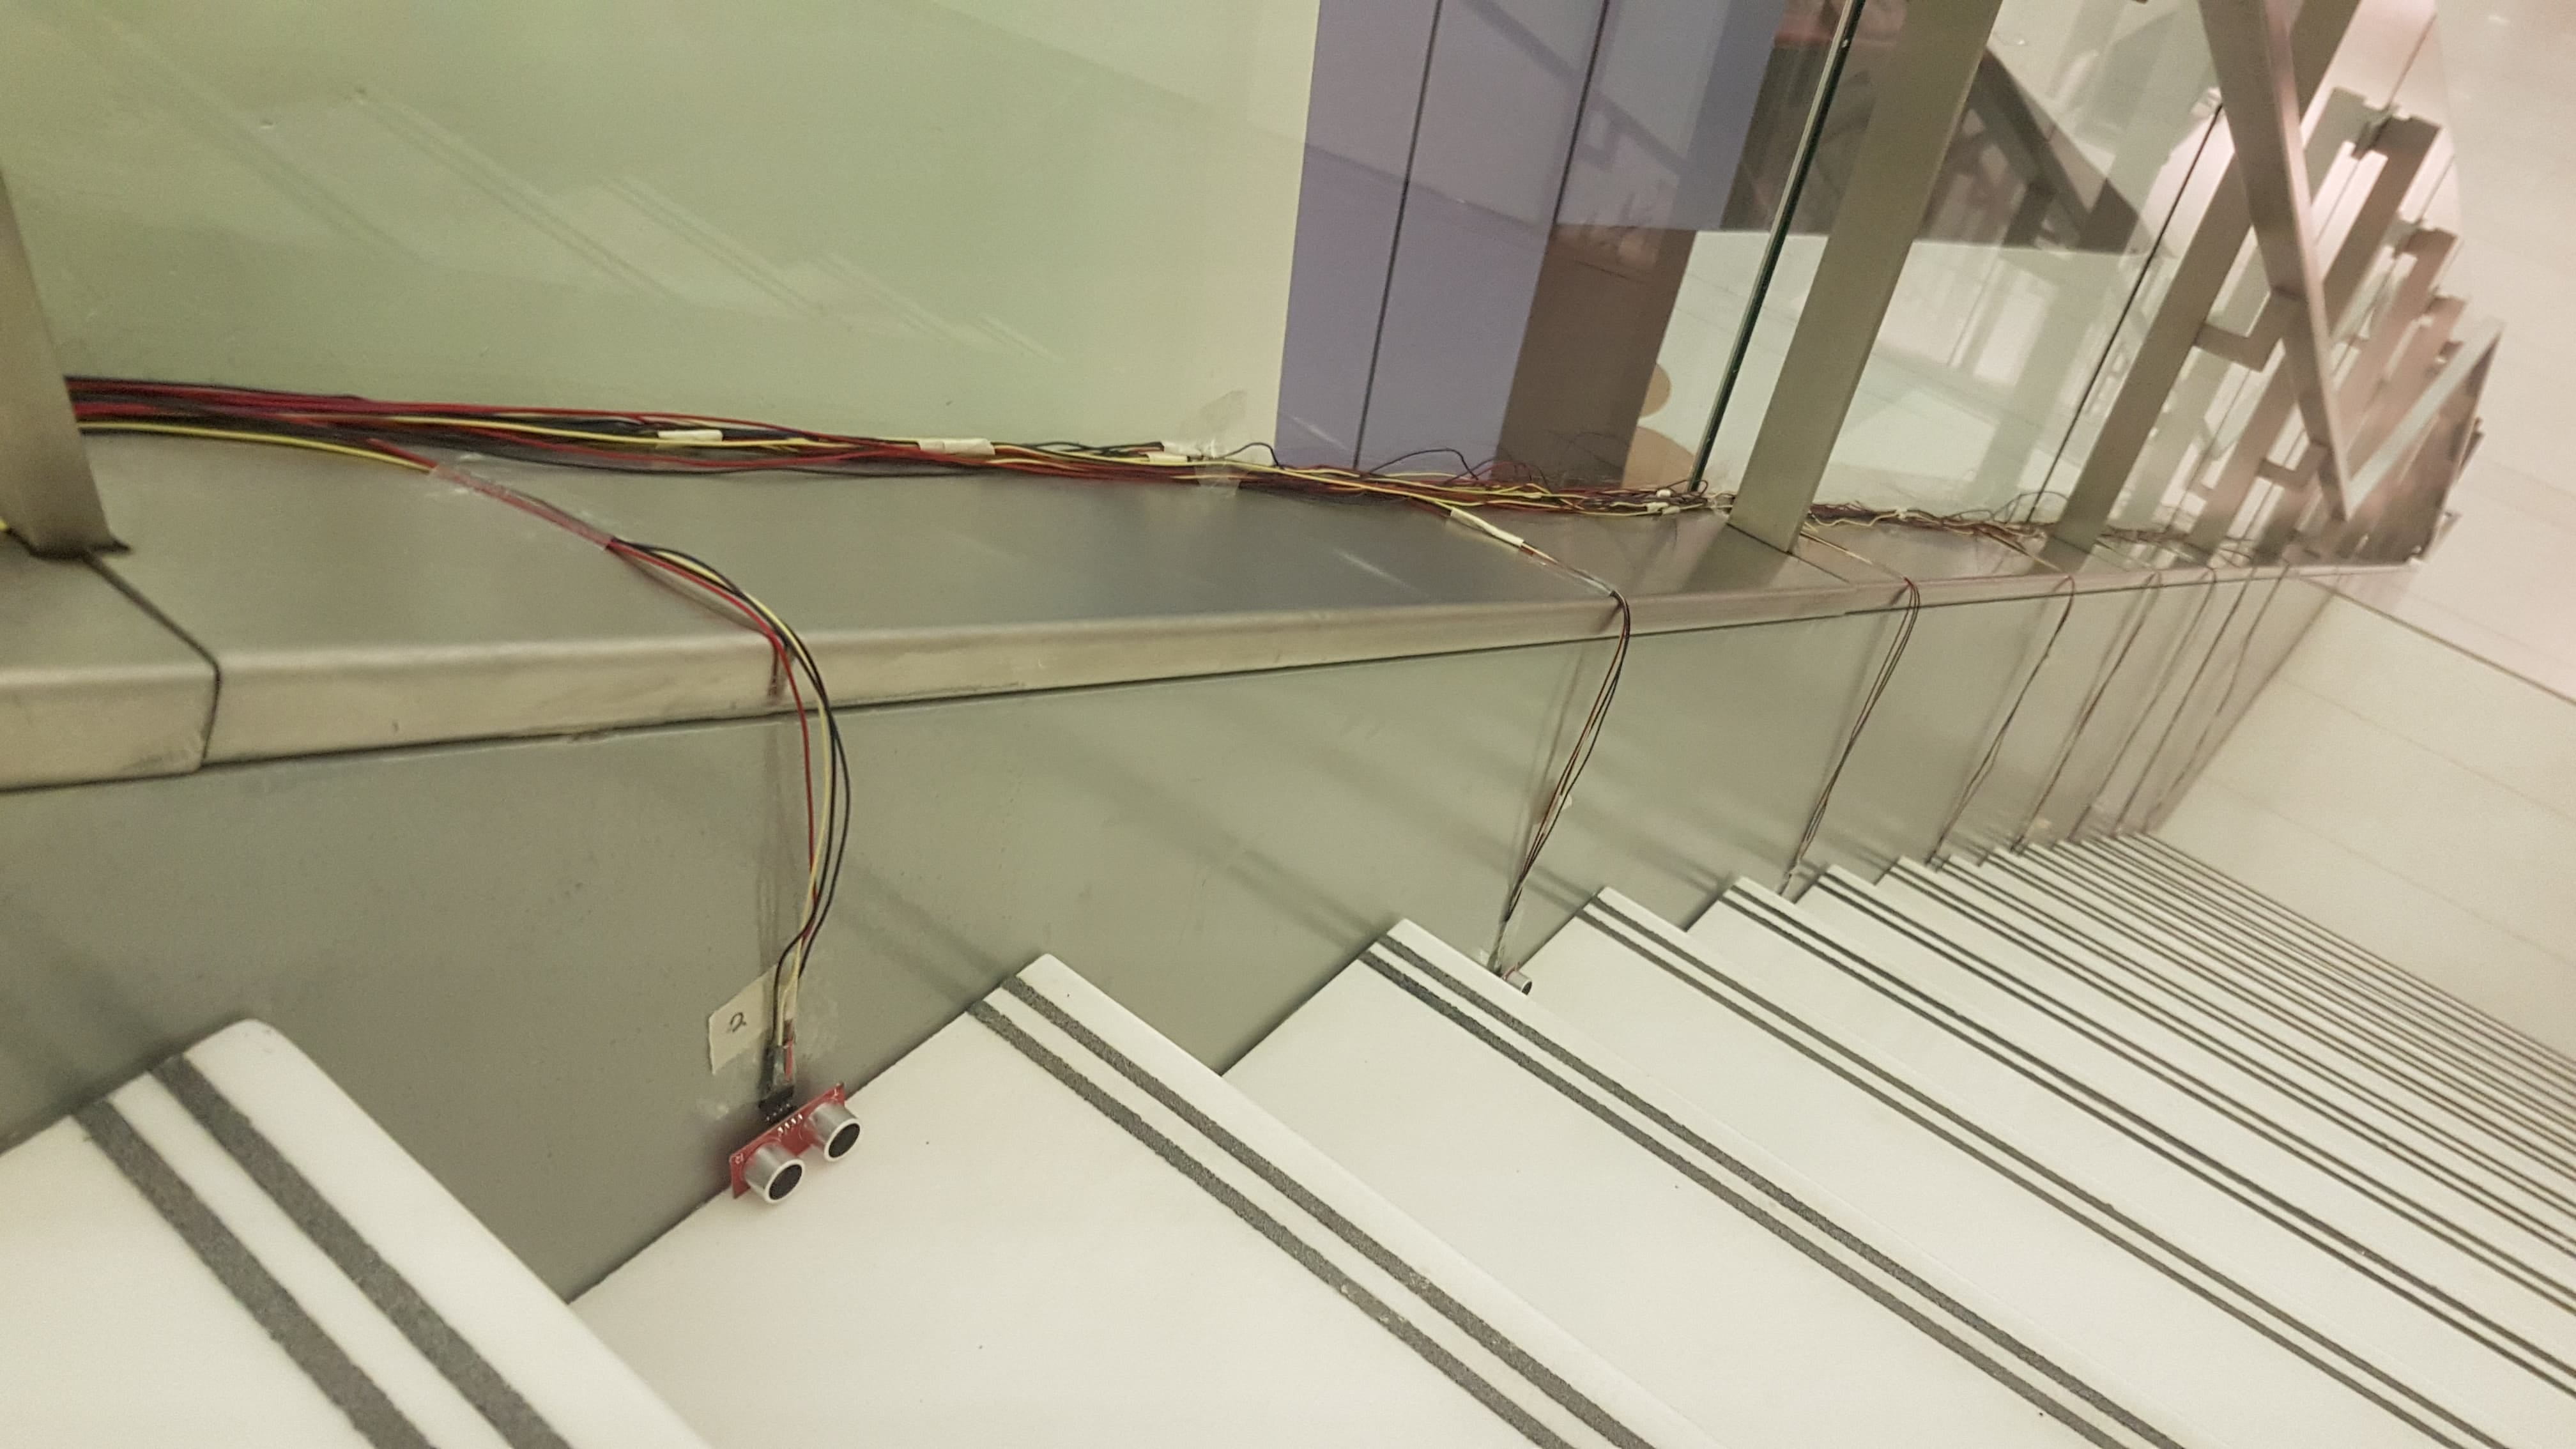
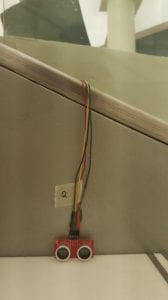
    • Preparing the wires: This step also took a significant amount of time as I had to go to the stairs and measure how long the 4 wires for each sensor would have to be according to each of their locations on the steps. After measuring and cutting the 40 stranded wires (which were better than solid ones since they are more flexible), I then had to strip and solder their tips before connecting them to the rest of the circuit. I wanted to ensure that no components were directly soldered to each other, so I soldered all these wires onto the female headers on the ultrasonic sensors and on the perfboard. 
    • I tested the perfboard only until after all this was done, which made me really apprehensive about the possibility of it somehow not working. The biggest hindrance at this point was the fact that all the 9 sensors did not work properly simultaneously once they were on the stairs. They would sometimes trigger by themselves and would lose their sensitivity, which is why in the end I decided to take out 3 sensors. This was the trick that made the final 6 sensors work properly in the end.
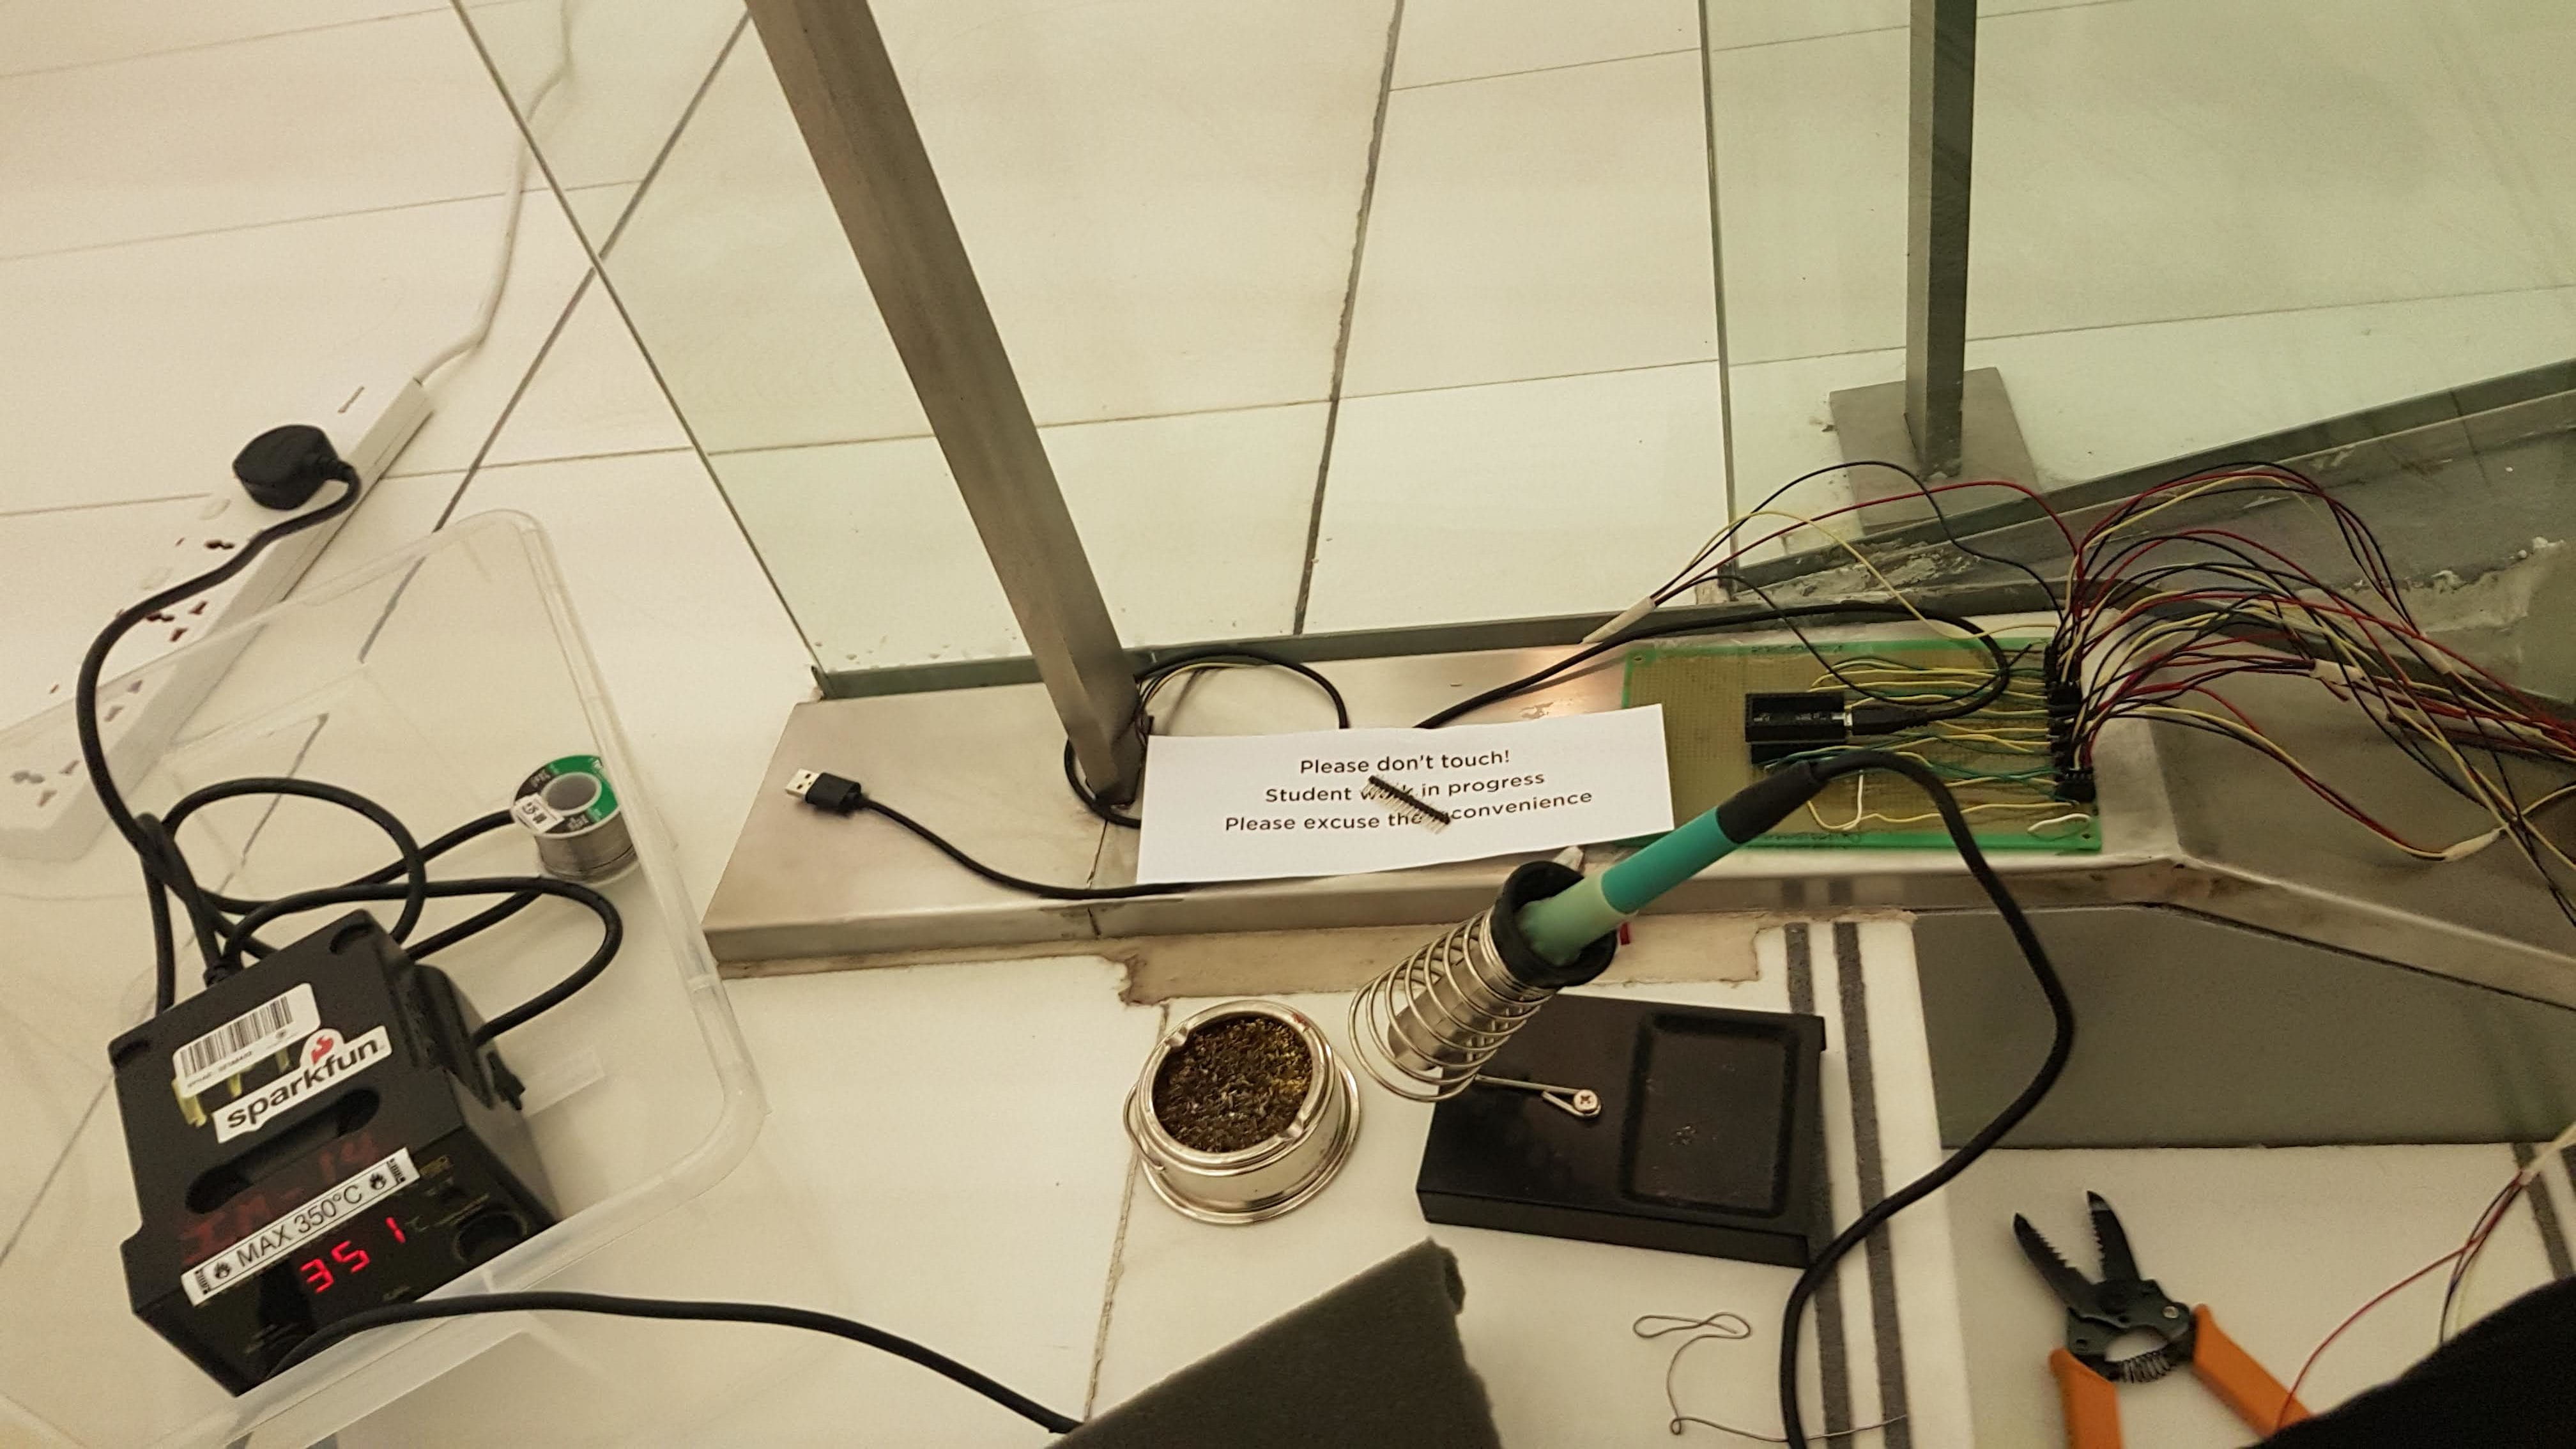
    • Since the wires were already attached to the stairs, I had to bring the solders with me.

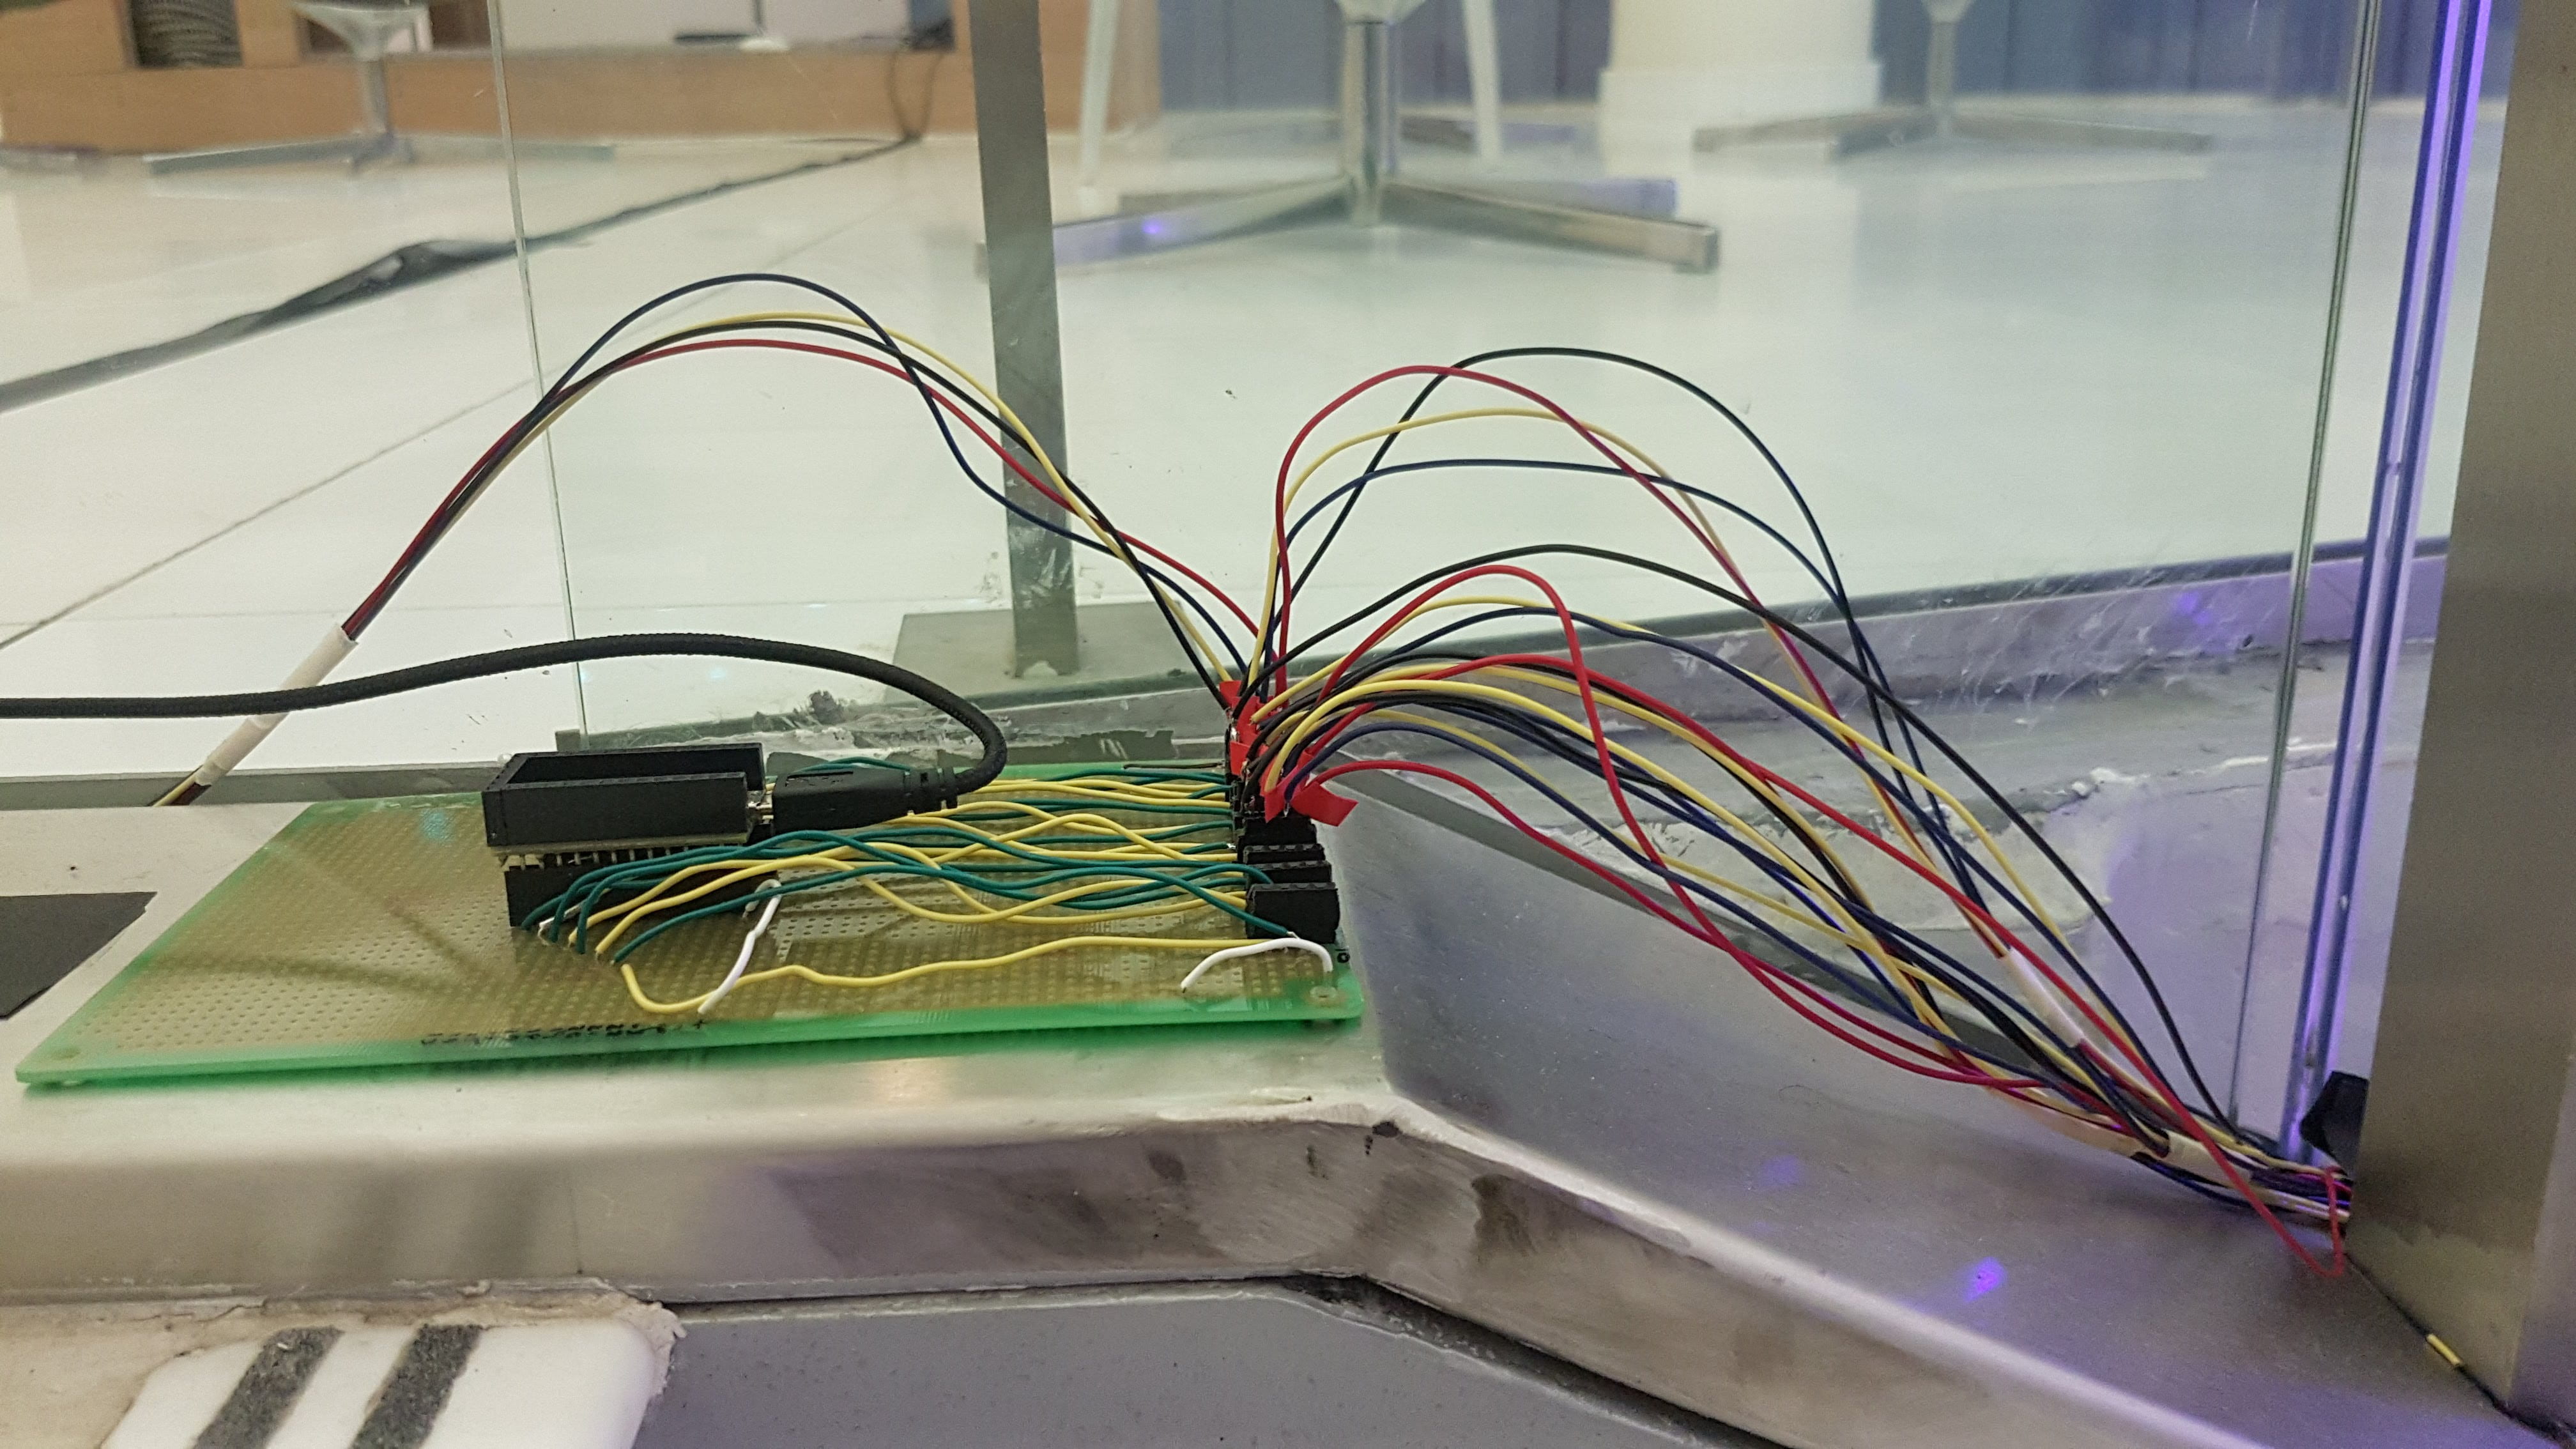
      Perfboard with all the components attached.
  5.  Install everything on the stairs.
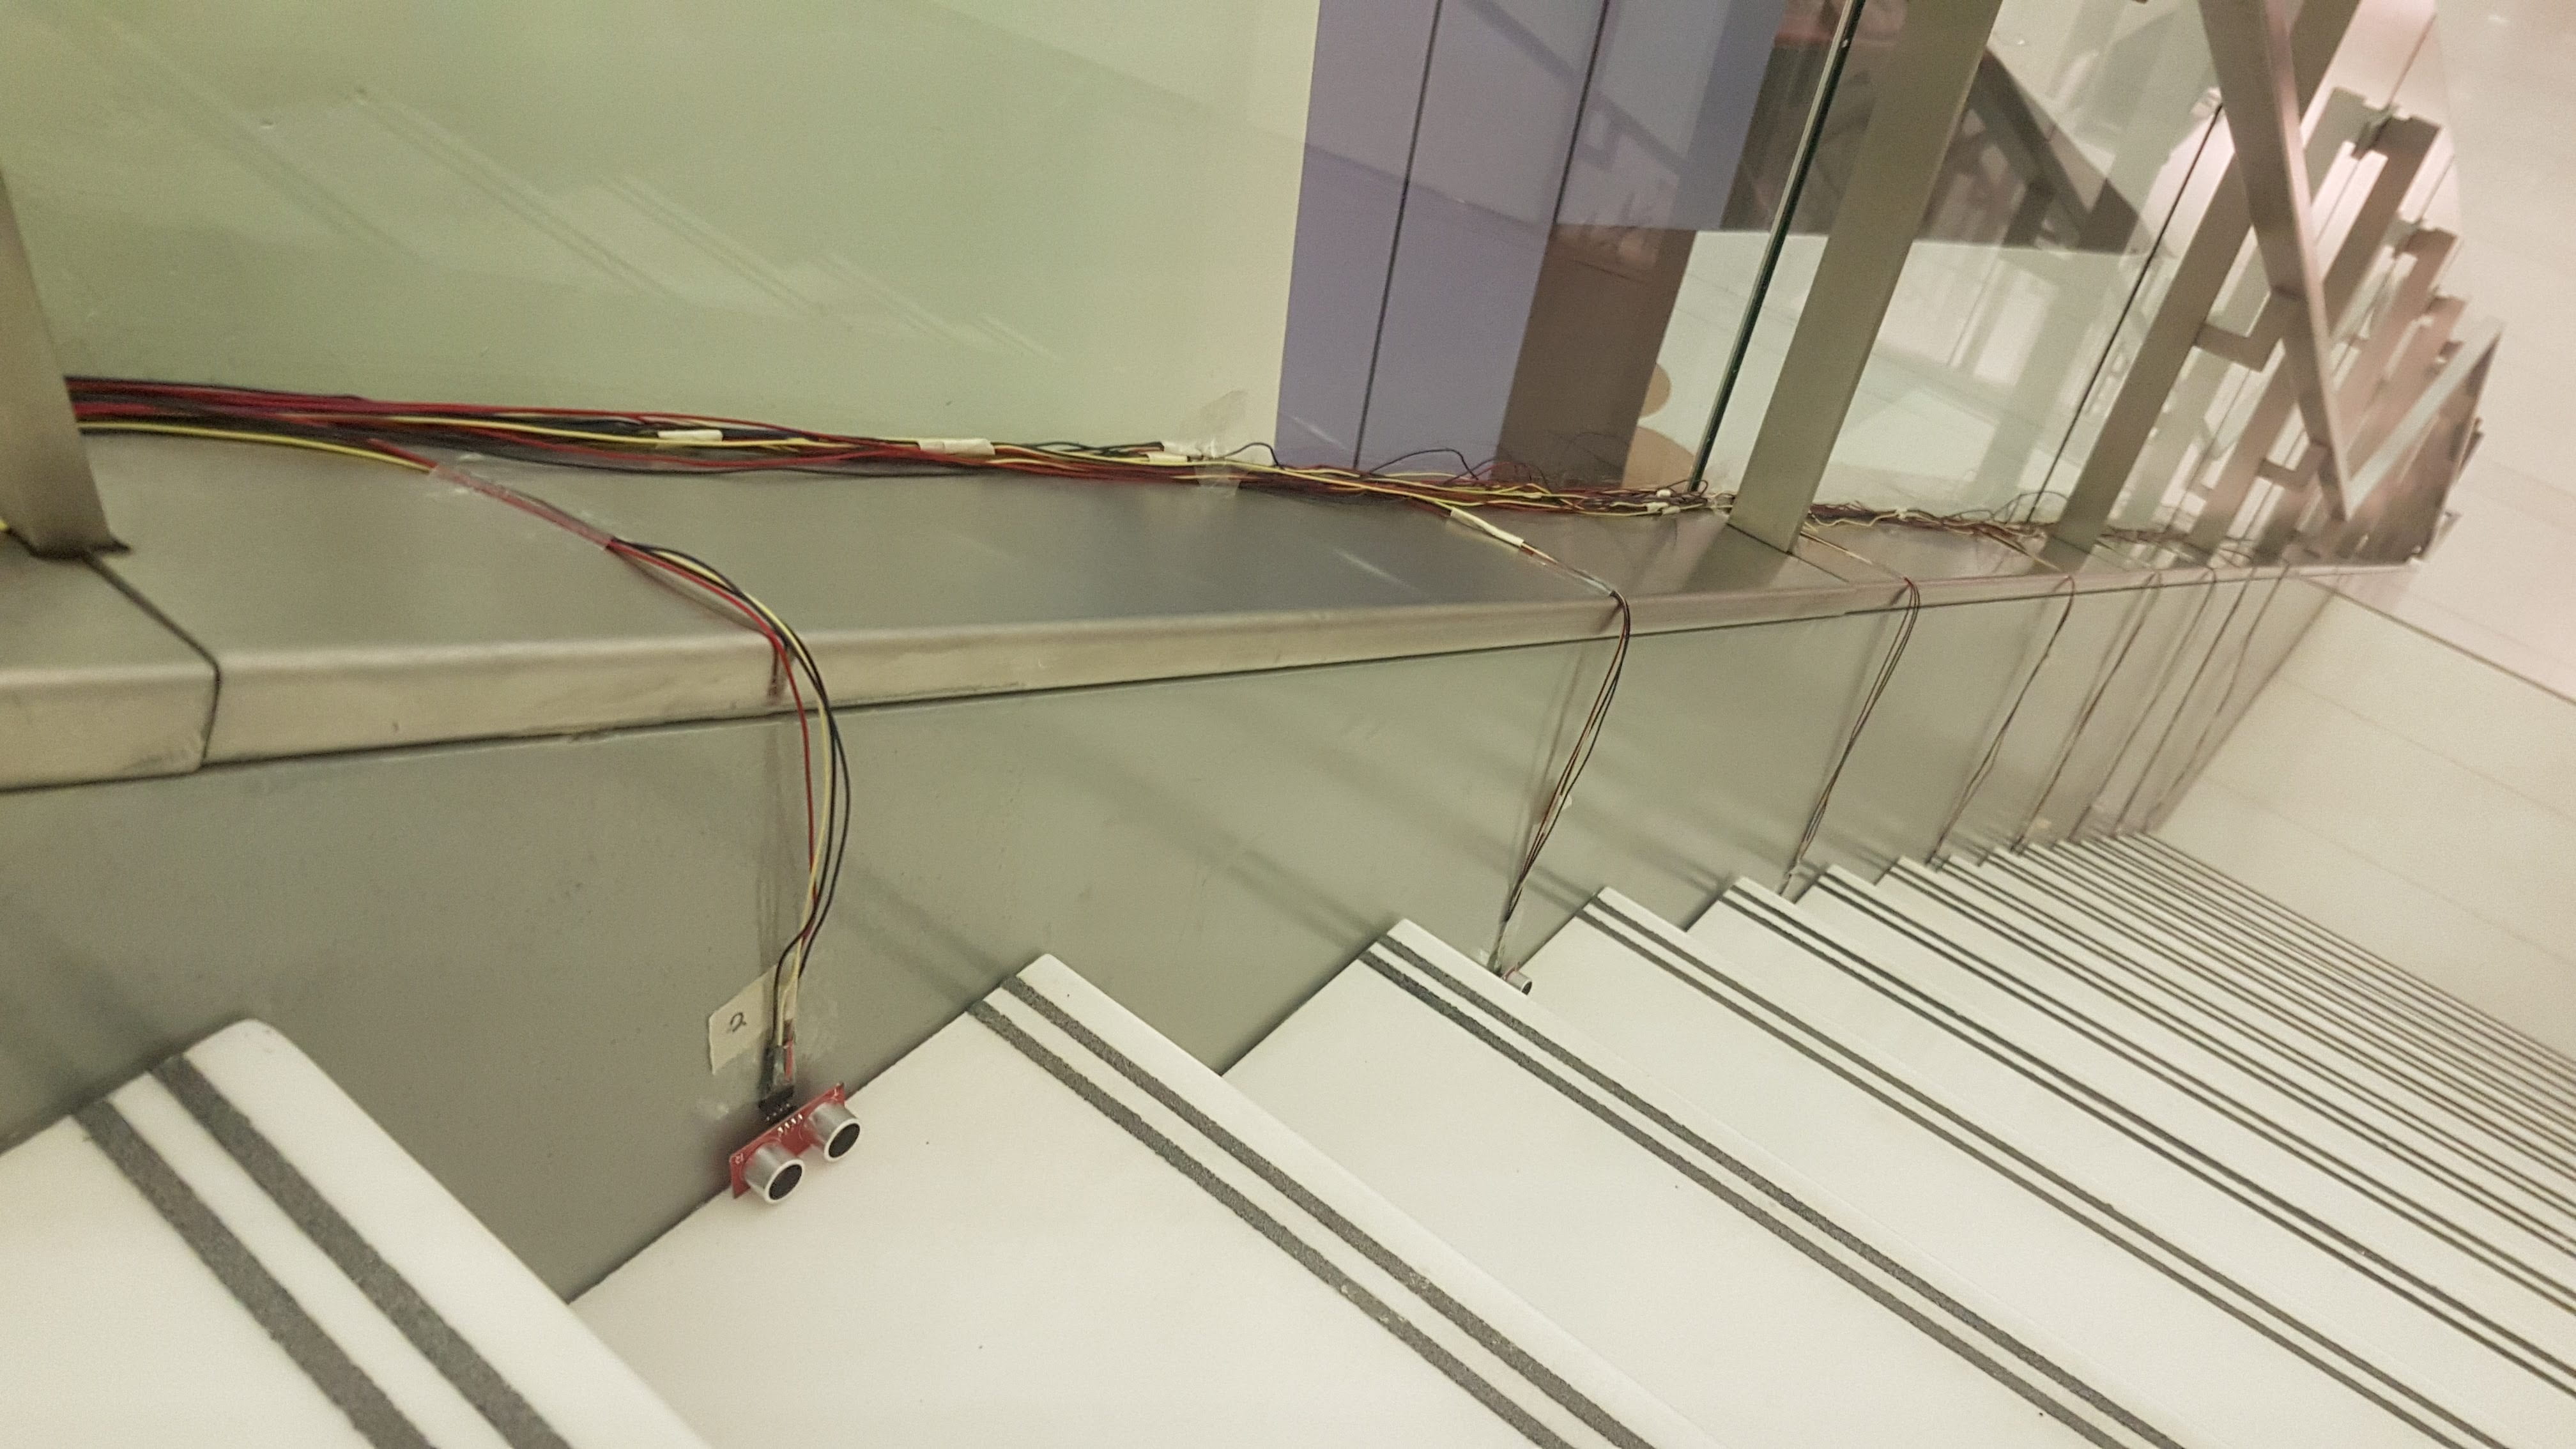
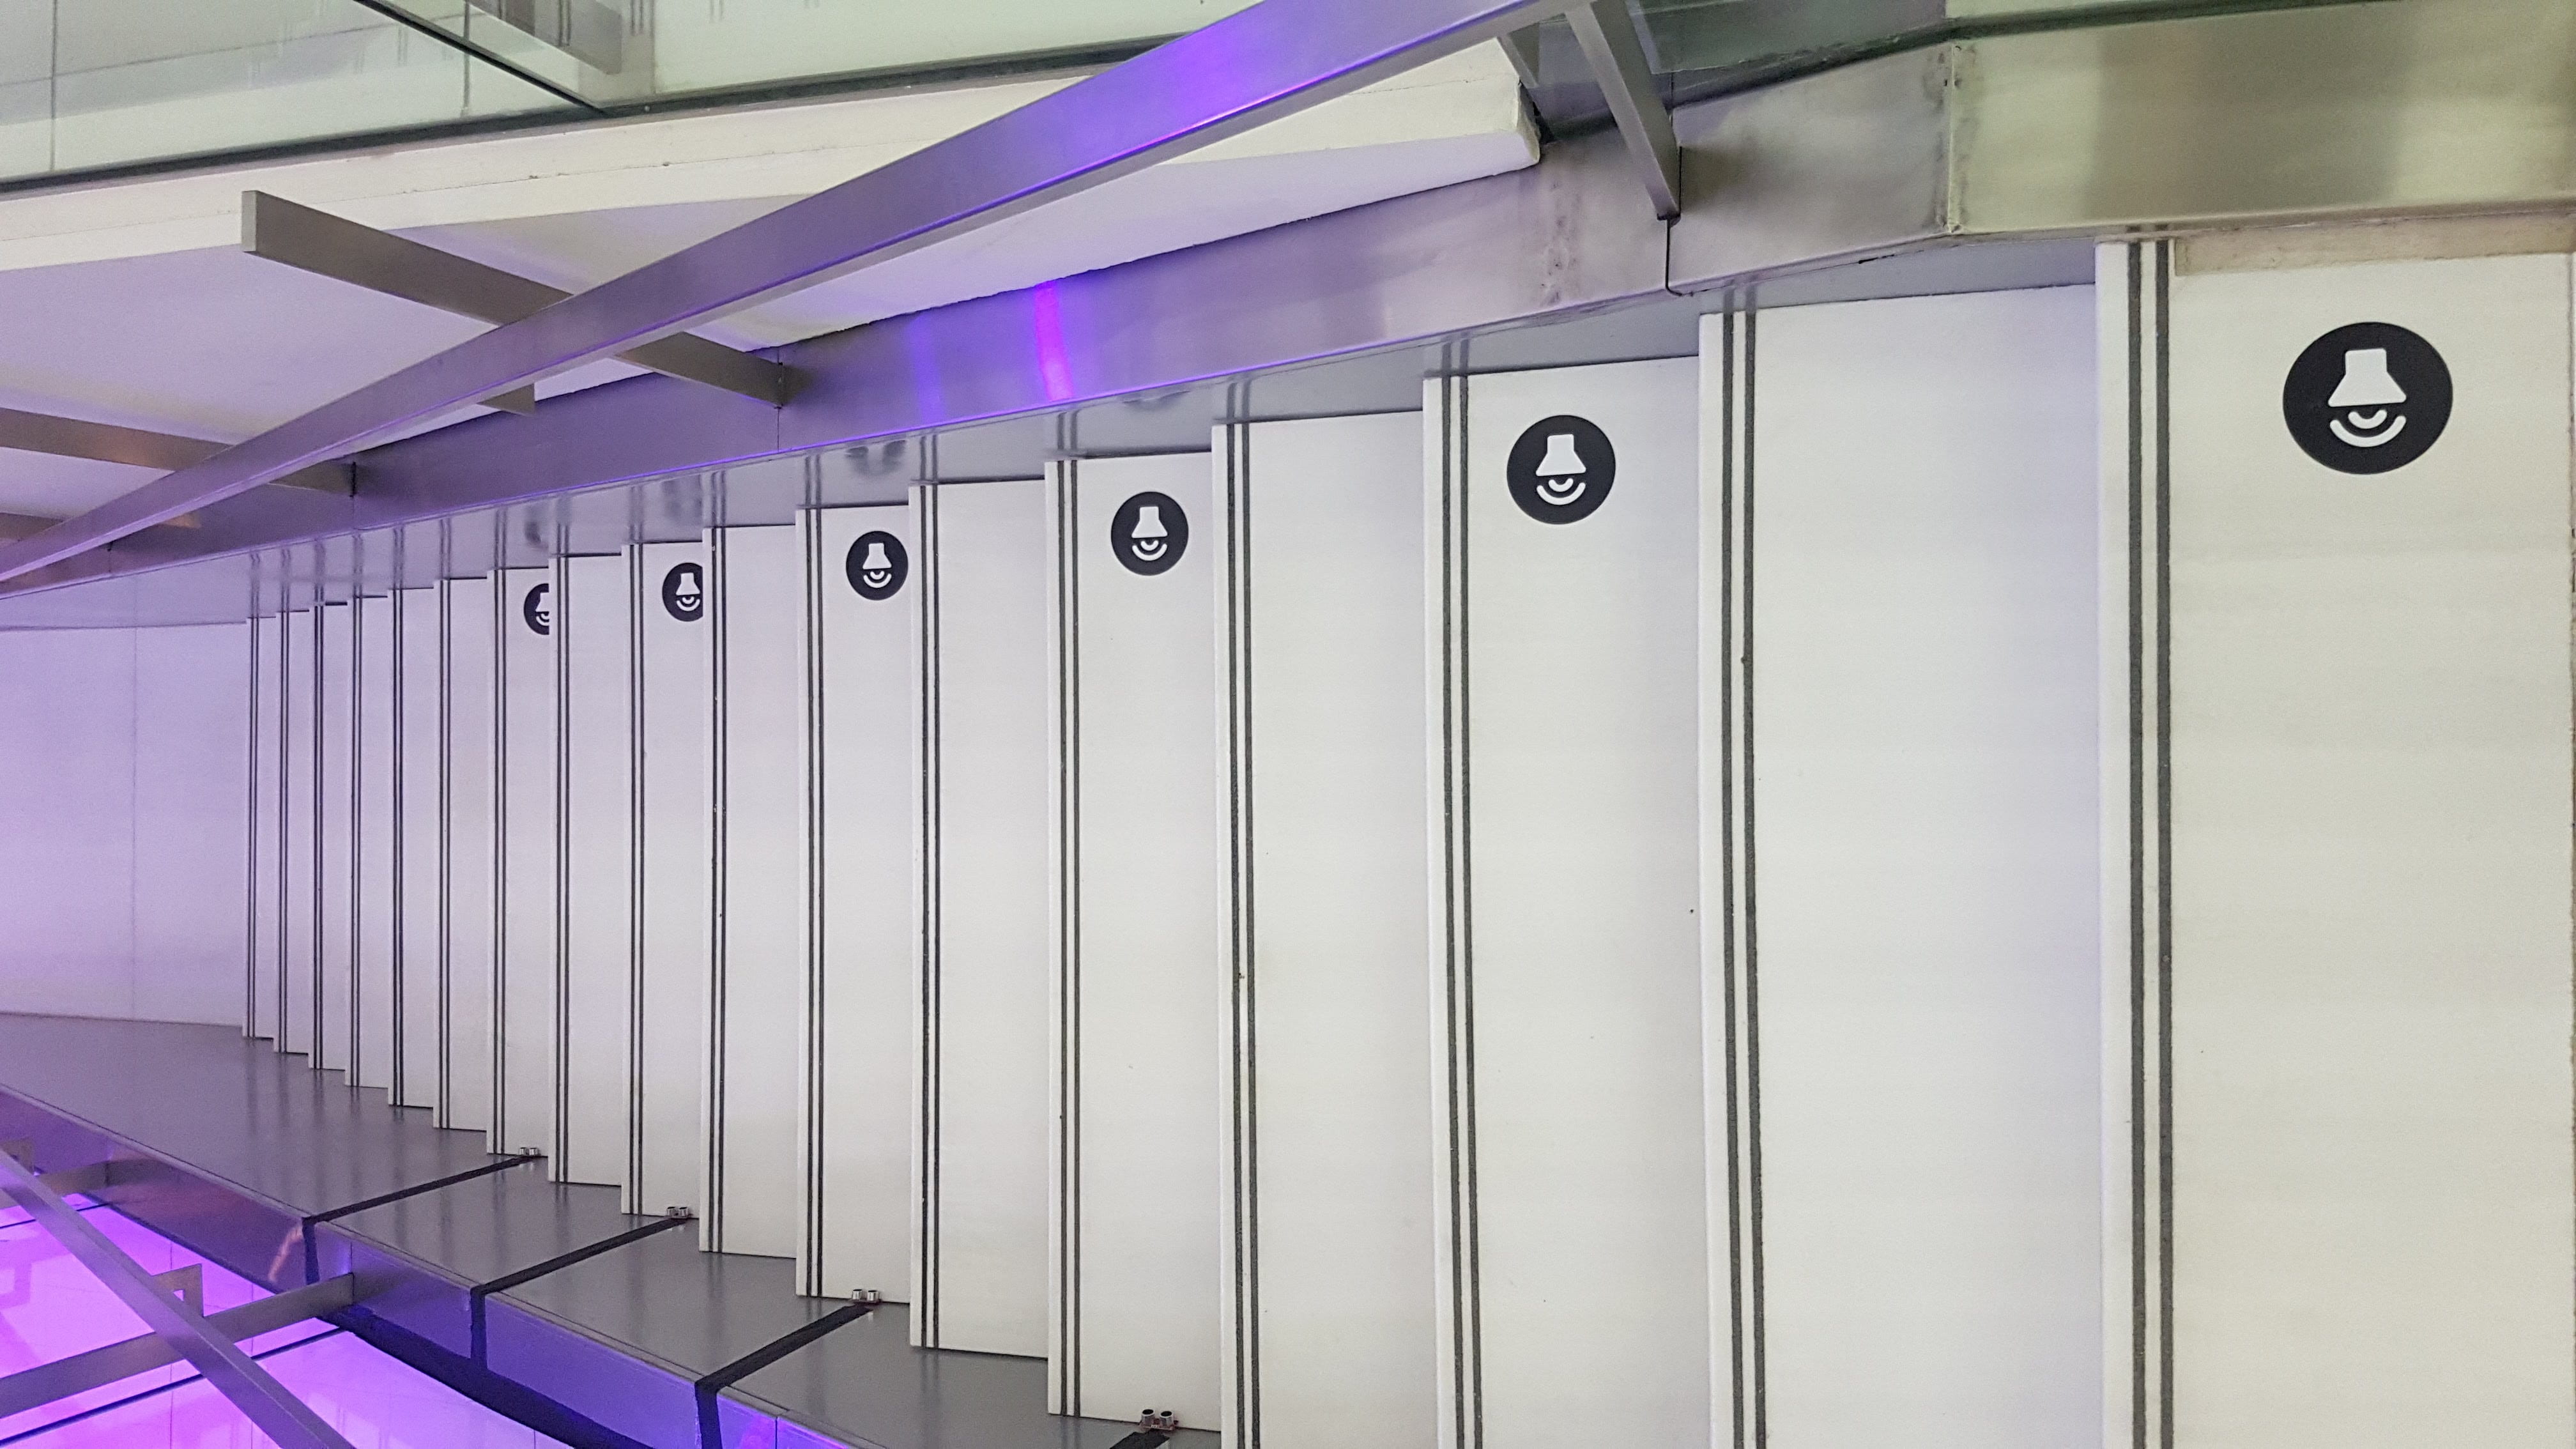
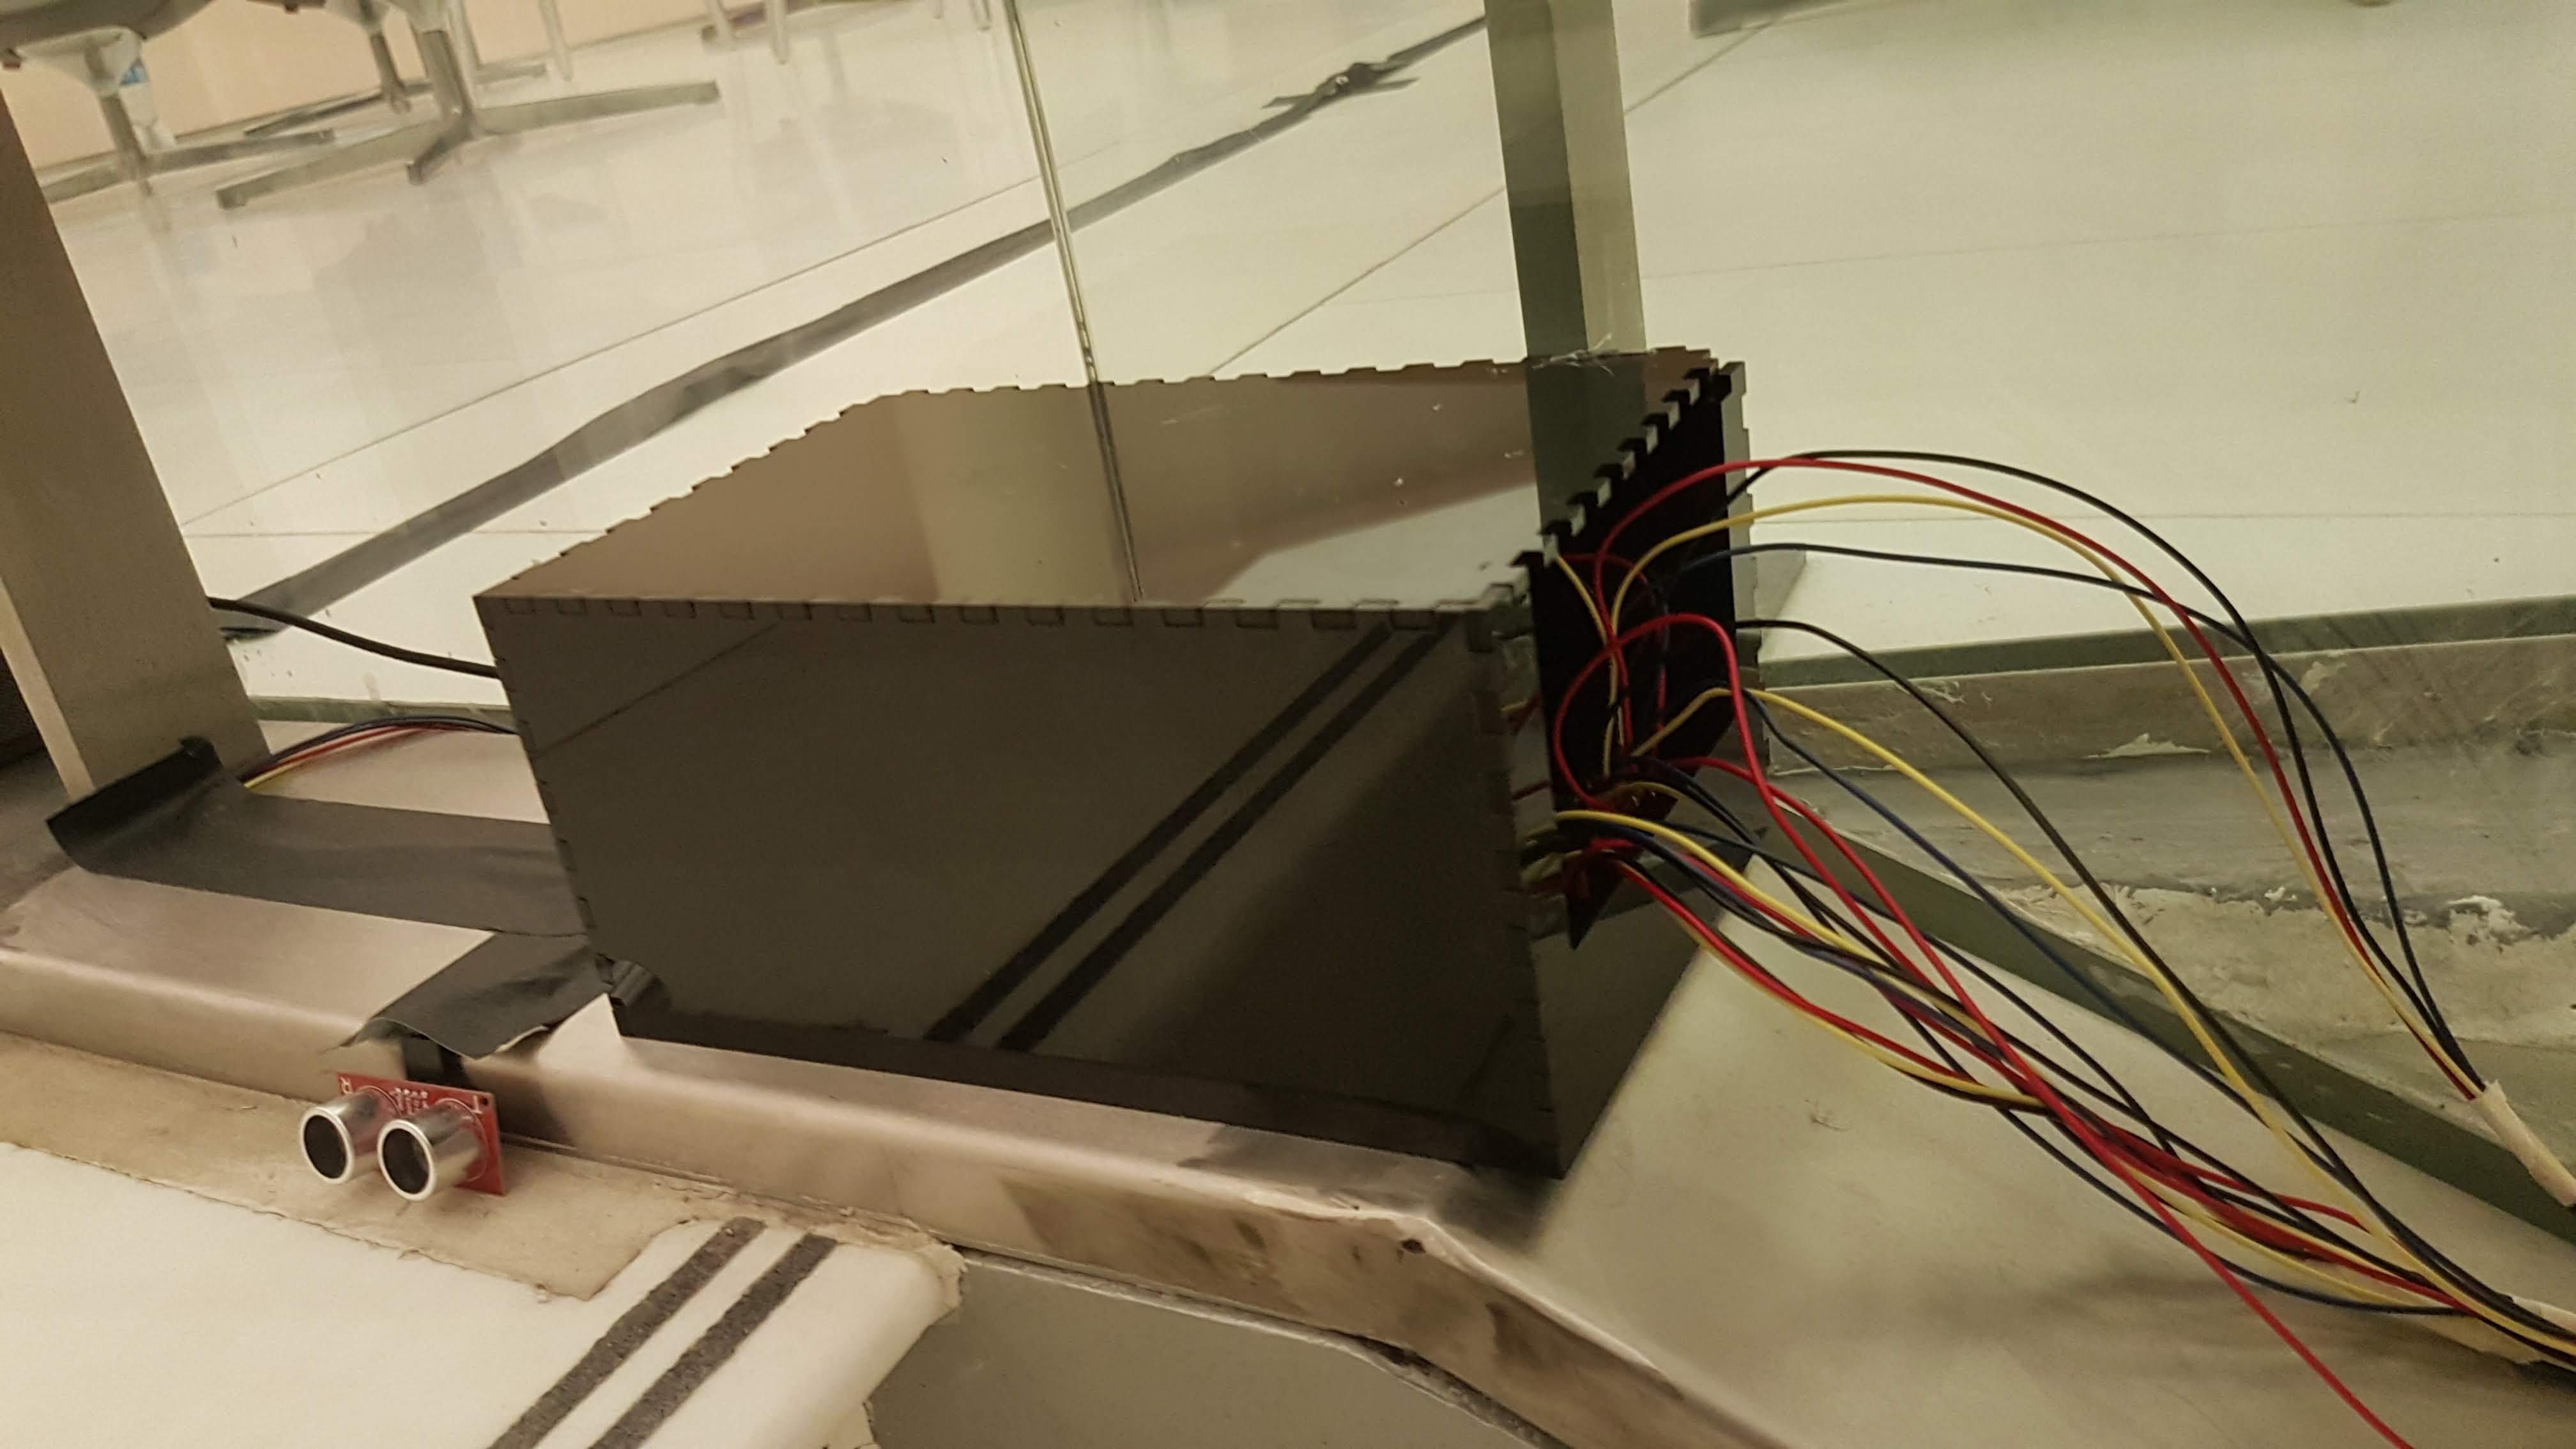
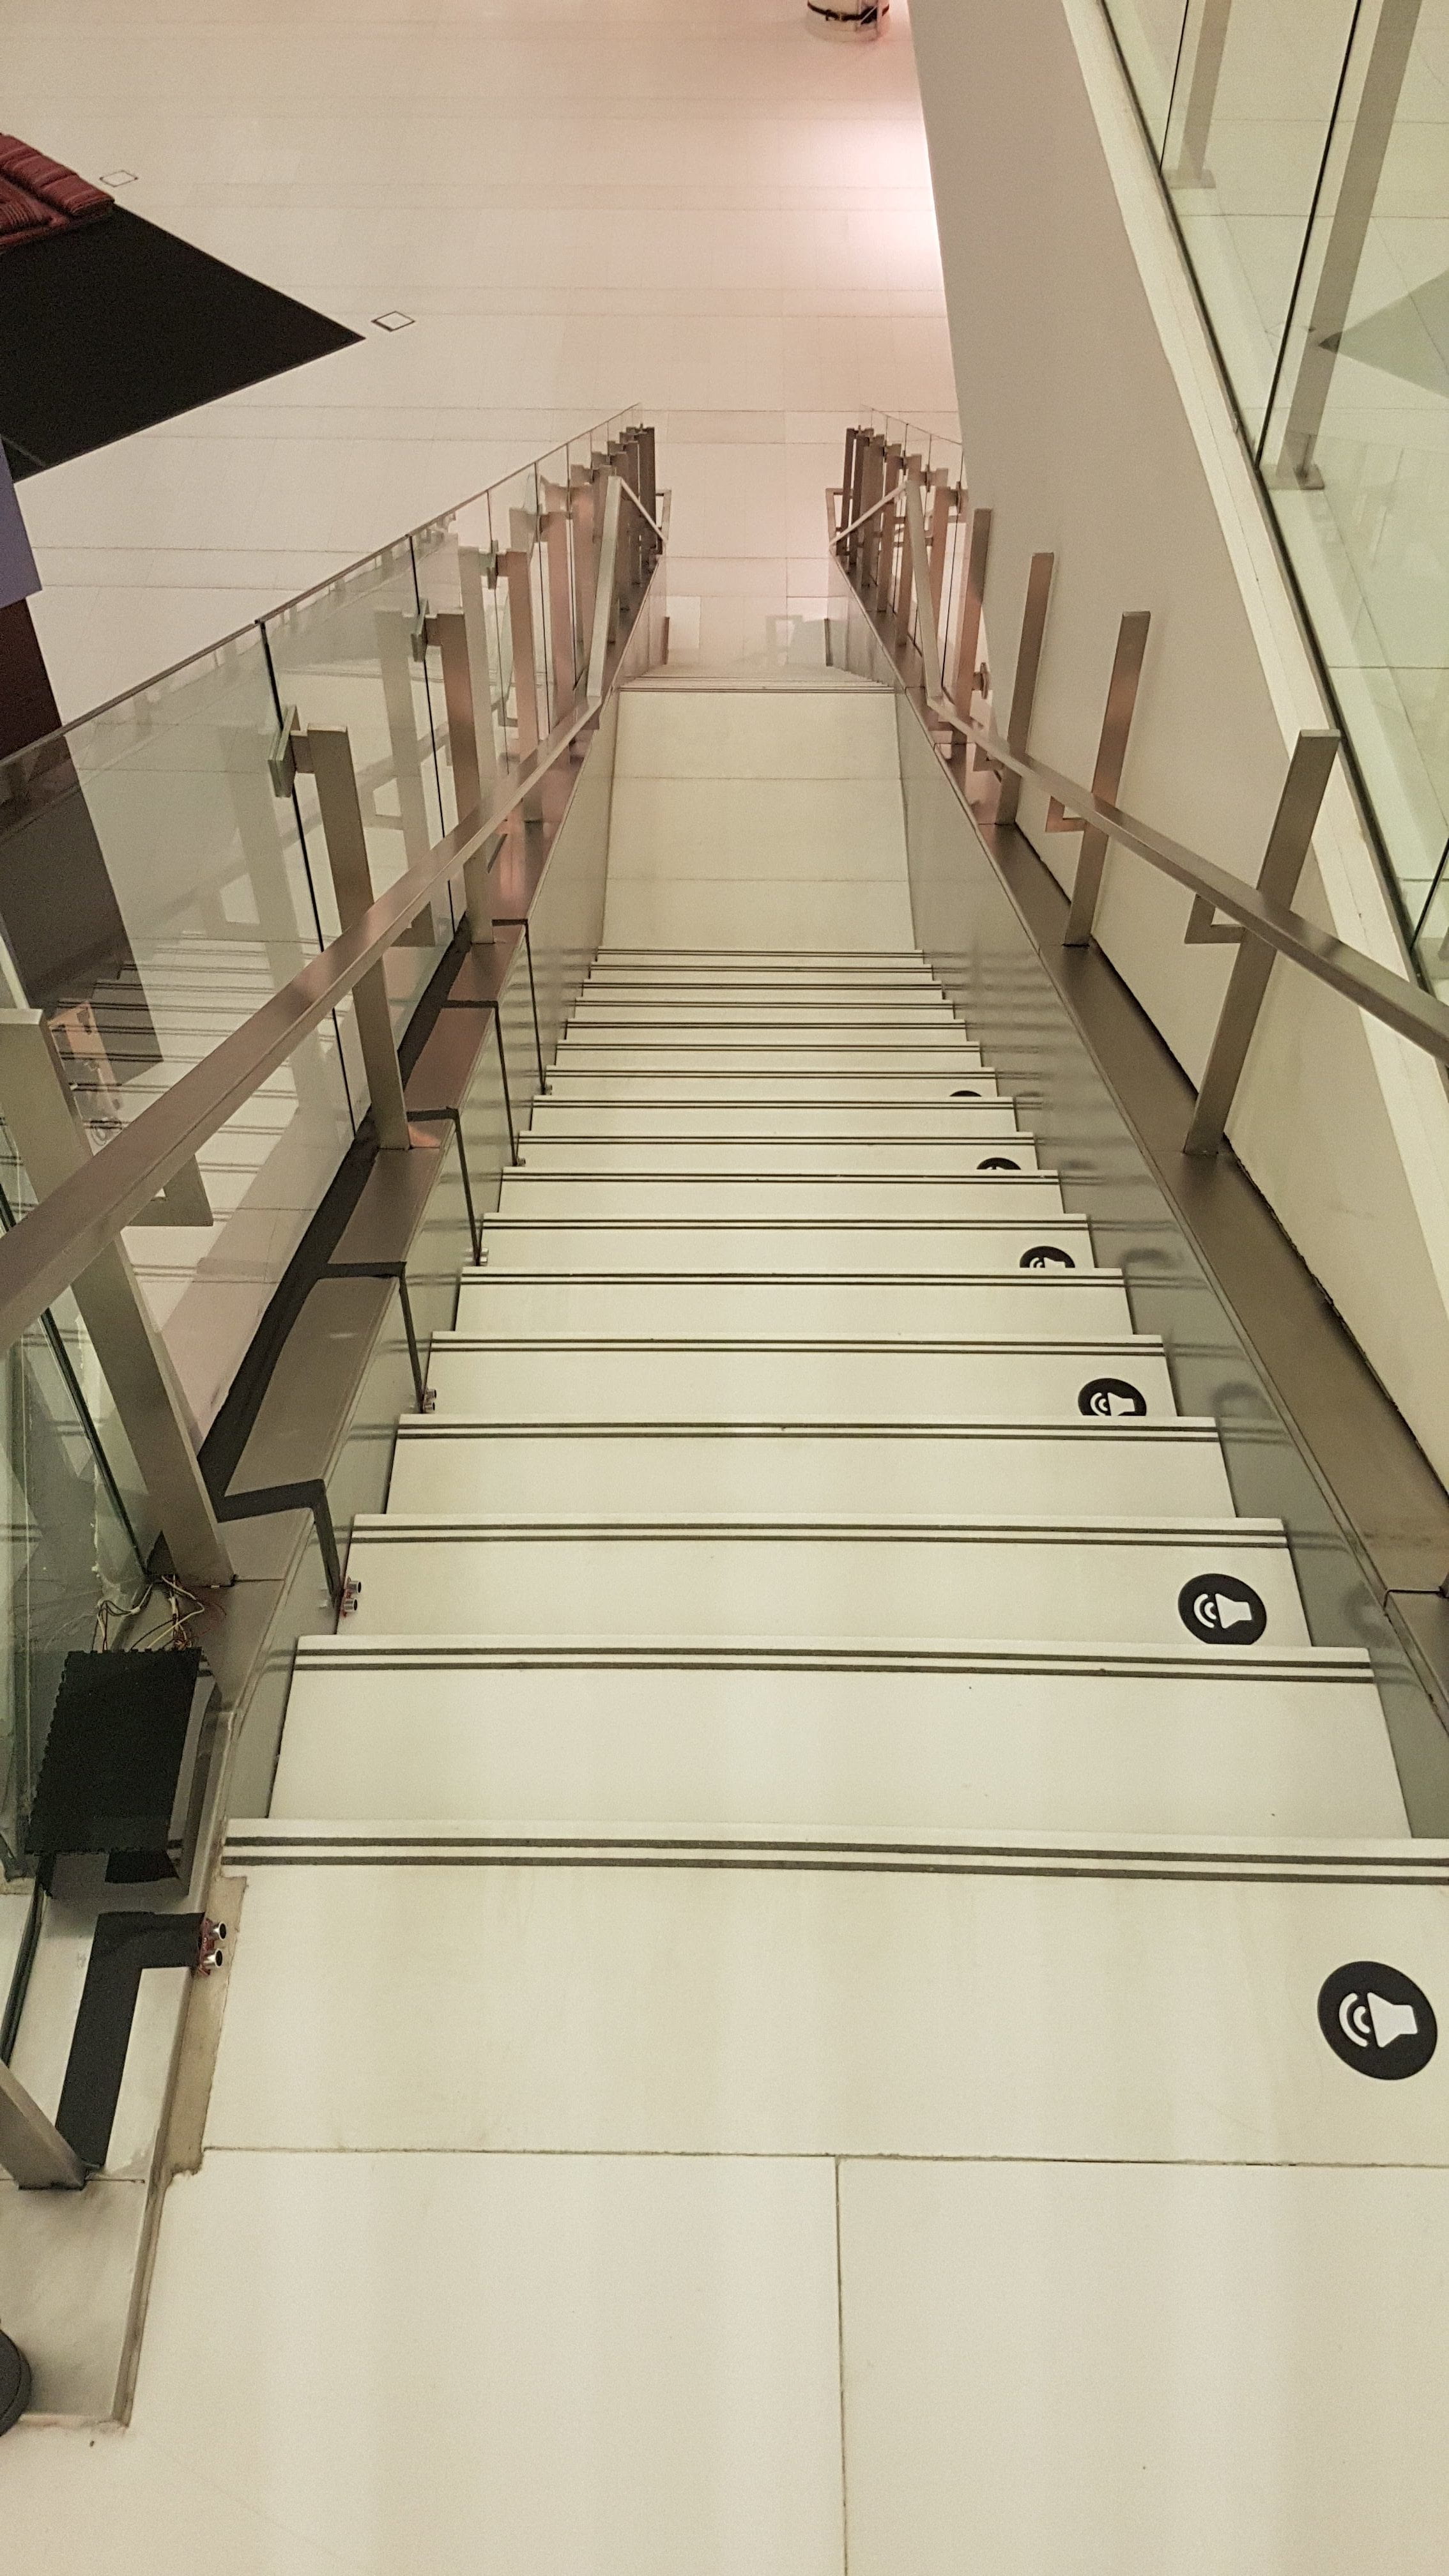
    • After having the hardware done, I ended with installing everything properly. I used gaff tape to keep the wires in place while also hiding them from direct view. Since I decided to use a Mac Mini, I also installed all the software and passed all the code onto it while working on the wooden Nomad Pad close to the stairs. To connect to the speakers and the Teensy, I connected everything to USB extensions and also secured them onto the floor with gaff tape. Finally, I asked Dustin in the 4D lab to print a series of vinyl stickers with sound icons that would serve as indicators for users about which steps they could expect to produce sound. After all of this was done, I then decided that placing a box on the perfboard and exposed wires would also be a good way to avoid people from tinkering with the project and ensure its permanence throughout the month of installation.
    • This is how everything looked with the exposed wires.
      The stickers looked quite good in the end!

      Acrylic box placed on top of the components to avoid people from messing with the wires.
    • The final look with everything semi-hidden šŸ™‚
  6. Choose sound (and conduct user testing)
    • Throughout various steps of the process, (and usually as I got tired of working on the hardware), I explored different sound options I could implement. I initially wanted to use random libraries of sounds inspired by Googleā€™s Drum Machine and a WebSynths site with a large selection of sounds. The sounds I initially downloaded included water drops, percussion instruments (clap, hi-hat, etc.), human sounds (coughing, random voices, laugh), and other more abstract sounds. However, as I conducted research, and as people walked by as I was testing the installation, many people told me how they wished they could distinguish the sounds more and collaborate with people through musical notes. As such, in the end I decided to use a scale and found a really pleasant guitar scale to use. I really liked how this sound worked in the end since it is soothing enough for the people around the arts center to not get tired or annoyed by it, while still being fun to play with.  
The Code

Link to the Github Repo with the Arduino, Xcode and sound files here!

In terms of the code, the project runs on a handshake between Arduino and openFrameworks. In Arduino, I used the NewPing library that allows me to easily create new “Pings” for each sensor, allowing me to easily obtain simultaneous readings for all of them. The most important part of the code pertains to the switching part, which checks the distance values for all the sensors and adds a smoothing value to them based on its previous value. Then, if the distance is less than the length of the stair (which basically means there is a person on the stair), and if the step was previously empty, then the program recognizes the reading as an actual person’s step. This logic was done in order to ignore the random reading drops that the sensors would receive, causing the stairs to play sounds even when people weren’t in them. 

In openFrameworks, the logic is more simple. Once the bytes are received from the Teensy, the program checks which sensors are getting triggered and plays the corresponding sound. 

Final Reflection

Overall, I am really satisfied with the outcome of this project. What at first felt like a relatively simple project that received input and triggered sound as output rapidly increased in difficulty and got complicated throughout the four weeks of development. Preparing the installation for a long-term duration was also an added challenge/enjoyment, as I had mostly been used to preparing projects for 2 or 3 hour-long showcases. Preparing the perfboard, securing the wires, and cleaning up the installation as a whole was an enduring yet fun process. Watching peopleā€™s reactions as they walked up and down the stairs also made all the effort worth it, as I saw how excited most passersby got once they realized they were the ones making the music. Further iterations could include changing the sensors to infrared sensors to possibly have better sensitivity, and also magnify the project to have all the sensors cover all of the flight of stairs. In the end, Iā€™m really happy with how everything turned out, and am glad it all worked out in the end.


User Testing

User Testing 1

This was the first “informal” user test I did, as two people just passed by my project as I was trying out a series of water drop sounds. They instantly started jumping between different steps and playing around with the piece, which was one of my main goals. 

(The video got cut off cause my phone’s storage got full šŸ™ ) 

An important point Mateo brought up is that he would have liked to be able to distinguish between the different water drop sounds. For instance, he mentioned how being able to collaborate with someone to produce music would make the experience more fun. After this, I decided to look into possible instruments to incorporate. At this point, a lot of the sensors were self-triggering, so I also wanted to look for a sound that would be more soothing and less annoying so people around the stairs (like those in the equipment room and the people passing by the hall) would not mind it. The sensors were still not as sensitive as they could be, so I also needed to work on this aspect. 

User Testing 2 

I then changed the sounds to a more soothing guitar scale, and found that people really enjoyed passing through. In this video, the sensors were sensitive enough, but they would get self-triggered a lot to a point where it was hard to distinguish which where each person’s sounds. 

User Testing 3

This is the final outcome, after I decided to take out 3 sensors for the whole experience to work faster. Now none of the sensors trigger by themselves and they are still quite sensitive to people passing through.  (Please ignore my annoying laugh at the end)

“Informal” user testing also happened when groups of students and professors would pass through the stairs to go to class. A lot of the students got surprised and seemed quite happy with the experience. A music professor also started telling me that it would be nice to have different sounds according to the different distances that the sensors obtain. (Of course this would be great to implement in a distant future). Another teacher even came by to ask where the guitar sound was coming from, and was surprised that it was from the speakers. 

Midterm Progress Documentation

Up until now, the basic functionality of my project is mostly ready: the sensors are installed (though the wires need to be slightly concealed), all the wires are soldered and their length fits each sensor’s location to reach the Teensy, and the sounds (mostly) play accurately.  

Here are some photos/videos of how the project currently looks like:

The whole setup still looks kind of rough; I’m planning on putting black tape on the side wires to completely occult them. I still need to decide if the wires coming out from each sensor looks too intrusive or intimidating. 

Here’s a sample of how the experience currently works: 

As can be seen, the sensors identify footsteps quite accurately, which I’m really relieved about. They also currently continuously play sound if the clip is too short. I’m planning on addressing this issue for the final phase of this project. 

The cello sound was used to highlight the different sensors in each step. I am still exploring different possible sounds. Now that the tedious part is done, I look forward to doing user testing with different sounds to see what direction I could go in. 

Right now, everything is connected via a normal breadboard. This is mostly because I did not get a chance to finish soldering the following circuit. Having this ready for the final version of the project will hopefully ensure that it lasts for a long period of time while in the stairs. 

Next Steps: 

  1. Find more sound options 
  2. Calibrate sensors properly 
  3. Finish soldering circuit + add to installation 
  4. Clean the installation: organize/hide wires and the solderable breadboard
  5. Extra: get vinyl stickers indicating which steps play sound? 
  6. Do lots of user testing (particularly to test out the sound)

Midterm Progress – My Sound Finally Works!!

The past week and a half have been an immense roller coaster of emotions leading up to what I had initially thought of as a relatively simple goal: trigger a sensor, and then play sound (if only it had been as easy as it sounds).

These are the different steps I took to finally reach this goal:

  1. Test out the infrared sensor and the ultrasonic sensor on the stairs to see which would be the best fit for my project. In the end, since we have more ultrasonic sensors in the lab, and since I received more consistent readings on it, I decided to use it. 
  2.  Use Teensy Transfer to upload and play a sound from the PropShield
    • Since this was not working properly, I tried using other people’s Teensies and PropShields. This somehow resulted in Aaron’s, Lateefa’s, and my PropShield getting corrupted. I also tried using another laptop to transfer the sound files, but this did not work. 
  3. Use an Arduino Mega and an MP3 Music Maker Shield 
    • The Arduino Mega with its 52 pins initially seemed perfect for this project. The sound did work in this trial, but unfortunately Arduinos are not capable of playing various sound files simultaneously. This led me to discard this option as well. 
  4. Use Serial Communication between the Teensy and openFrameworks to play audio when one ultrasonic sensor is triggered
    • After much trial and error, I was finally able to successfully use serial communication to play a simple audio file when the ultrasonic sensor received a reading shorter than 102 centimeters (which covers the length of the steps). I then connected 2 more sensors to try this same outcome. However, when I used 3 sensors in total, the program would lag and the triggers would be delayed. This led me to the next step:
    • Using the New Ping library for a simplified use of the ultrasonic sensor. This streamlined the process of receiving readings from the sensors and it also stopped the delay. However, an issue I am still having right now is the fact that this library for some reason constantly sends multiple zeroes as it’s reading from the sensor. For instance, several of my values would have proper readings of the location of my foot, but with a lot of 0’s in between. When playing audio, even if the program can successfully sense a step, the sound sometimes replays quickly due to this rapid turning on and off received from the sensor. I tried thresholding as we did in class before and also smoothing these values, but the fact that I get flat 0’s complicates everything, since the averages are then inaccurate and inconsistent. Getting accurate reads from these sensors is definitely my biggest focus from now on. 
    • I also found some new sound files that I really like from the Web Synths page! I’m looking forward to seeing people’s thoughts in class on these sounds.  

Video Documentation

Next steps: 

  • As mentioned earlier, I am going to focus mainly now on making the ultrasonic sensor readings as accurate as possible. I need to somehow develop a smoothing/thresholding algorithm that disregards the multiple zeroes that are incorrectly read by the sensor. 
  • I’m also going to start connecting more ultrasonic sensors and finding ways to cleanly wire them up for their installation on the stairs. 
  • I’ll also find more sound sample possibilities to see different tones/experiences for this project.