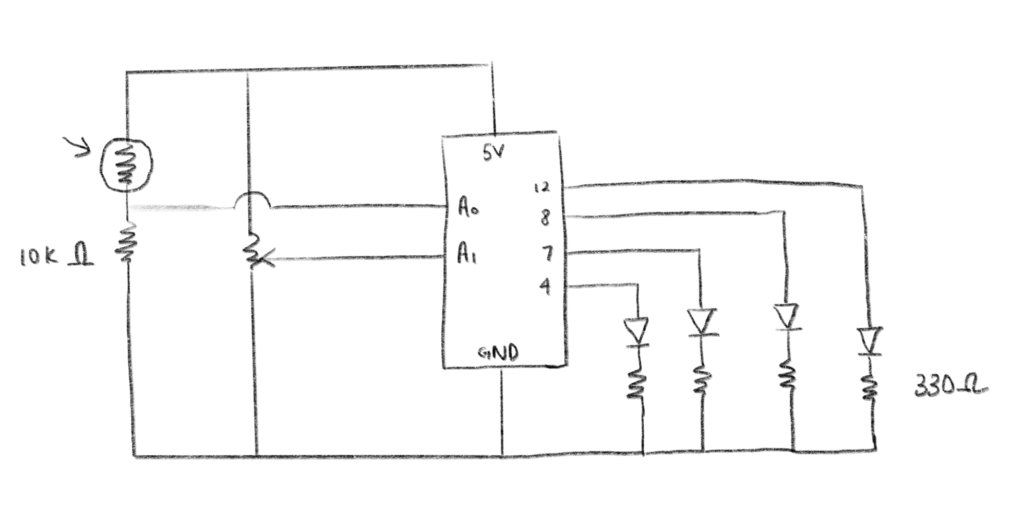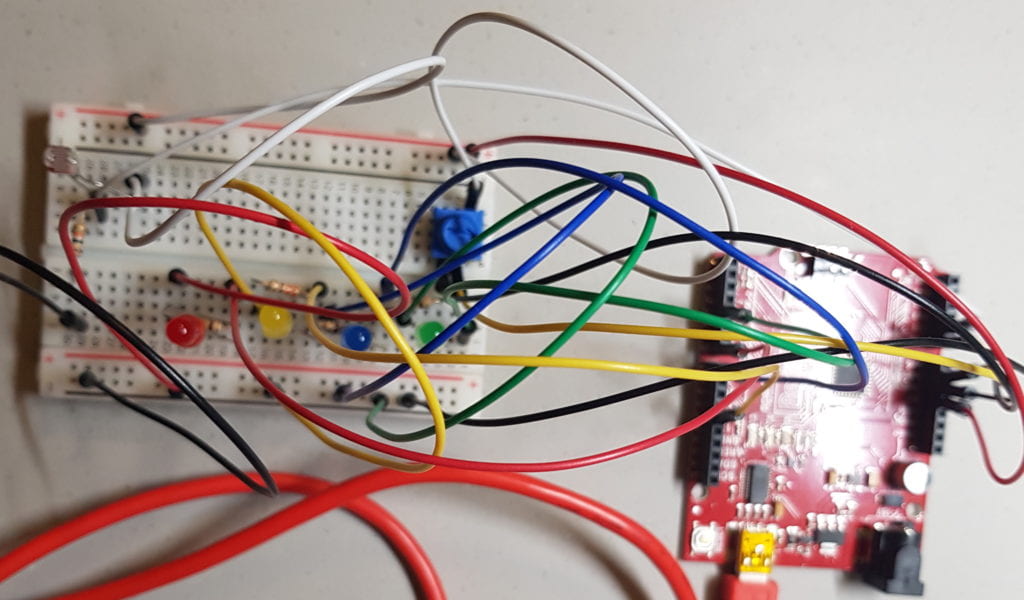
Schematic Diagram
As I twist the potentiometer, the light in the LED moves accordingly from green to blue to yellow to red. At the same time, the rate of the blinking of the LED increases as I twist the potentiometer more and more, until the red LED blinks once every 125 milliseconds. The light sensor reacts to light and switches all 4 LEDs when dark, and switches all LEDs on when bright.
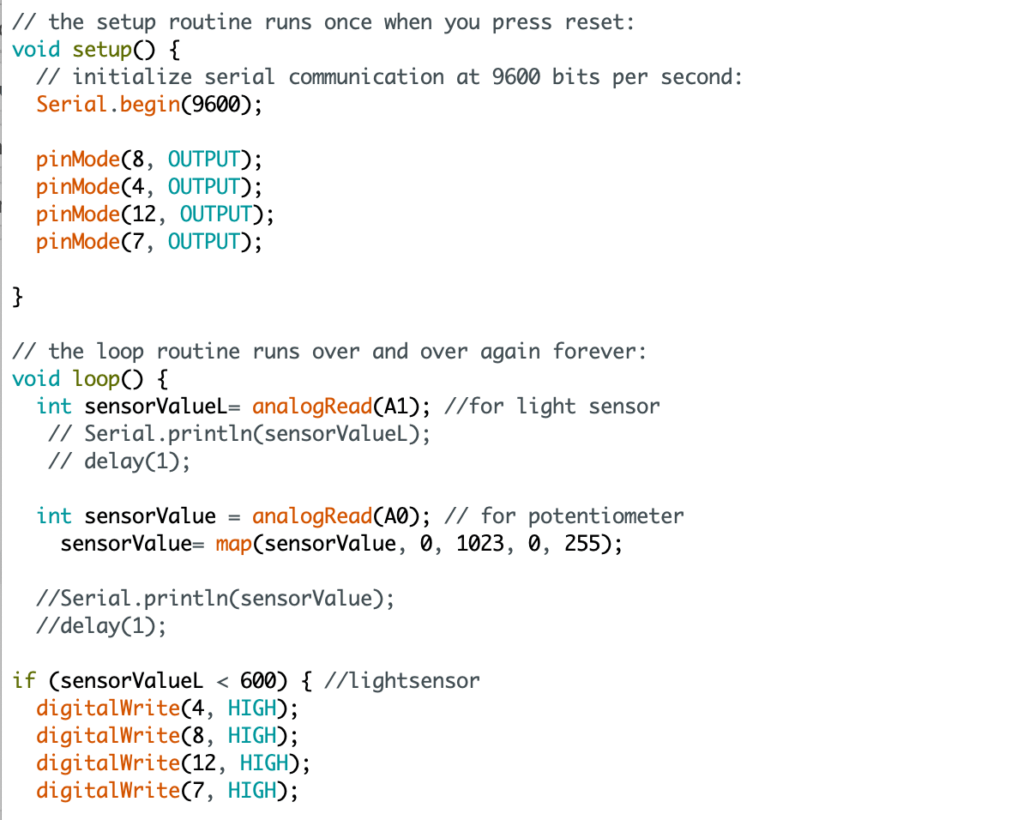
Initially, I incorporated the built-in blinking code we learned in the beginning of the lesson. I adjusted the rate by altering the value inside the delay (). However, as I was monitoring the values through the serial monitor, I noticed that for the green LED, the values were displayed at the rate I set the delay () value to be. This meant that I had to push down the switch for as long as a second, and even if I let go of it immediately, the LED would switch off after another second.
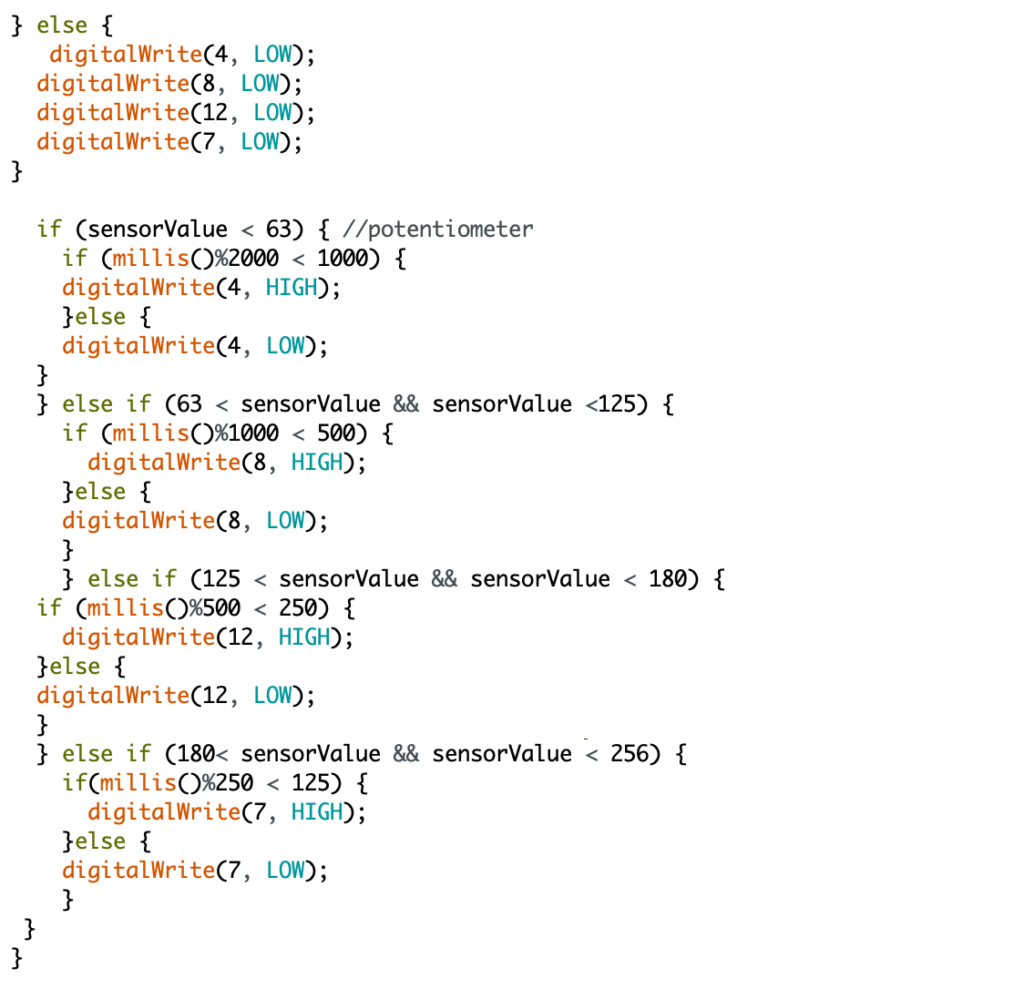
Jack helped me understand why this was the case; the delay() stops the coding system completely, and that was why the switch didn’t switch on and off as synchronized as it could be to my input. Instead, I used millis() as suggested by Jack, which returns the amount of milliseconds that have passed since the program started running. I used % and some numerical values and came up with a if/else statement to replace the delay() blink code.
I also found out how to use if statement within an if statement. I had a lot of errors that I couldn’t understand, but figured out the importance of the number of brackets and where they were placed. I’m pretty sure there are smarter ways in which the coding can be simplified and crafted but I’m satisfied that it does the job!


