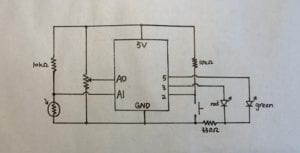
As shown in the schematic diagram, with a photoresistor, potentiometer, pushbutton, and two LEDs, I made a nightlight whose brightness and color can be controlled.

When the photoresistor detects the dark, its resistance increases, leading to higher voltage and larger reading from analog pin 1. Detecting the change in input, Arduino then lights an LED through analog write. When the LED is lighted, its brightness depends on the status of the potentiometer, while the color of the lighted LED depends on the status of the pushbutton—red if unpressed, and green if pressed.
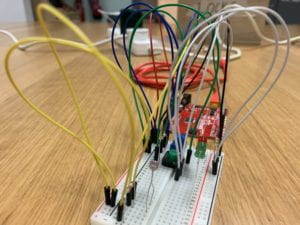
Here is my breadboard—I used yellow wires for photoresistor, blue wires for potentiometer, green wires for pushbutton, and white wires for LEDs. (but still seems messy)

In addition, I added a brightening/dimming feature to the led. When an LED is lighted, it will gradually reach the intended brightness; when it is turned off, it will gradually fade. This is achieved by loops that increment/decrement the brightness, along with multiple conditional statements that determine when brightening/dimming is needed and which color is affected. However, as there are different situations when an LED needs to be on or off, this feature kind of complicates my code.
Here is the result—a nightlight that brightens and fades gradually.
(The duration of the effect can be extended by increasing the parameter in delay() in my code.)
