

Nonvisual Soldering Workshop at NYU ITP
Building a Continuity Tester
People
Instructor
Facilitators
Chancey Fleet
Tom Igoe
Lauren Race
Technical Producer
Volunteers
Veronica Alfaro
Arnab Chakravarty
Huiyi Chen
Regine Gilbert
Rashida Kamal
Aidan Nelson
Pedro Oliveira
Willie Payne
Anita Perr
David Rios
Jesse Simpson
Yeseul Song
Trae Winter
Location
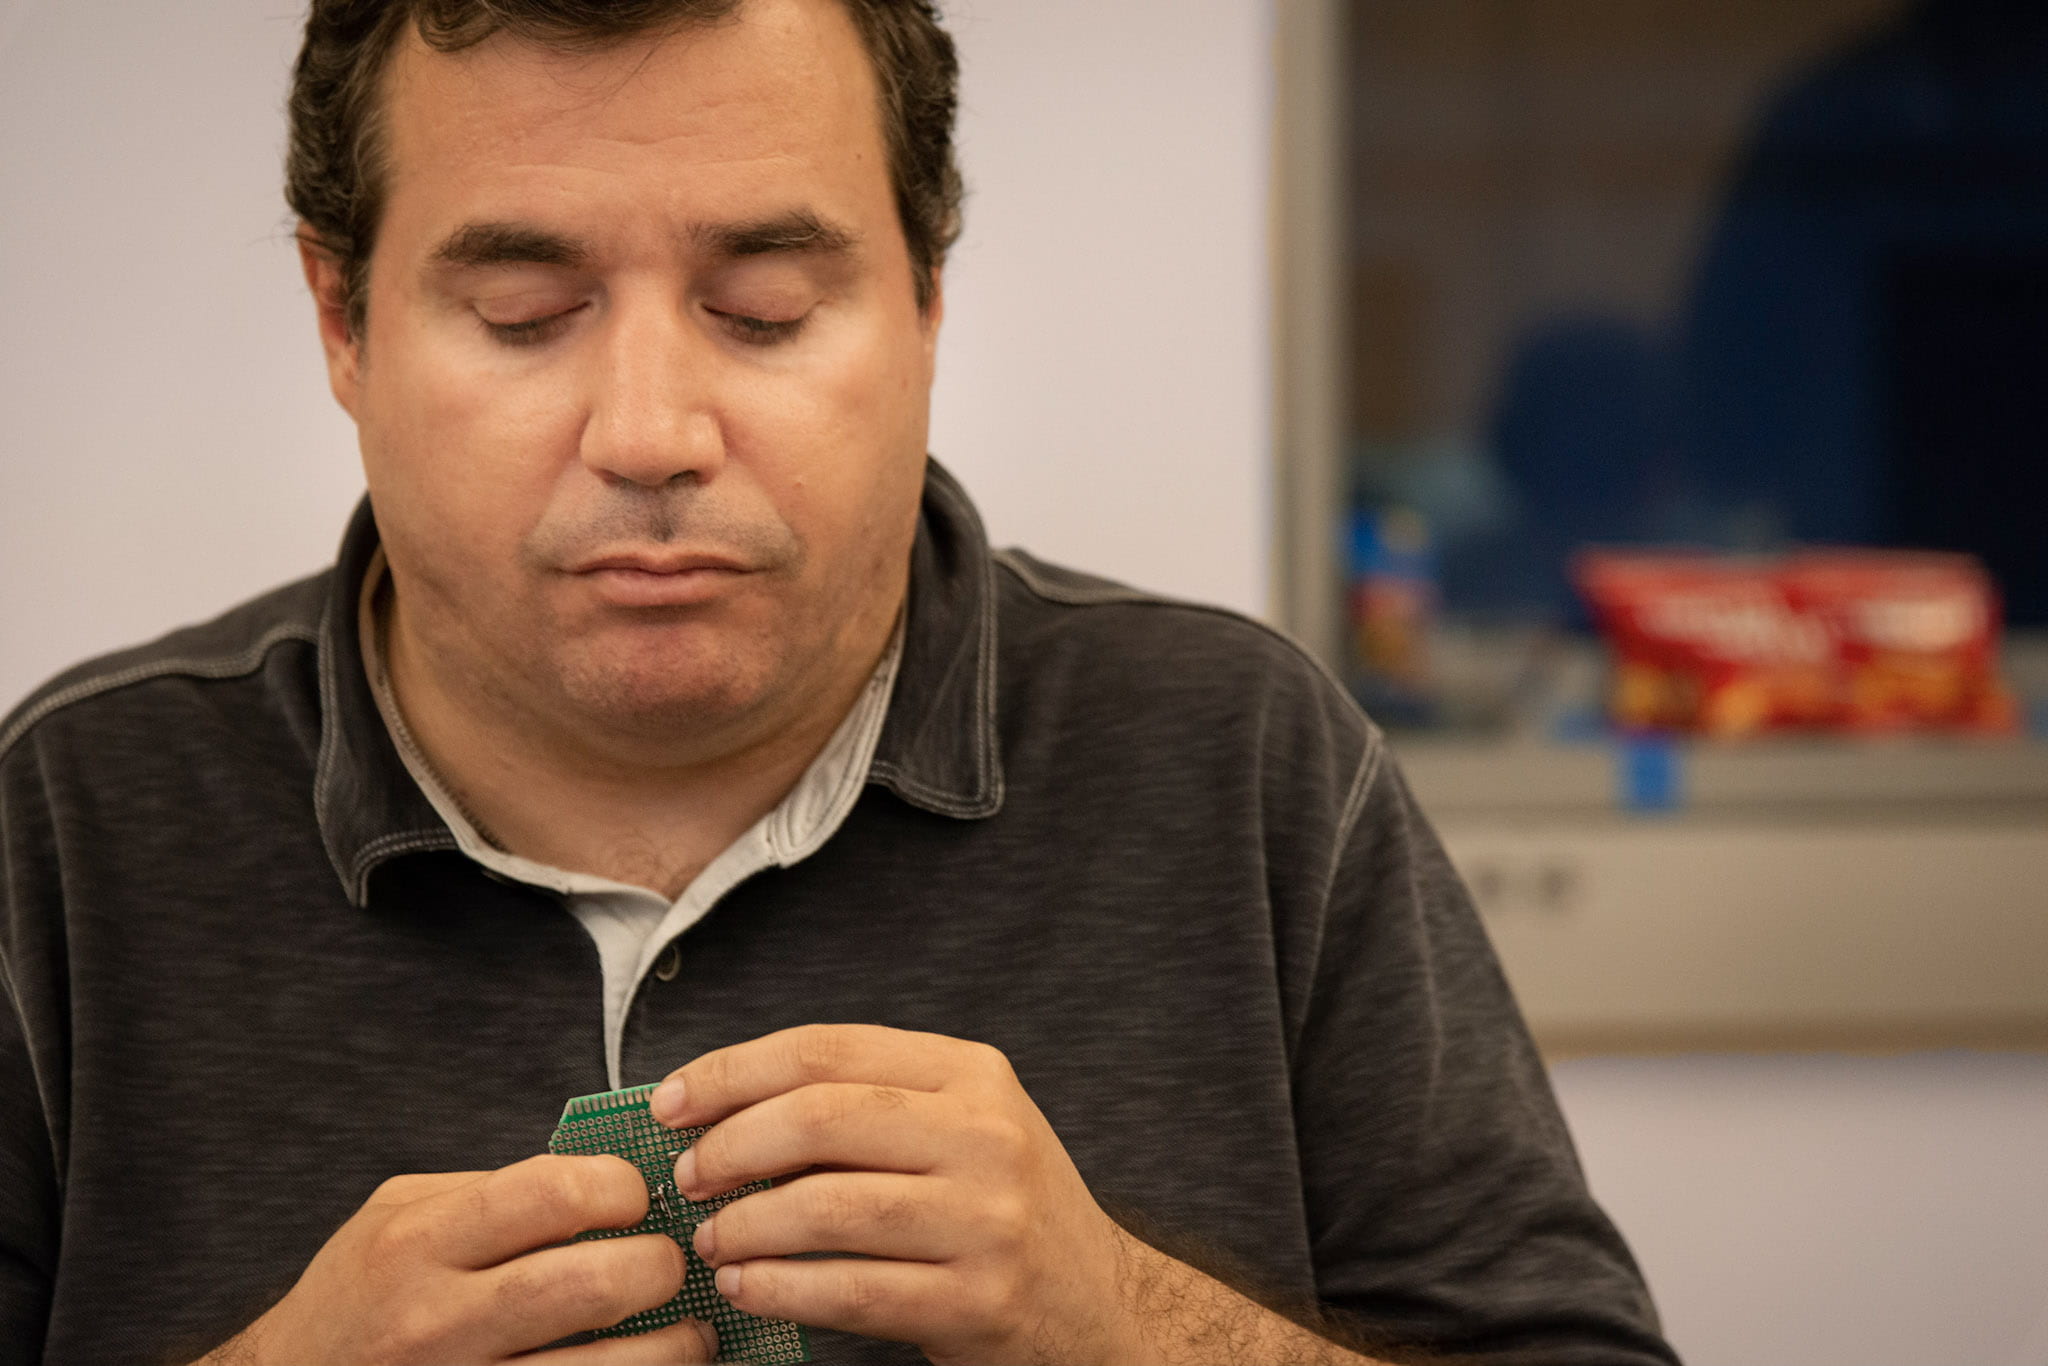
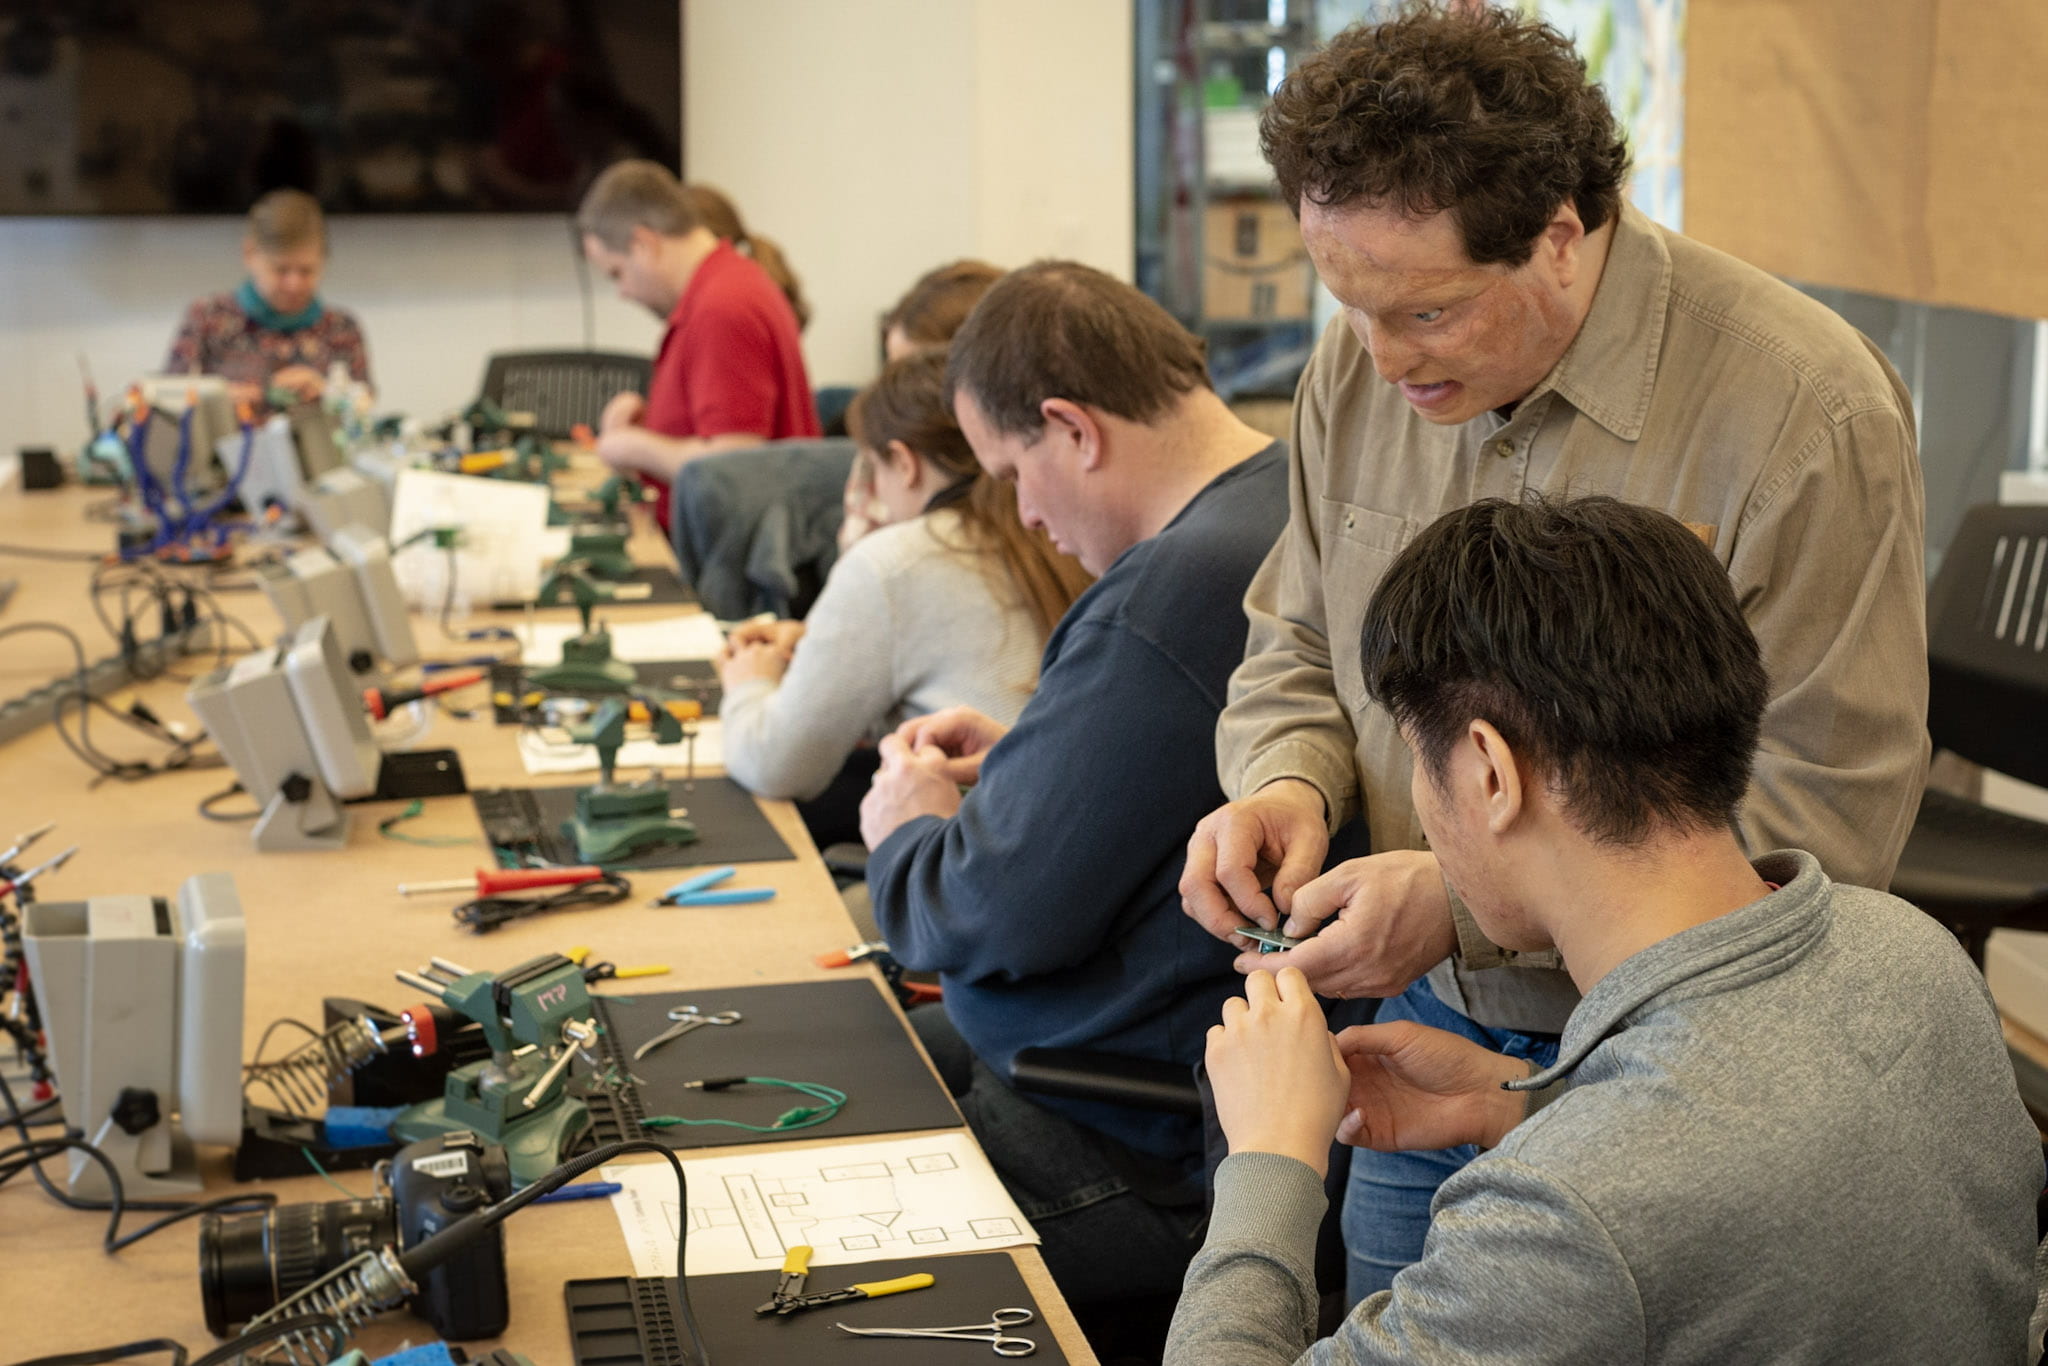
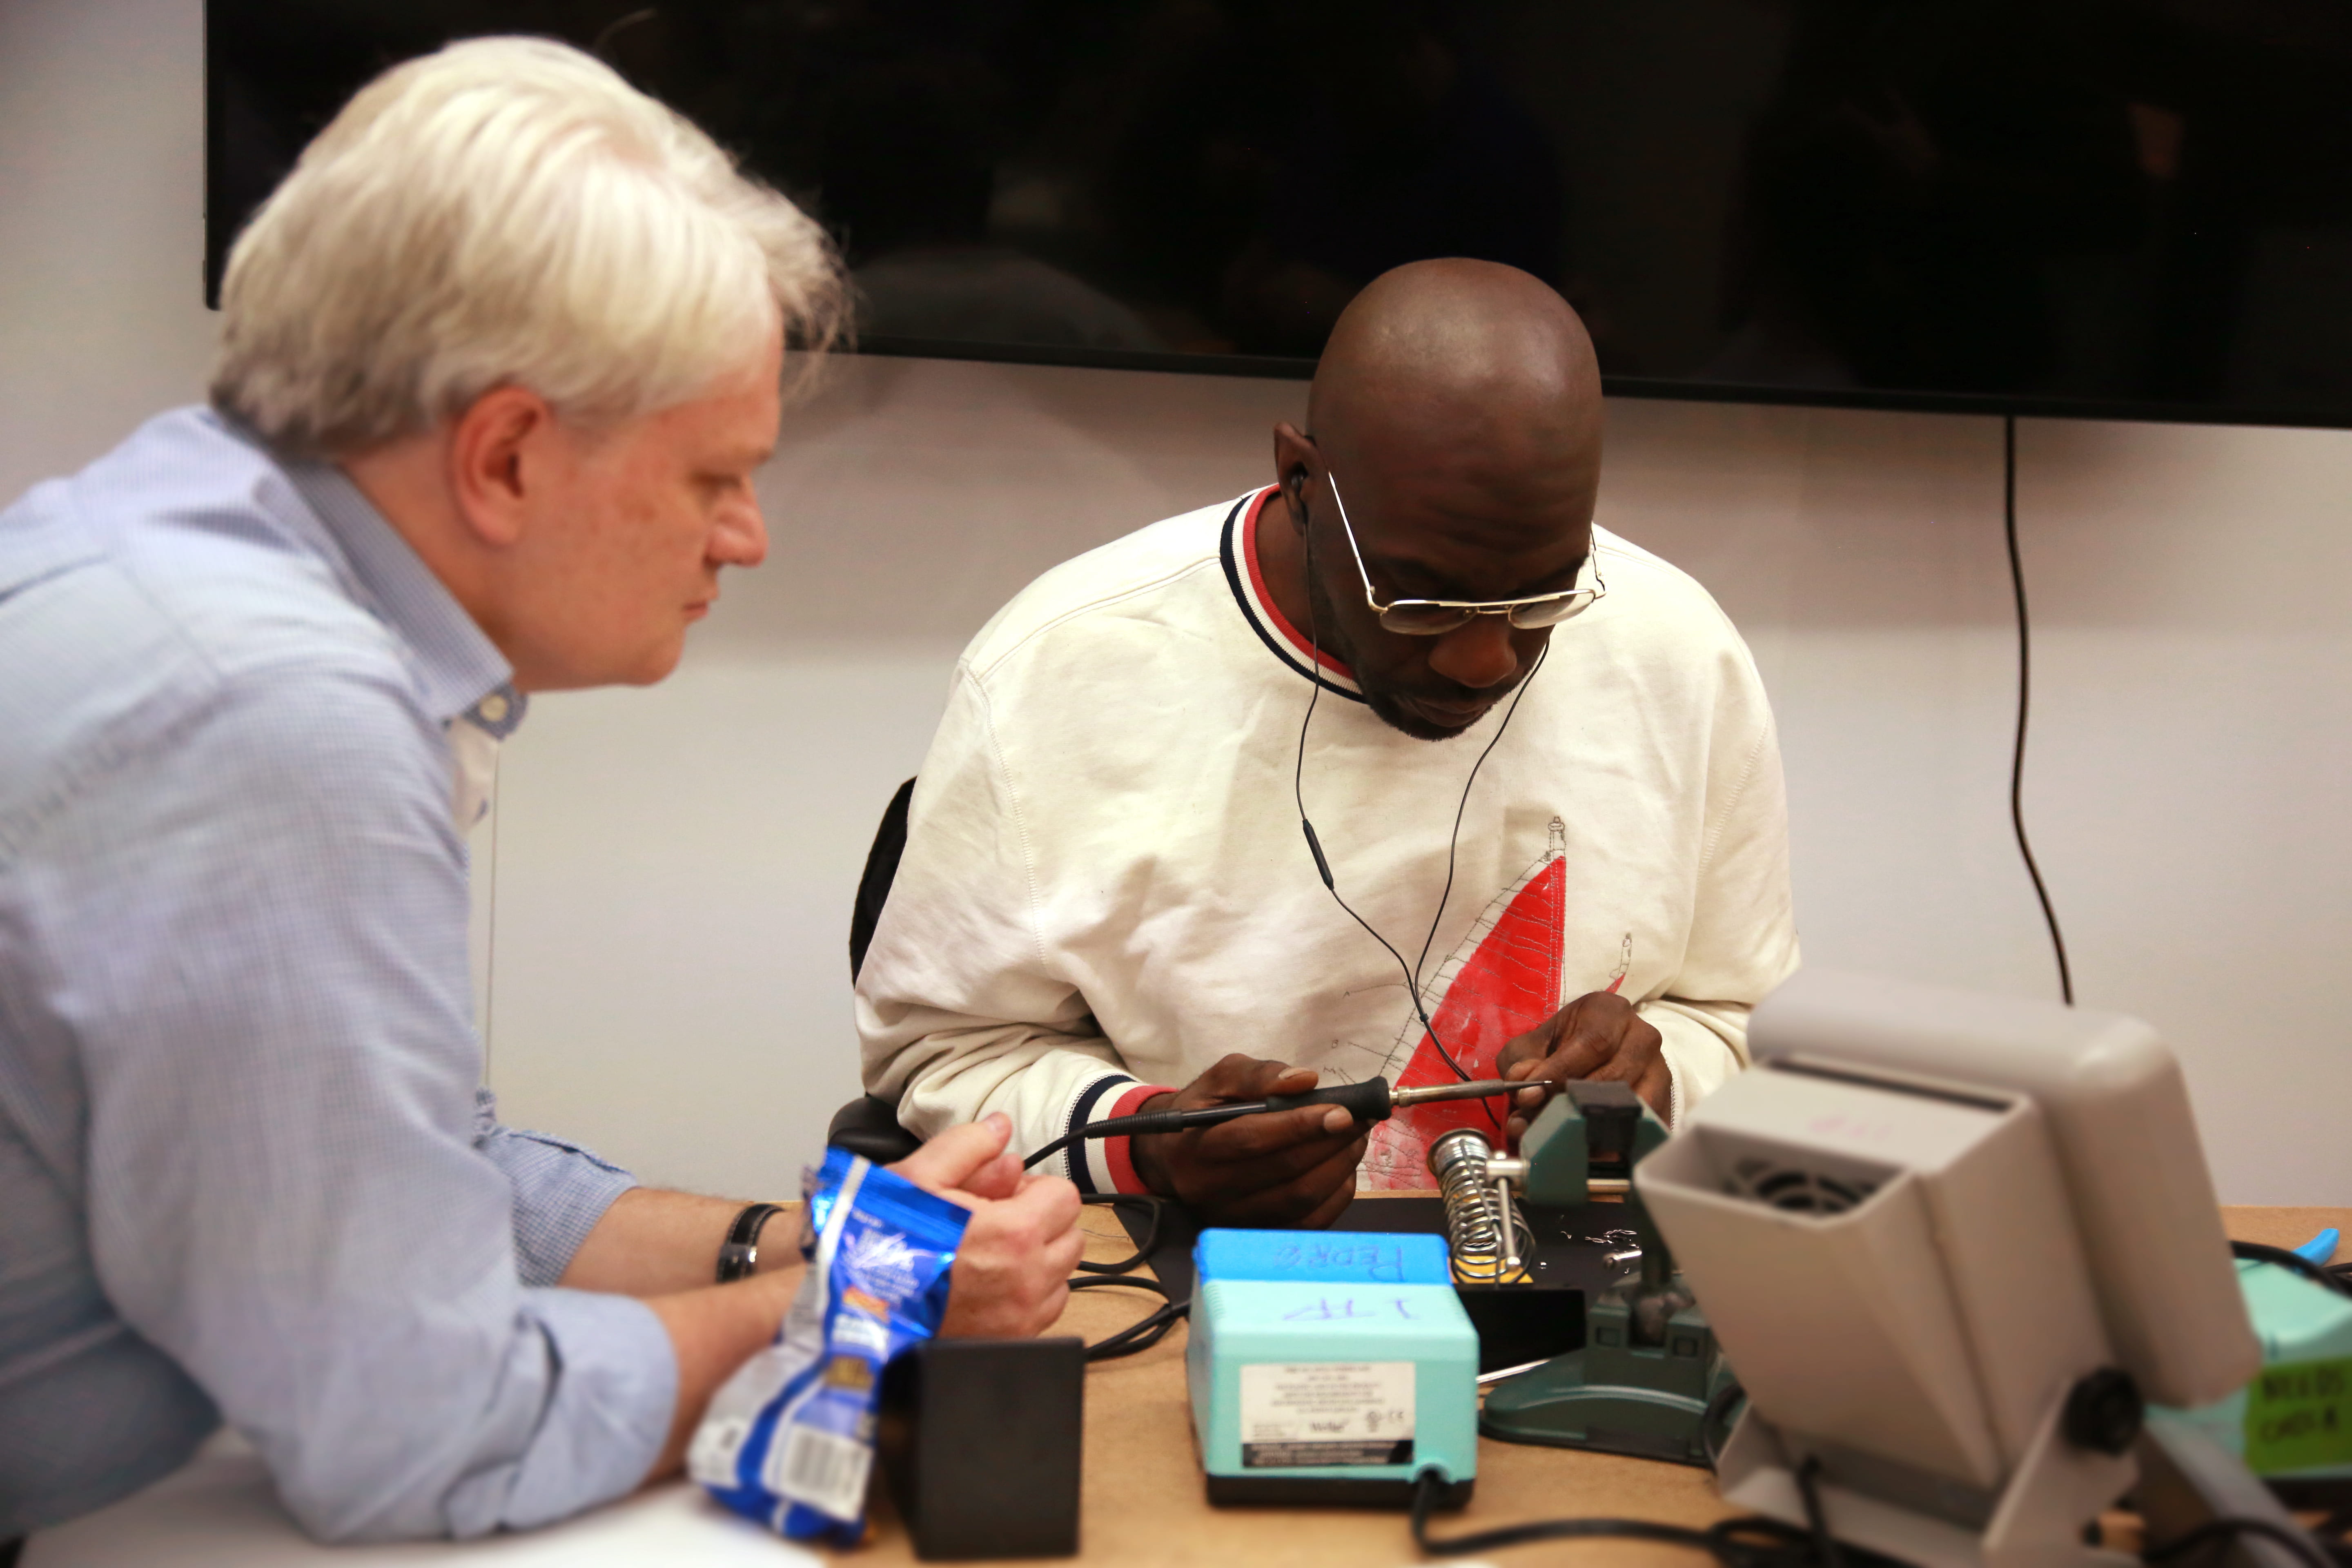
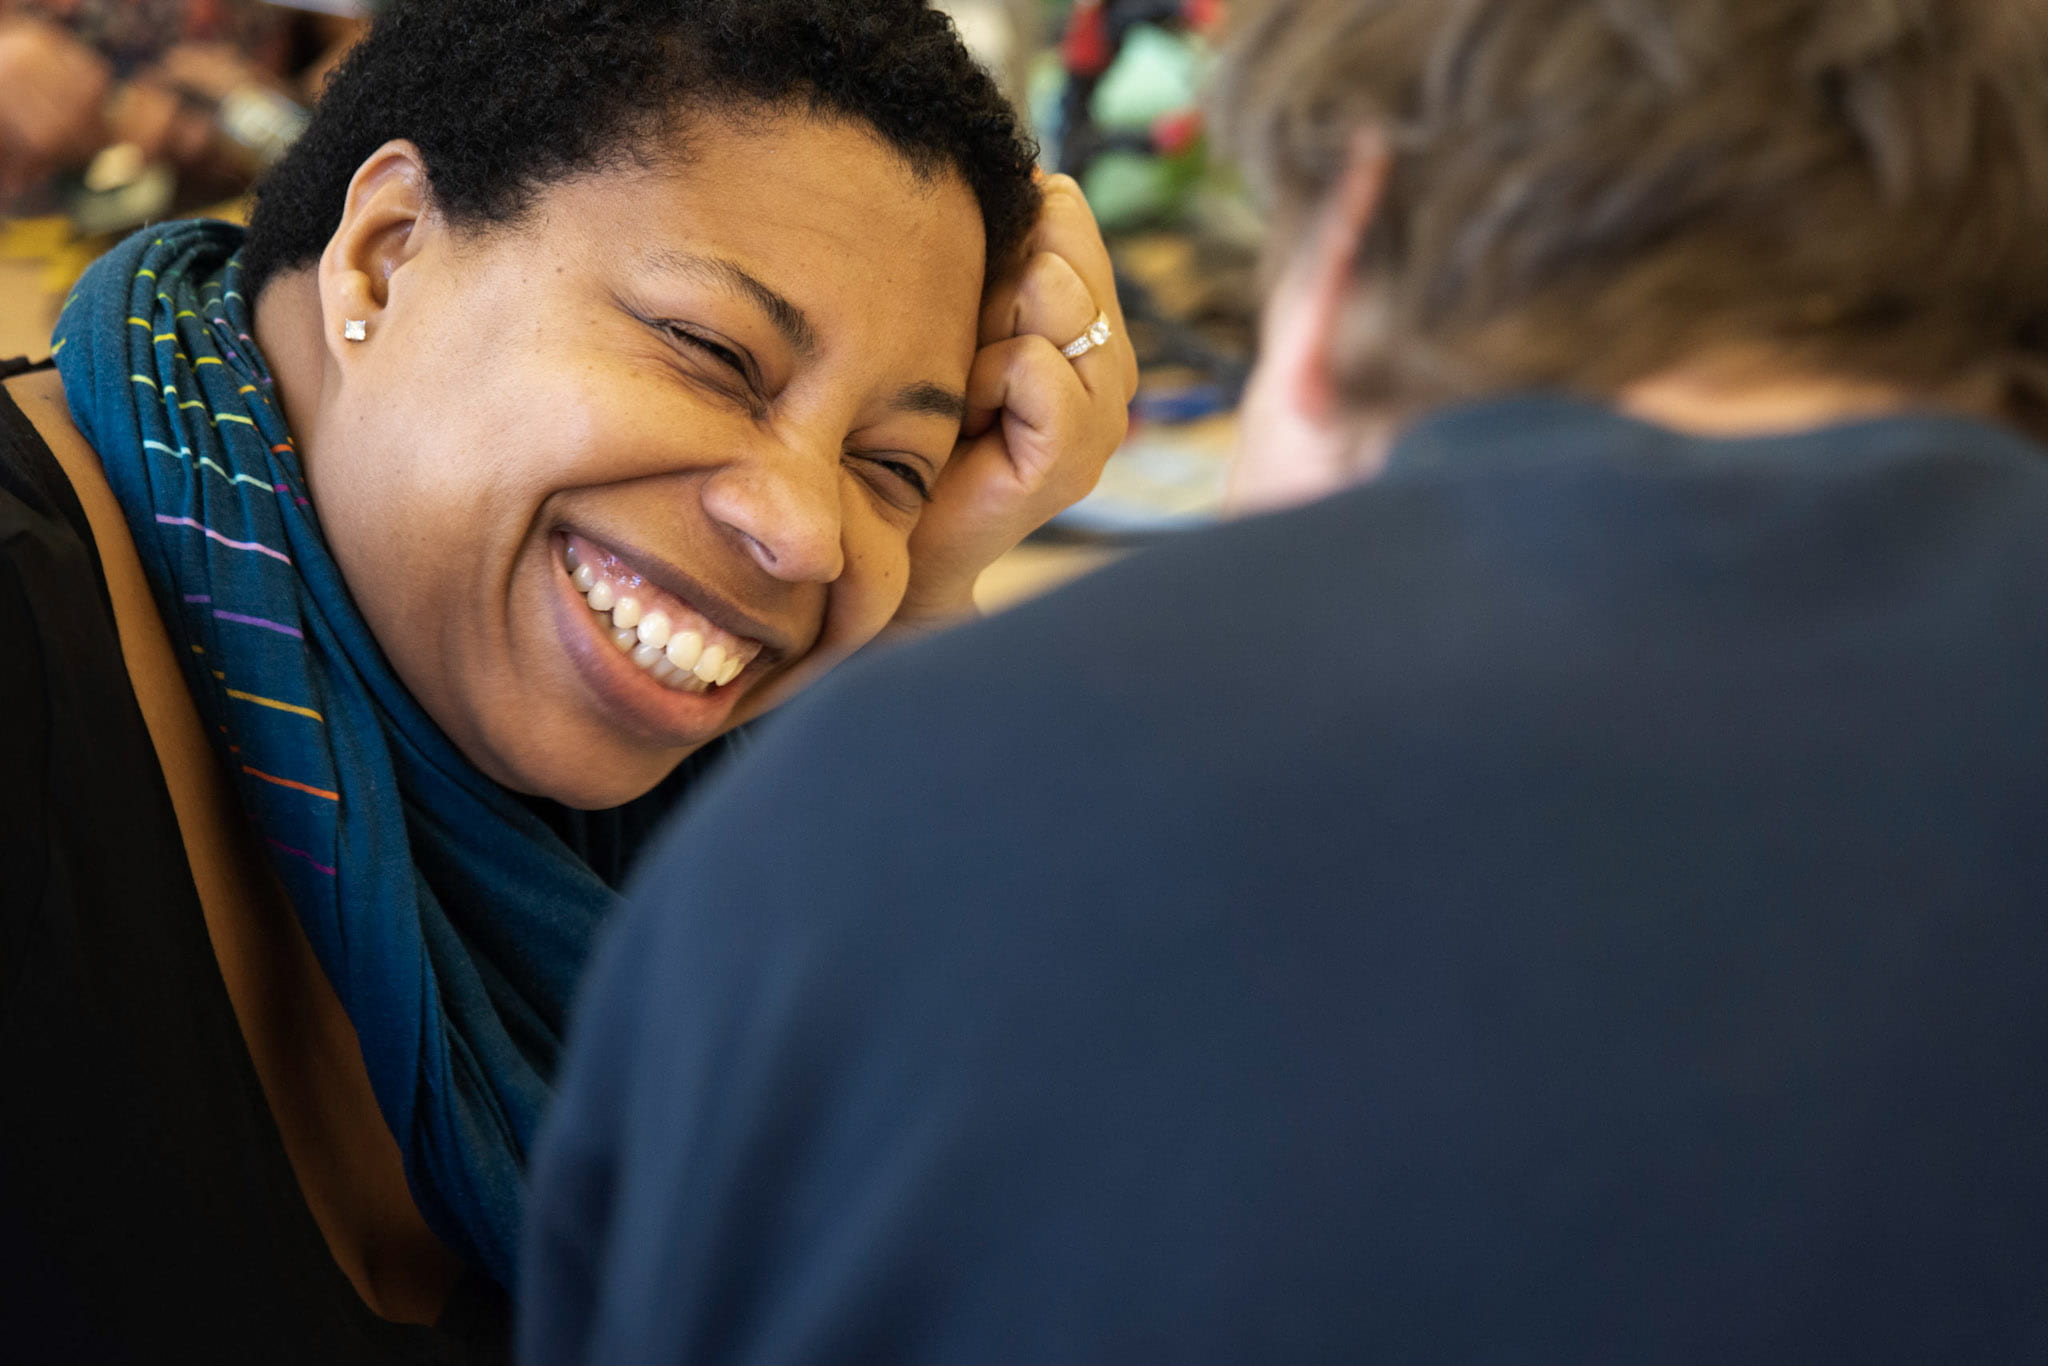
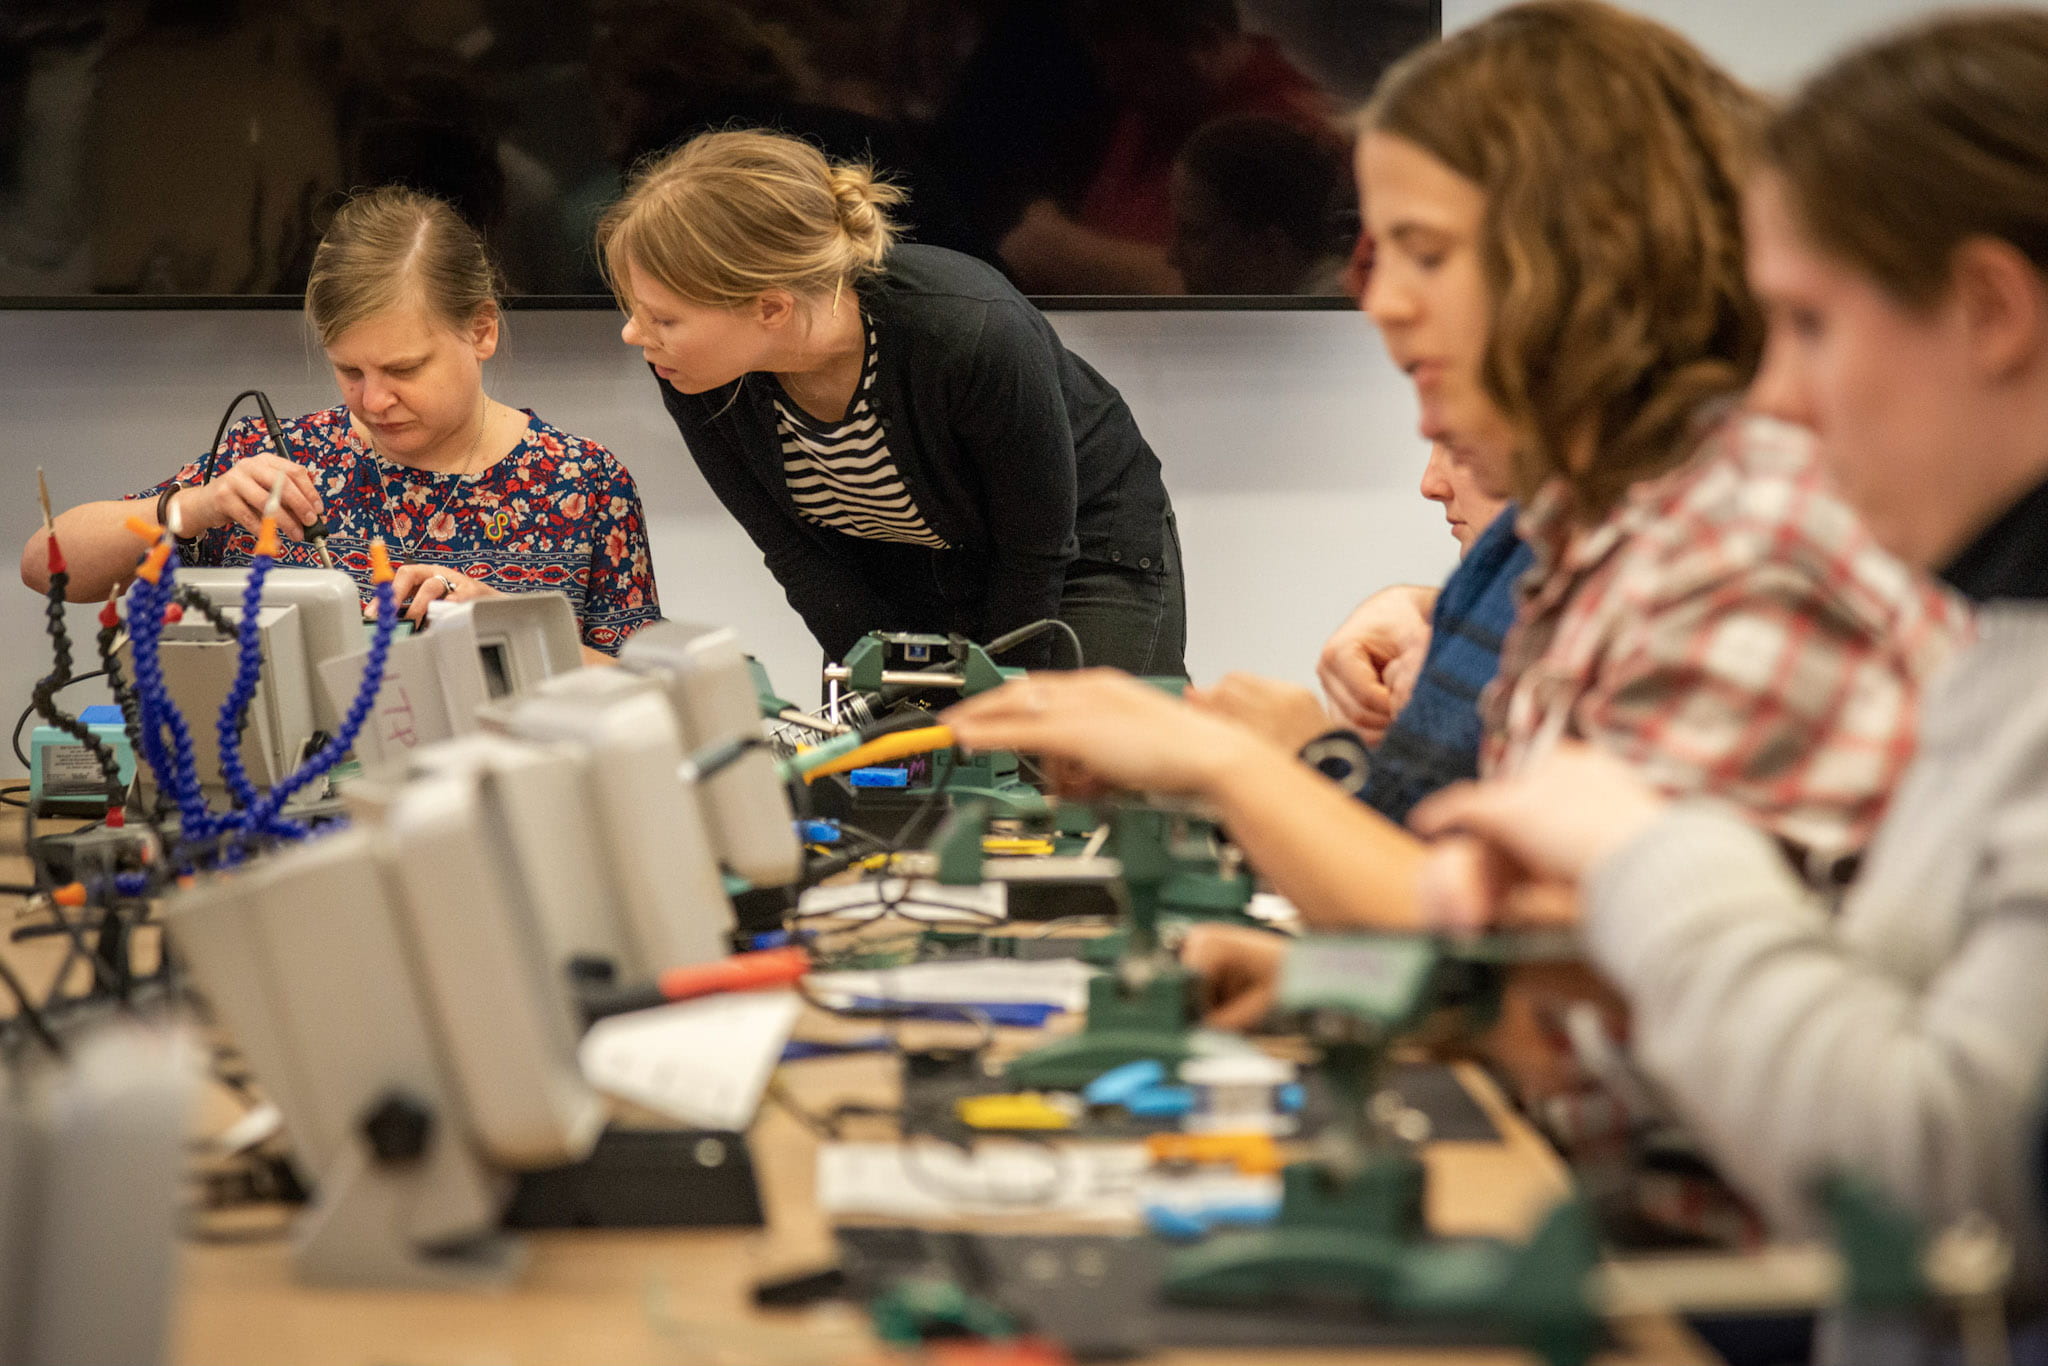
Photos
Jean Miele
Chunhan Chen
Yuanyuan Wang
All attendees agreed to have their photos taken for public documentation.
About
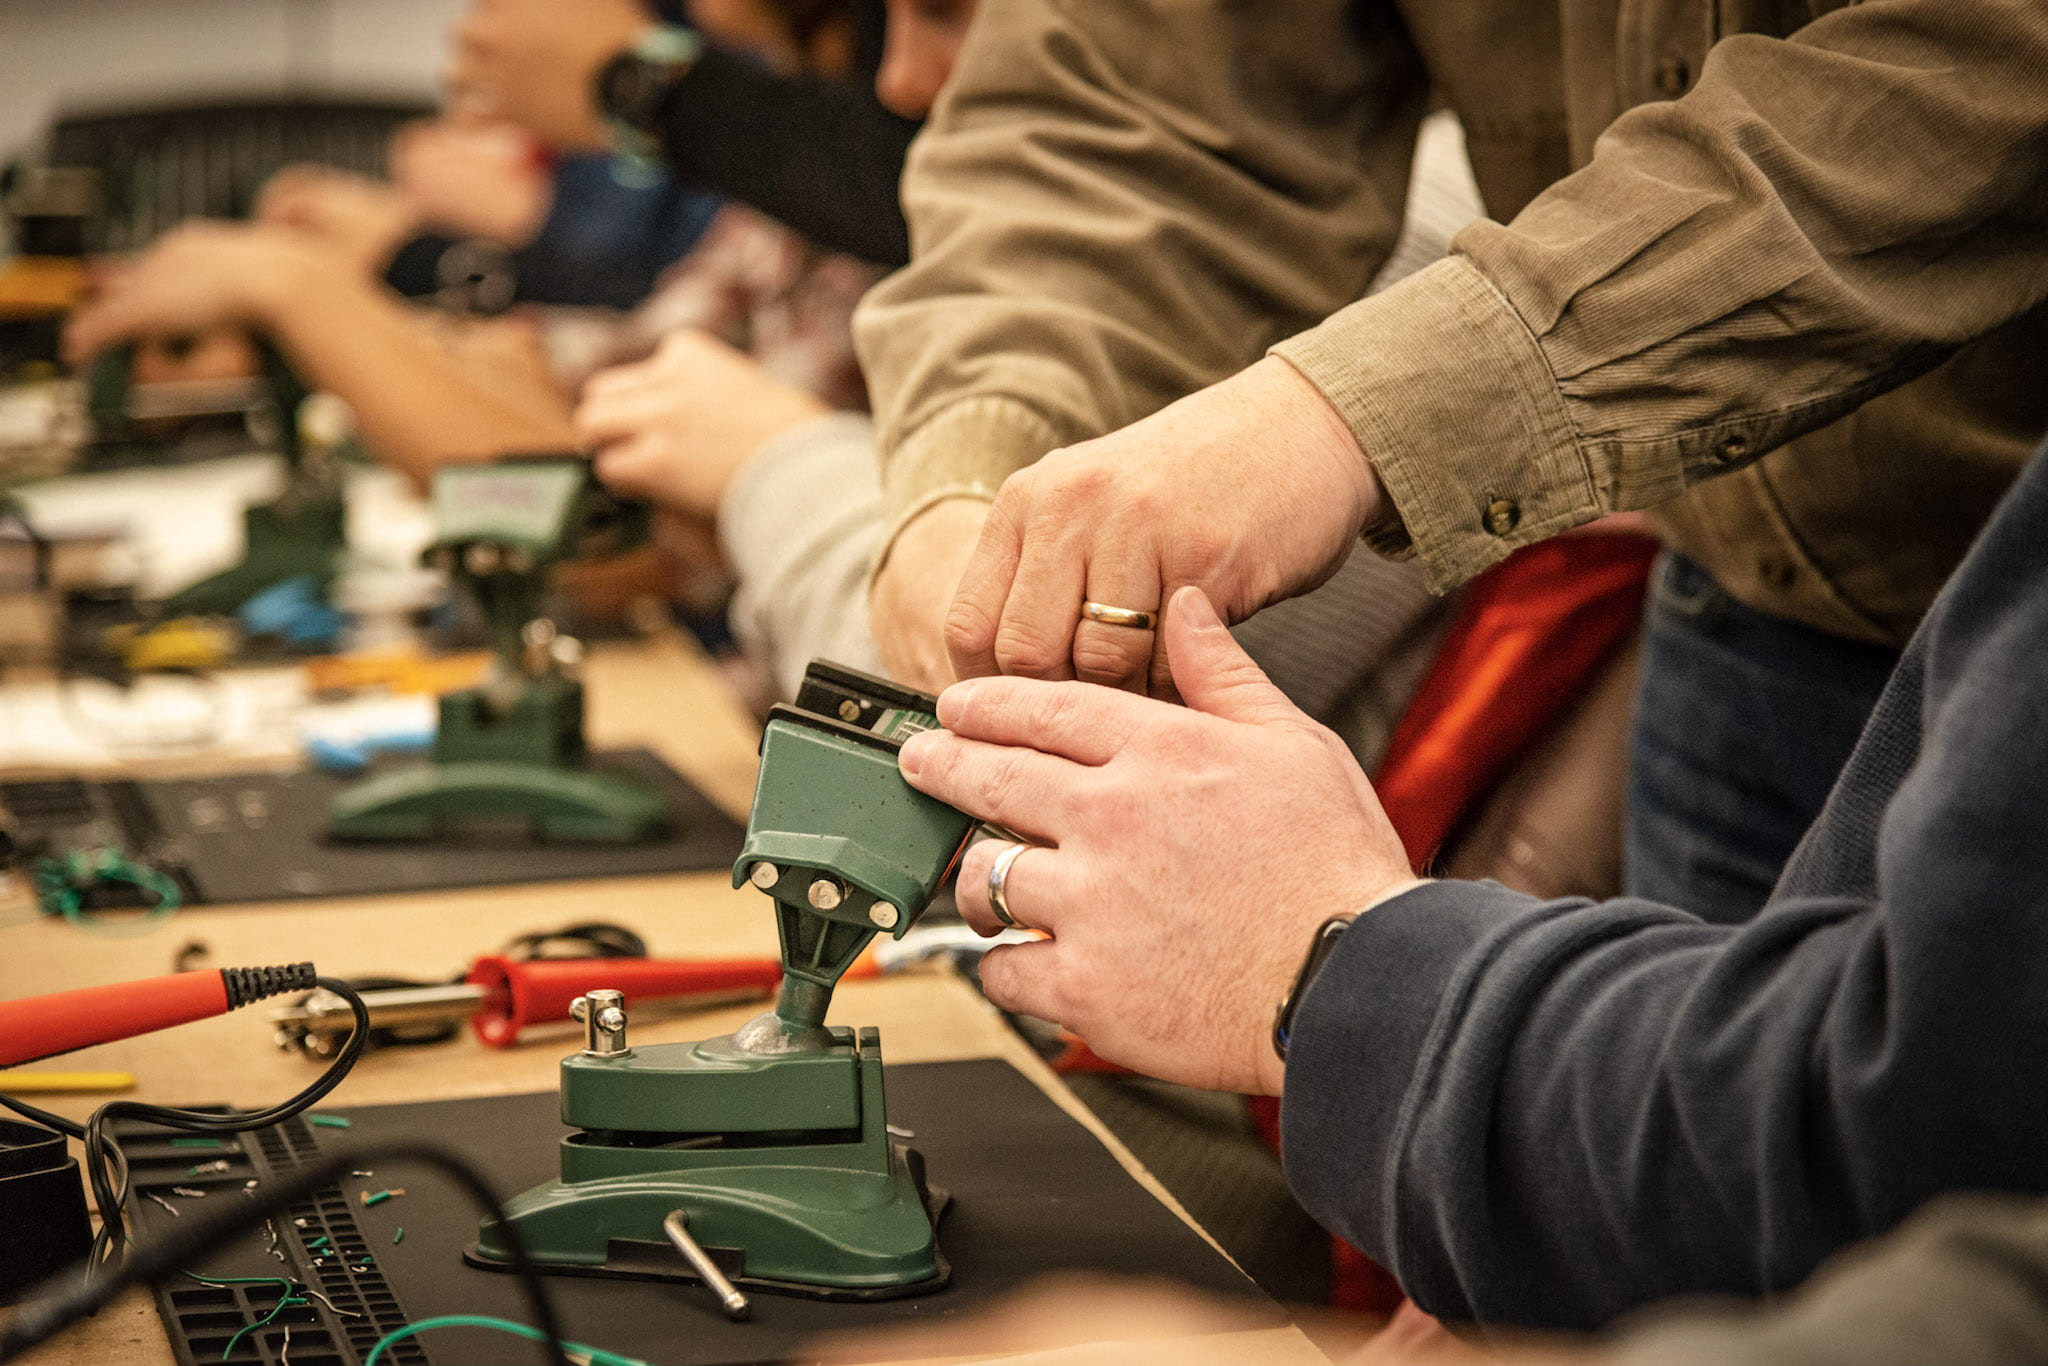
Soldering is an essential skill for prototyping and building electronics. There is plenty of discussion about addressing the STEM gap for blind and low vision (BLV) learners but, in the spirit of NYU ITP’s focus on hands-on learning, soldering experts and NYU faculty sought to take it one step further and put tools in hands. 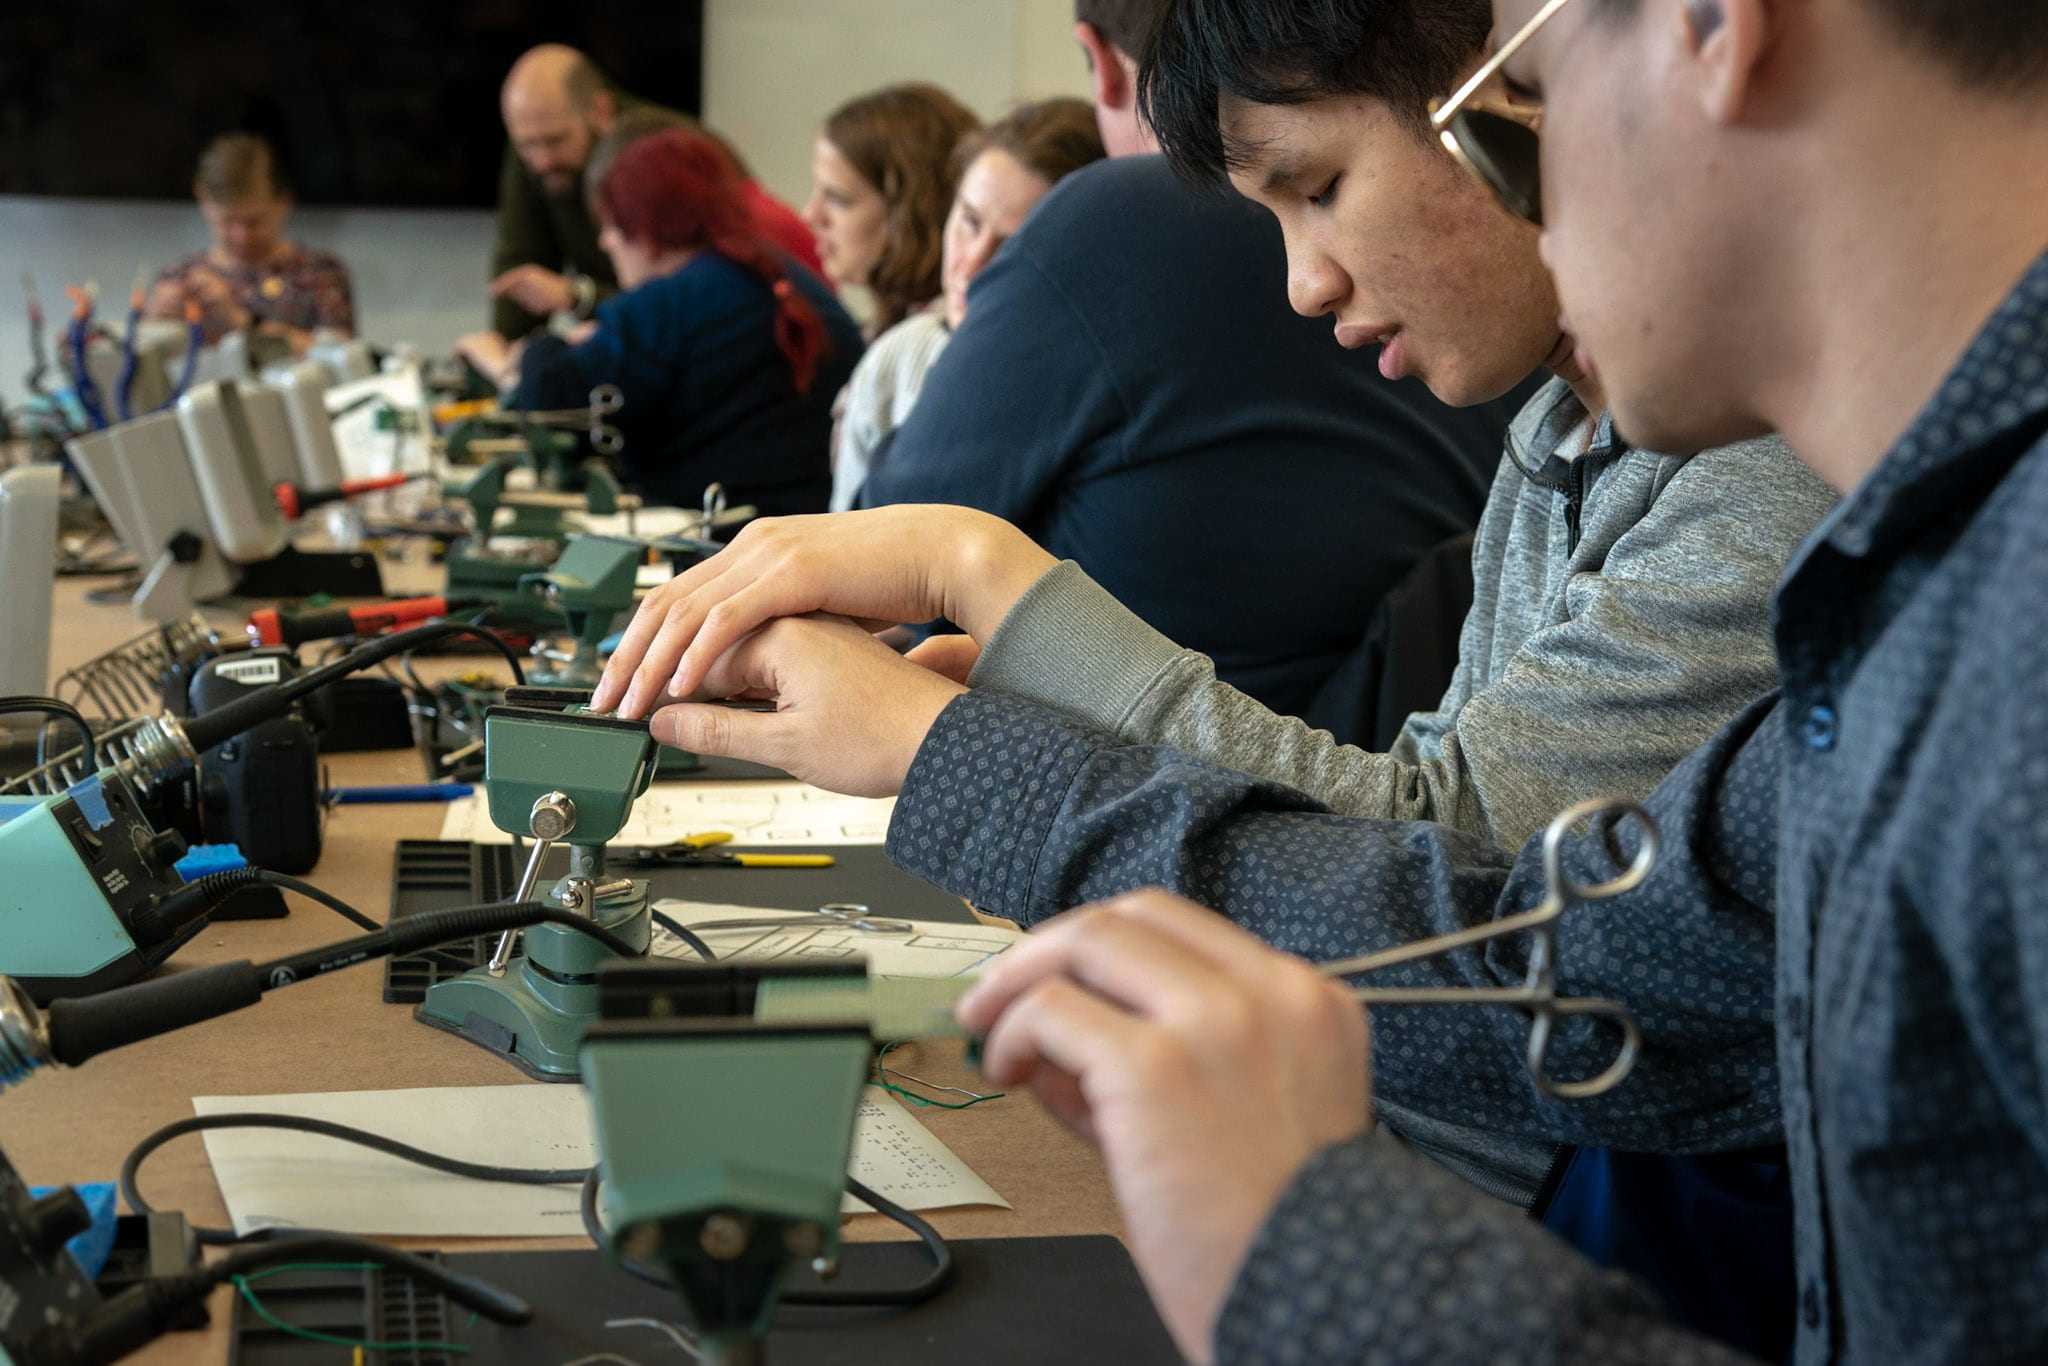
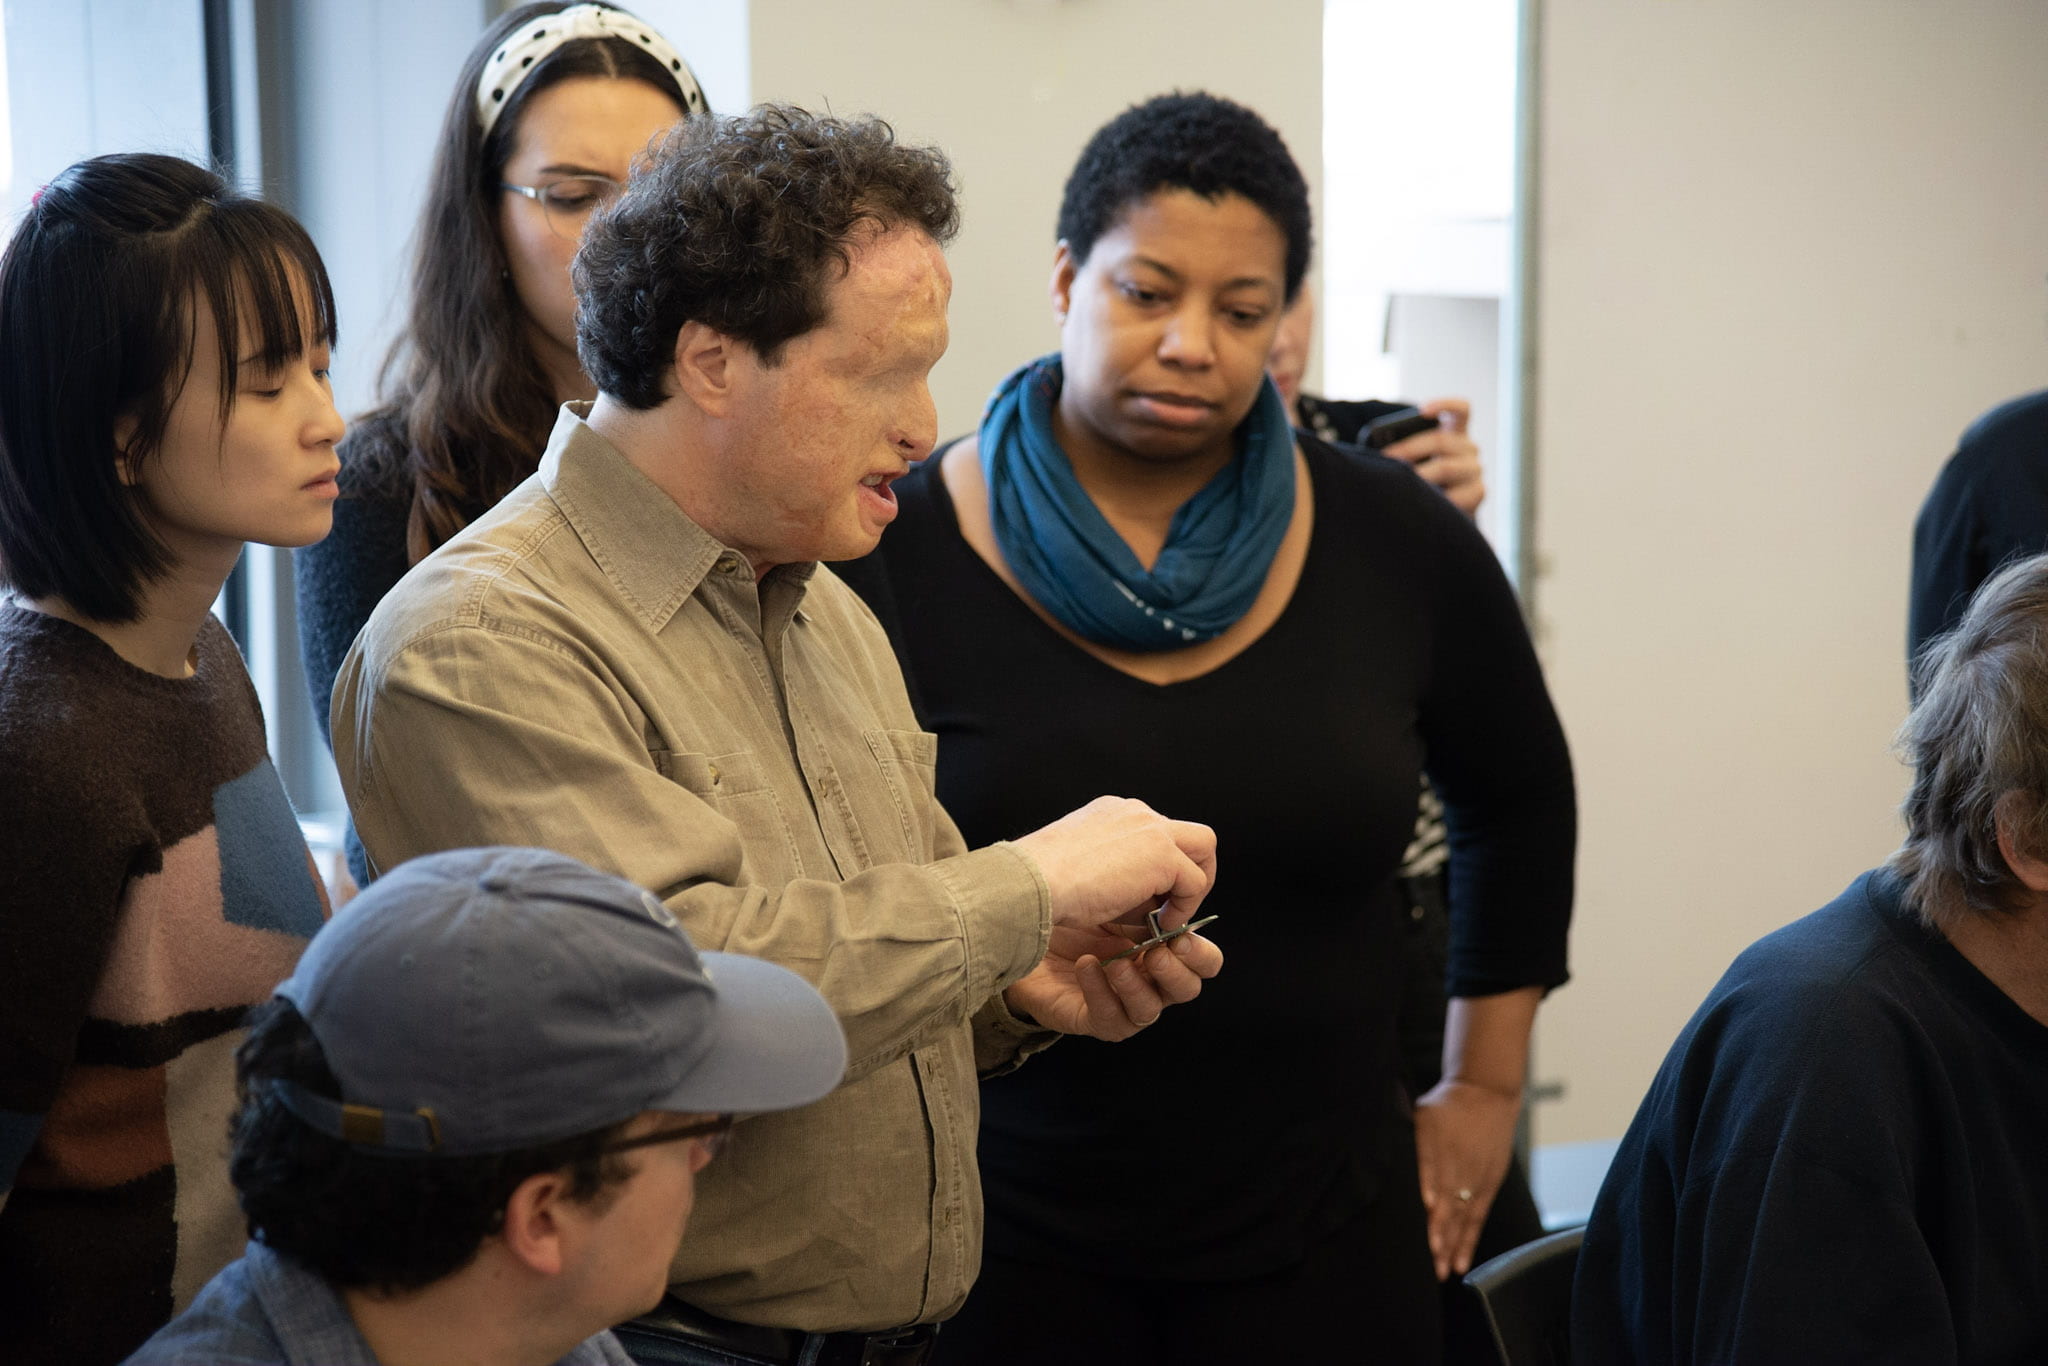
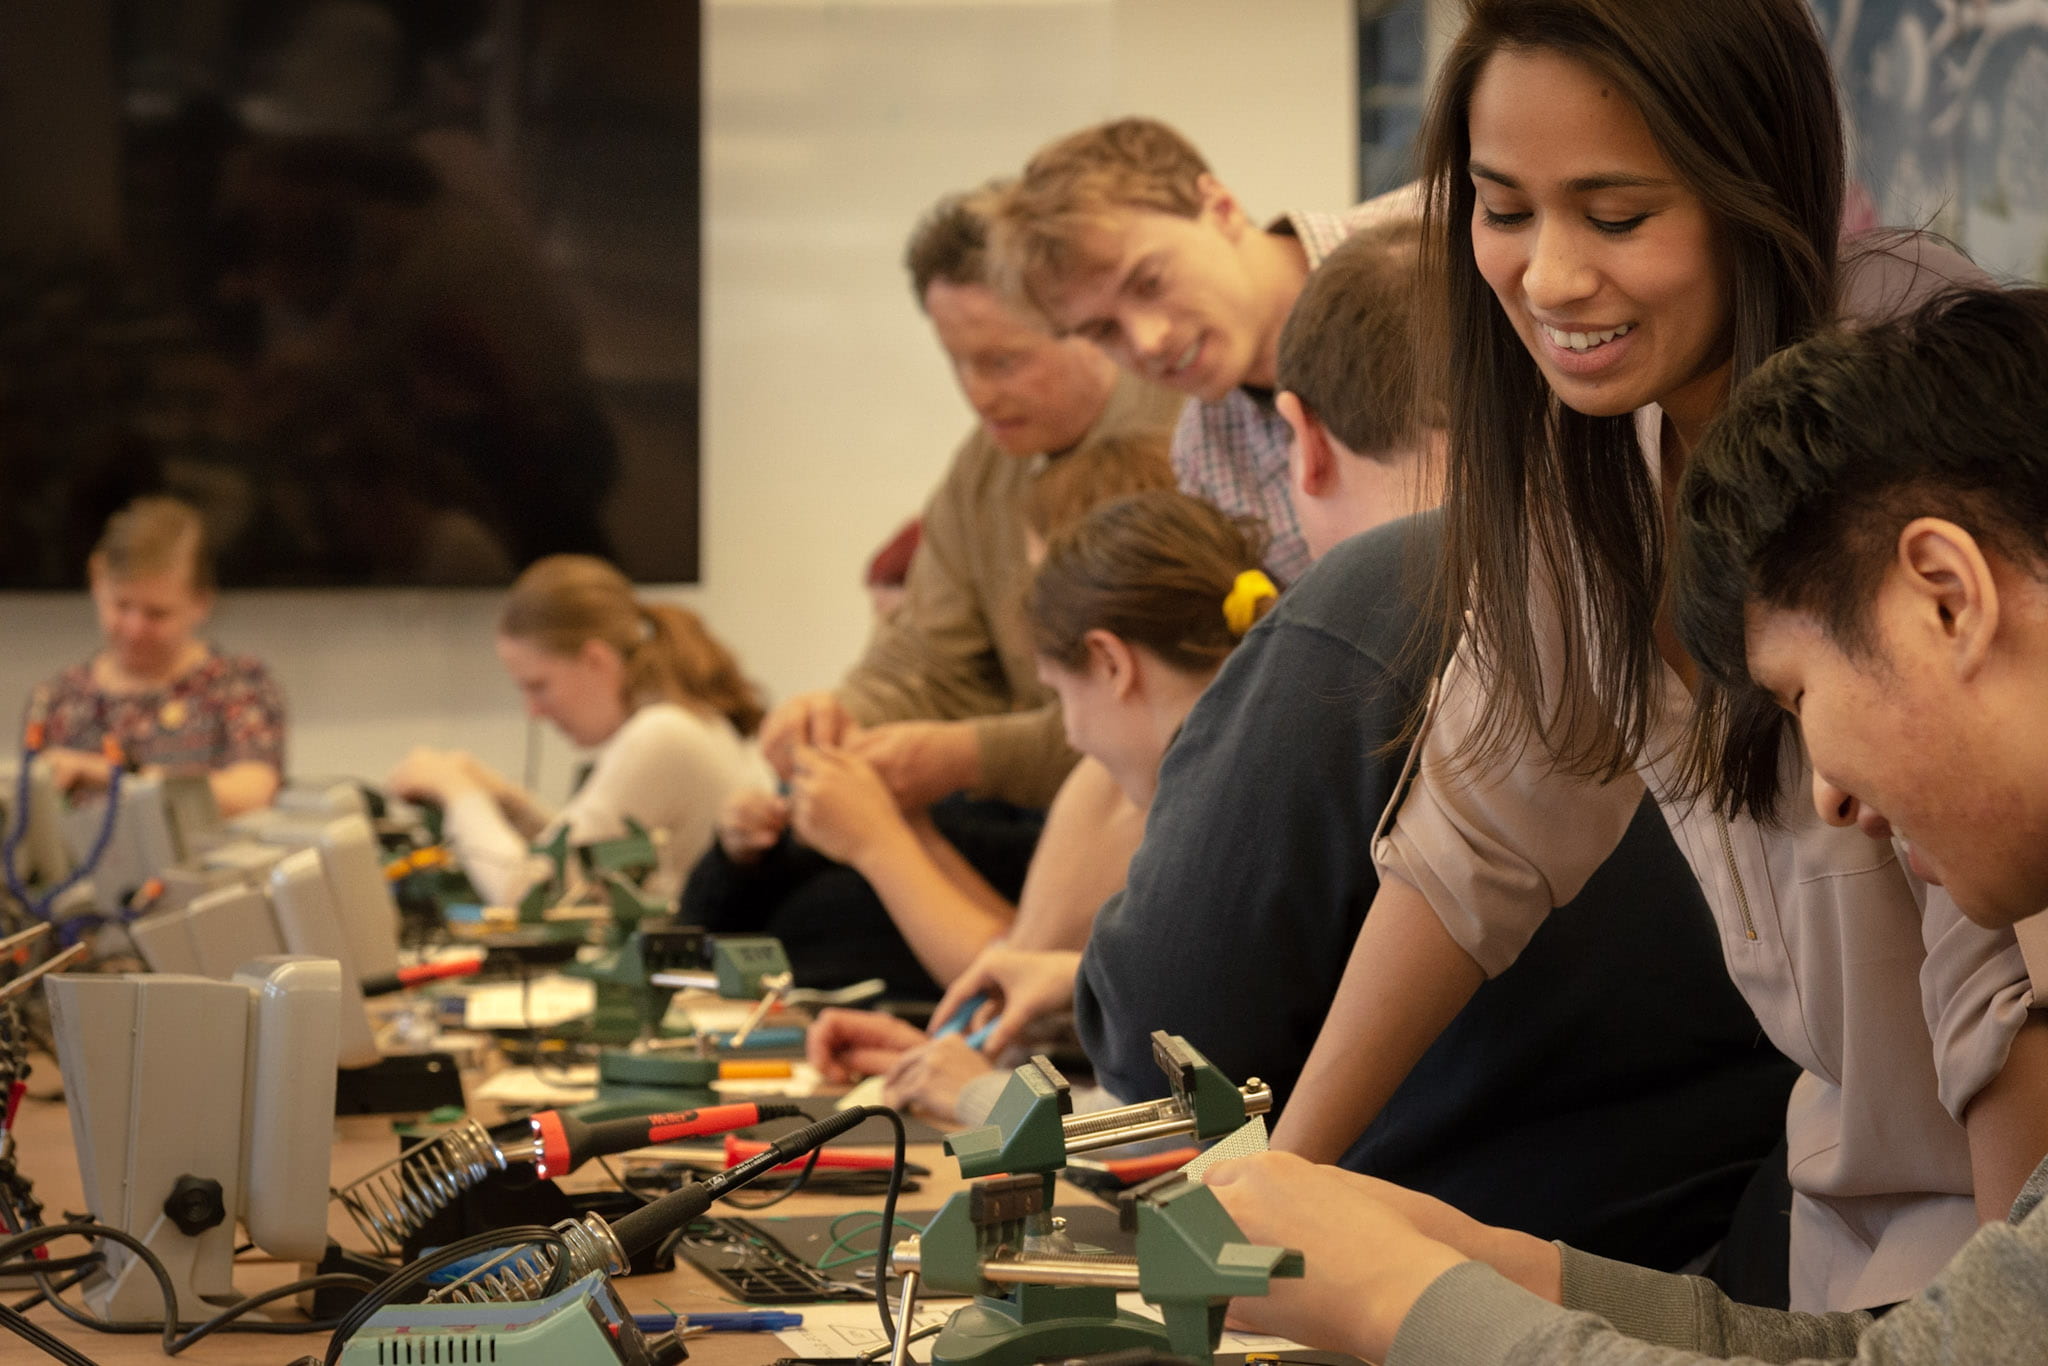
A weekend-long workshop—Friday, February 28 – Sunday, March 1, 2020—at NYU ITP offered students the opportunity to learn nonvisual soldering techniques from Dr. Joshua Miele: founder of the Blind Arduino Project, former Associate Director of the Smith-Kettlewell Rehabilitation Engineering Research Center on Low Vision and Blindness, and former Creative Director of LightHouse Labs. In addition to gaining hands-on experience with a soldering iron, students were guided in building their own accessible continuity tester—one of the most fundamental and flexible tools for electronics work without vision.
The Project: A Continuity Tester
Our project was building an audio continuity tester – one of the most useful and versatile pieces of accessible equipment for making electronics. In the process, attendees learned about nonvisual soldering tools and techniques, and gained hands-on soldering experience in the company of blind teachers and classmates. 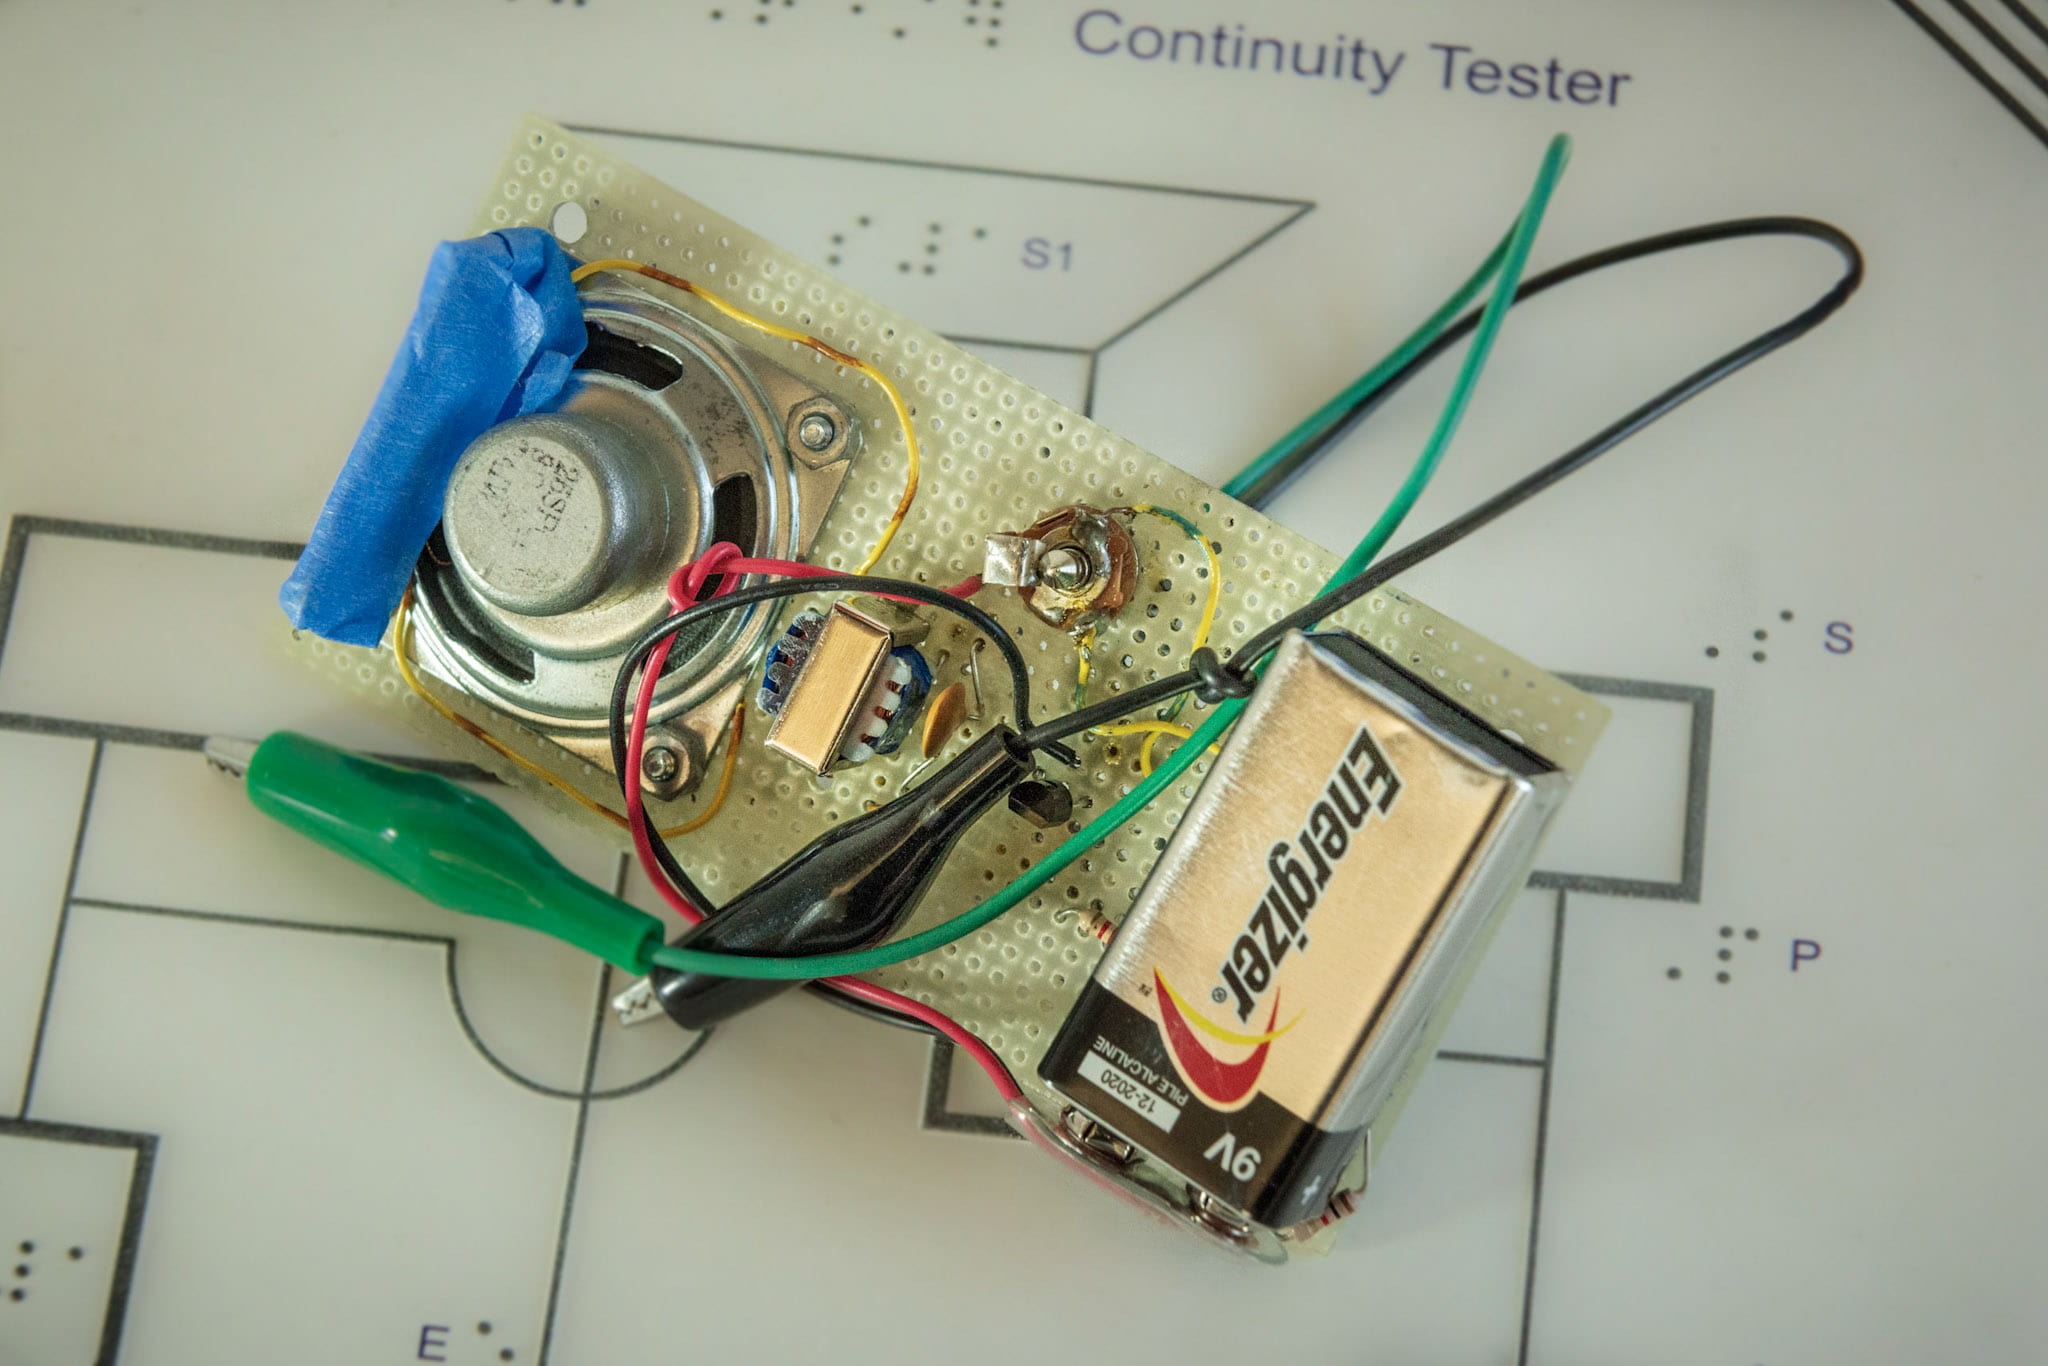
Materials
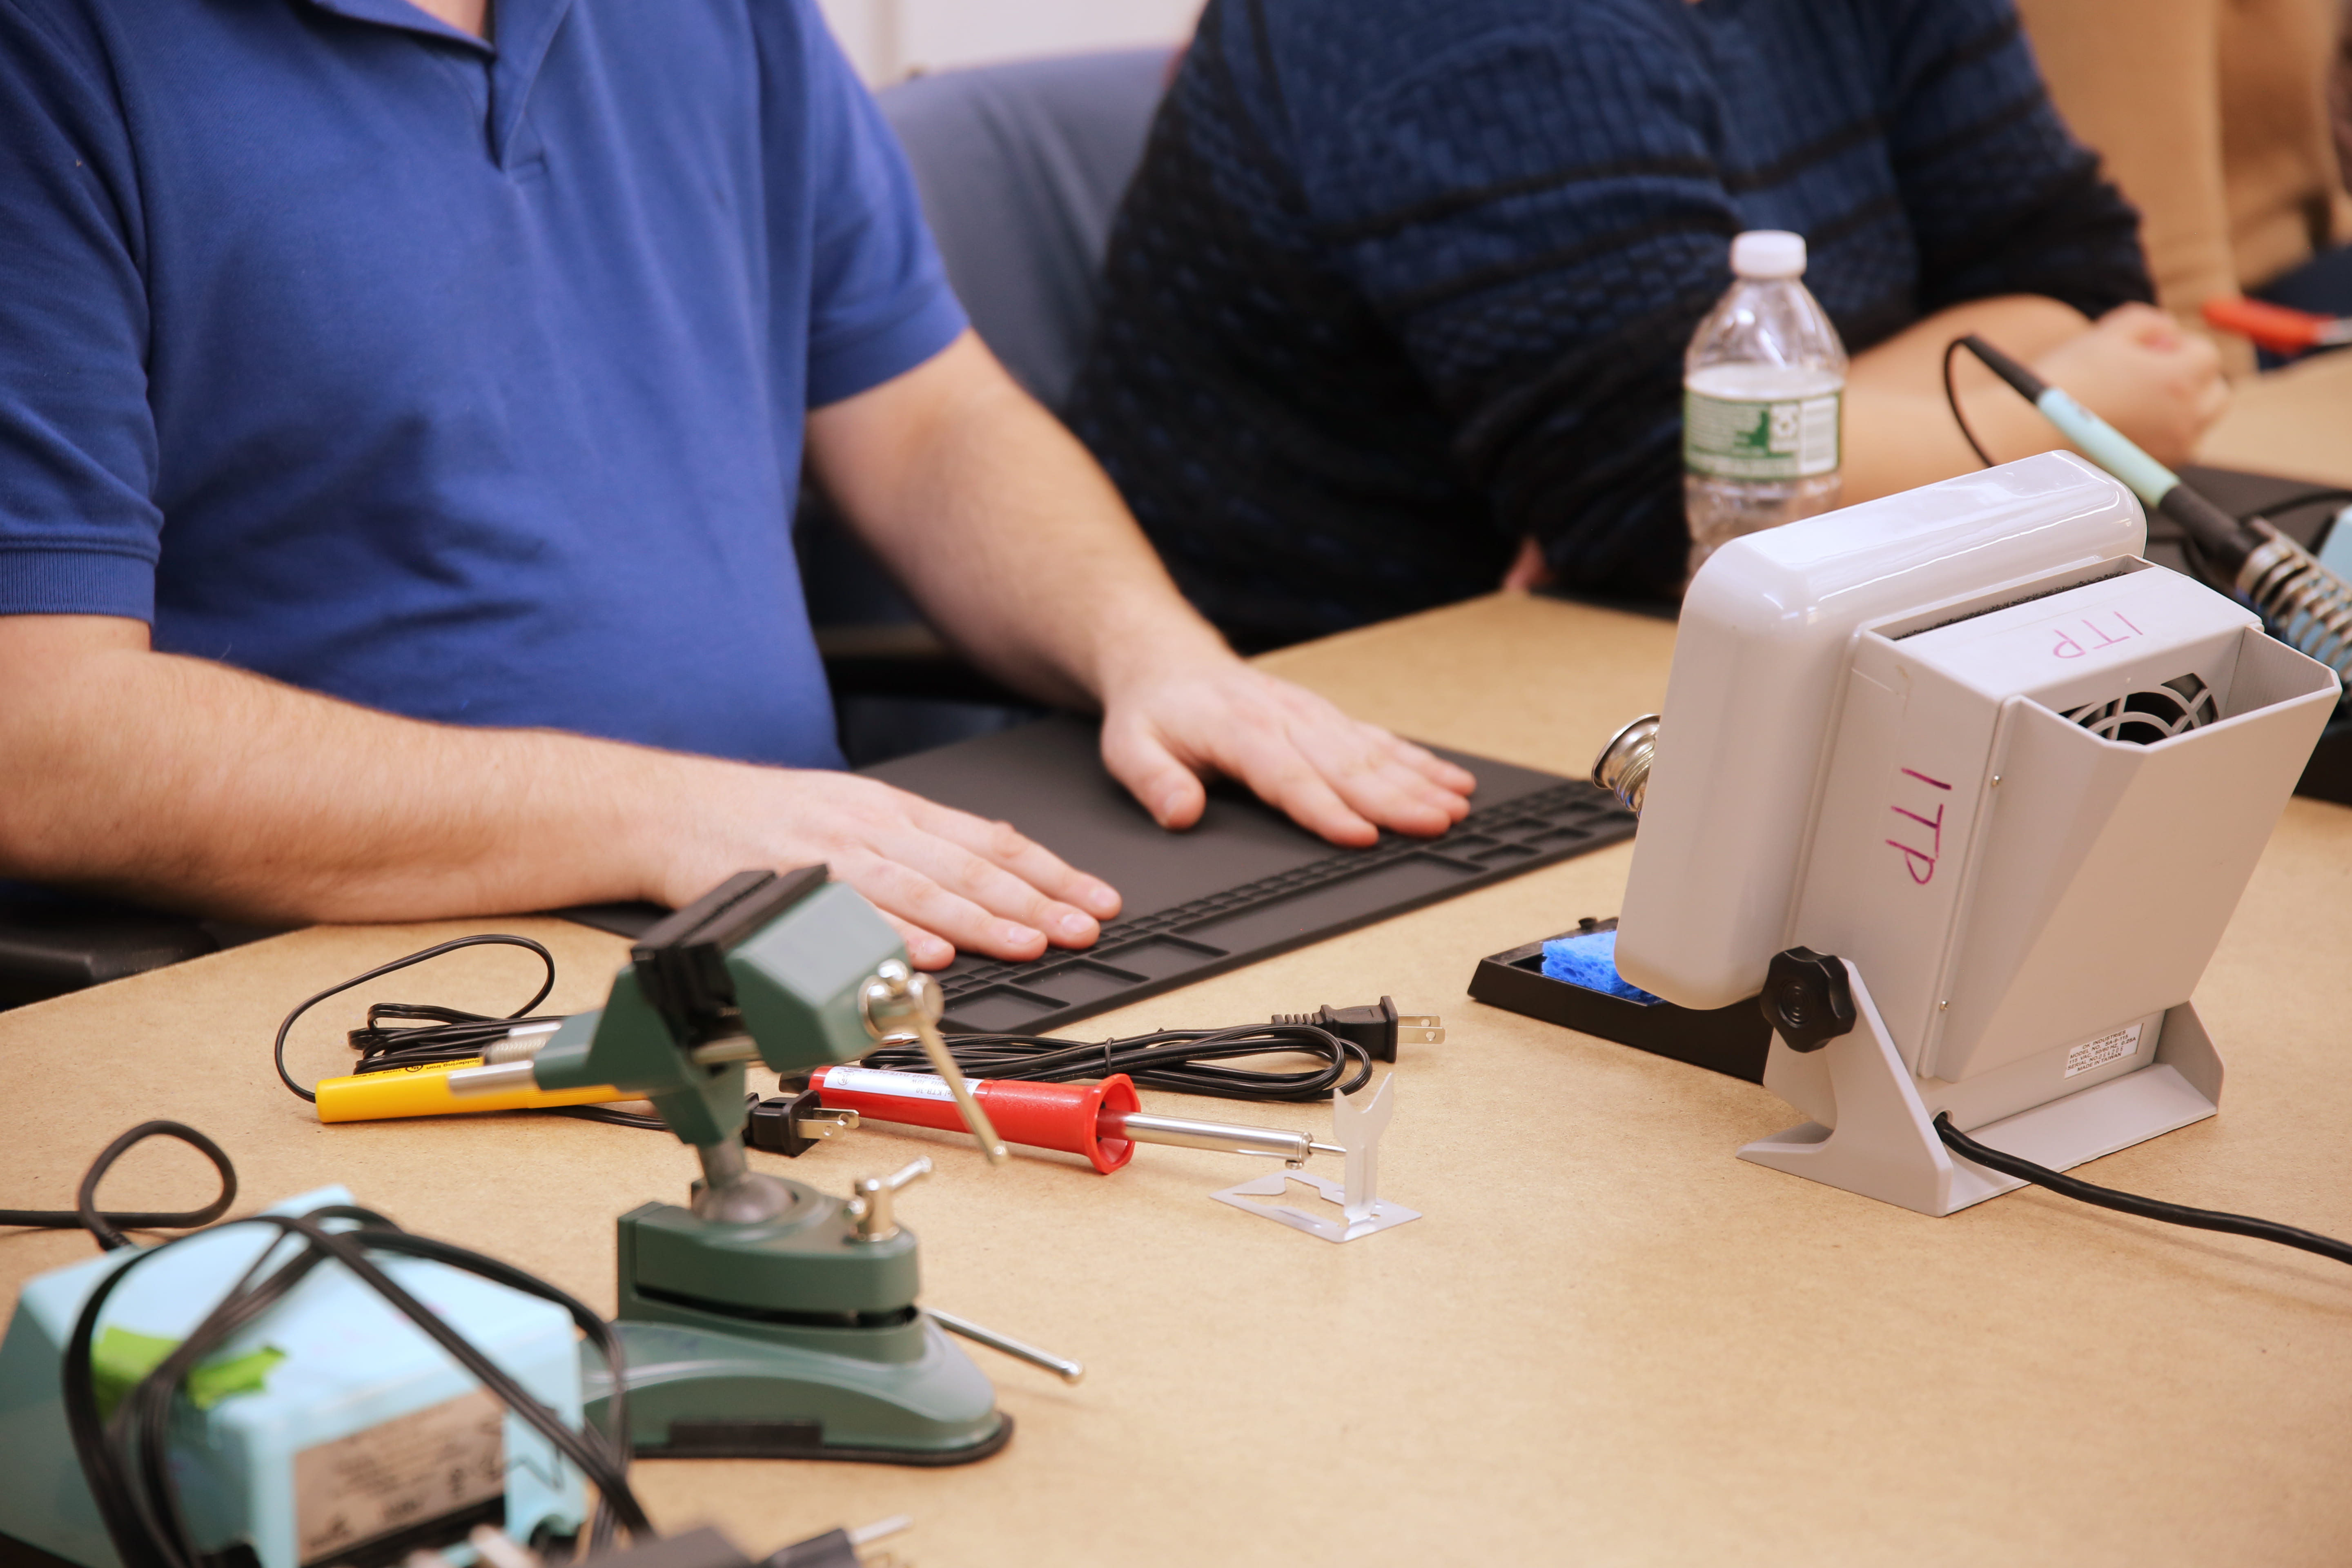
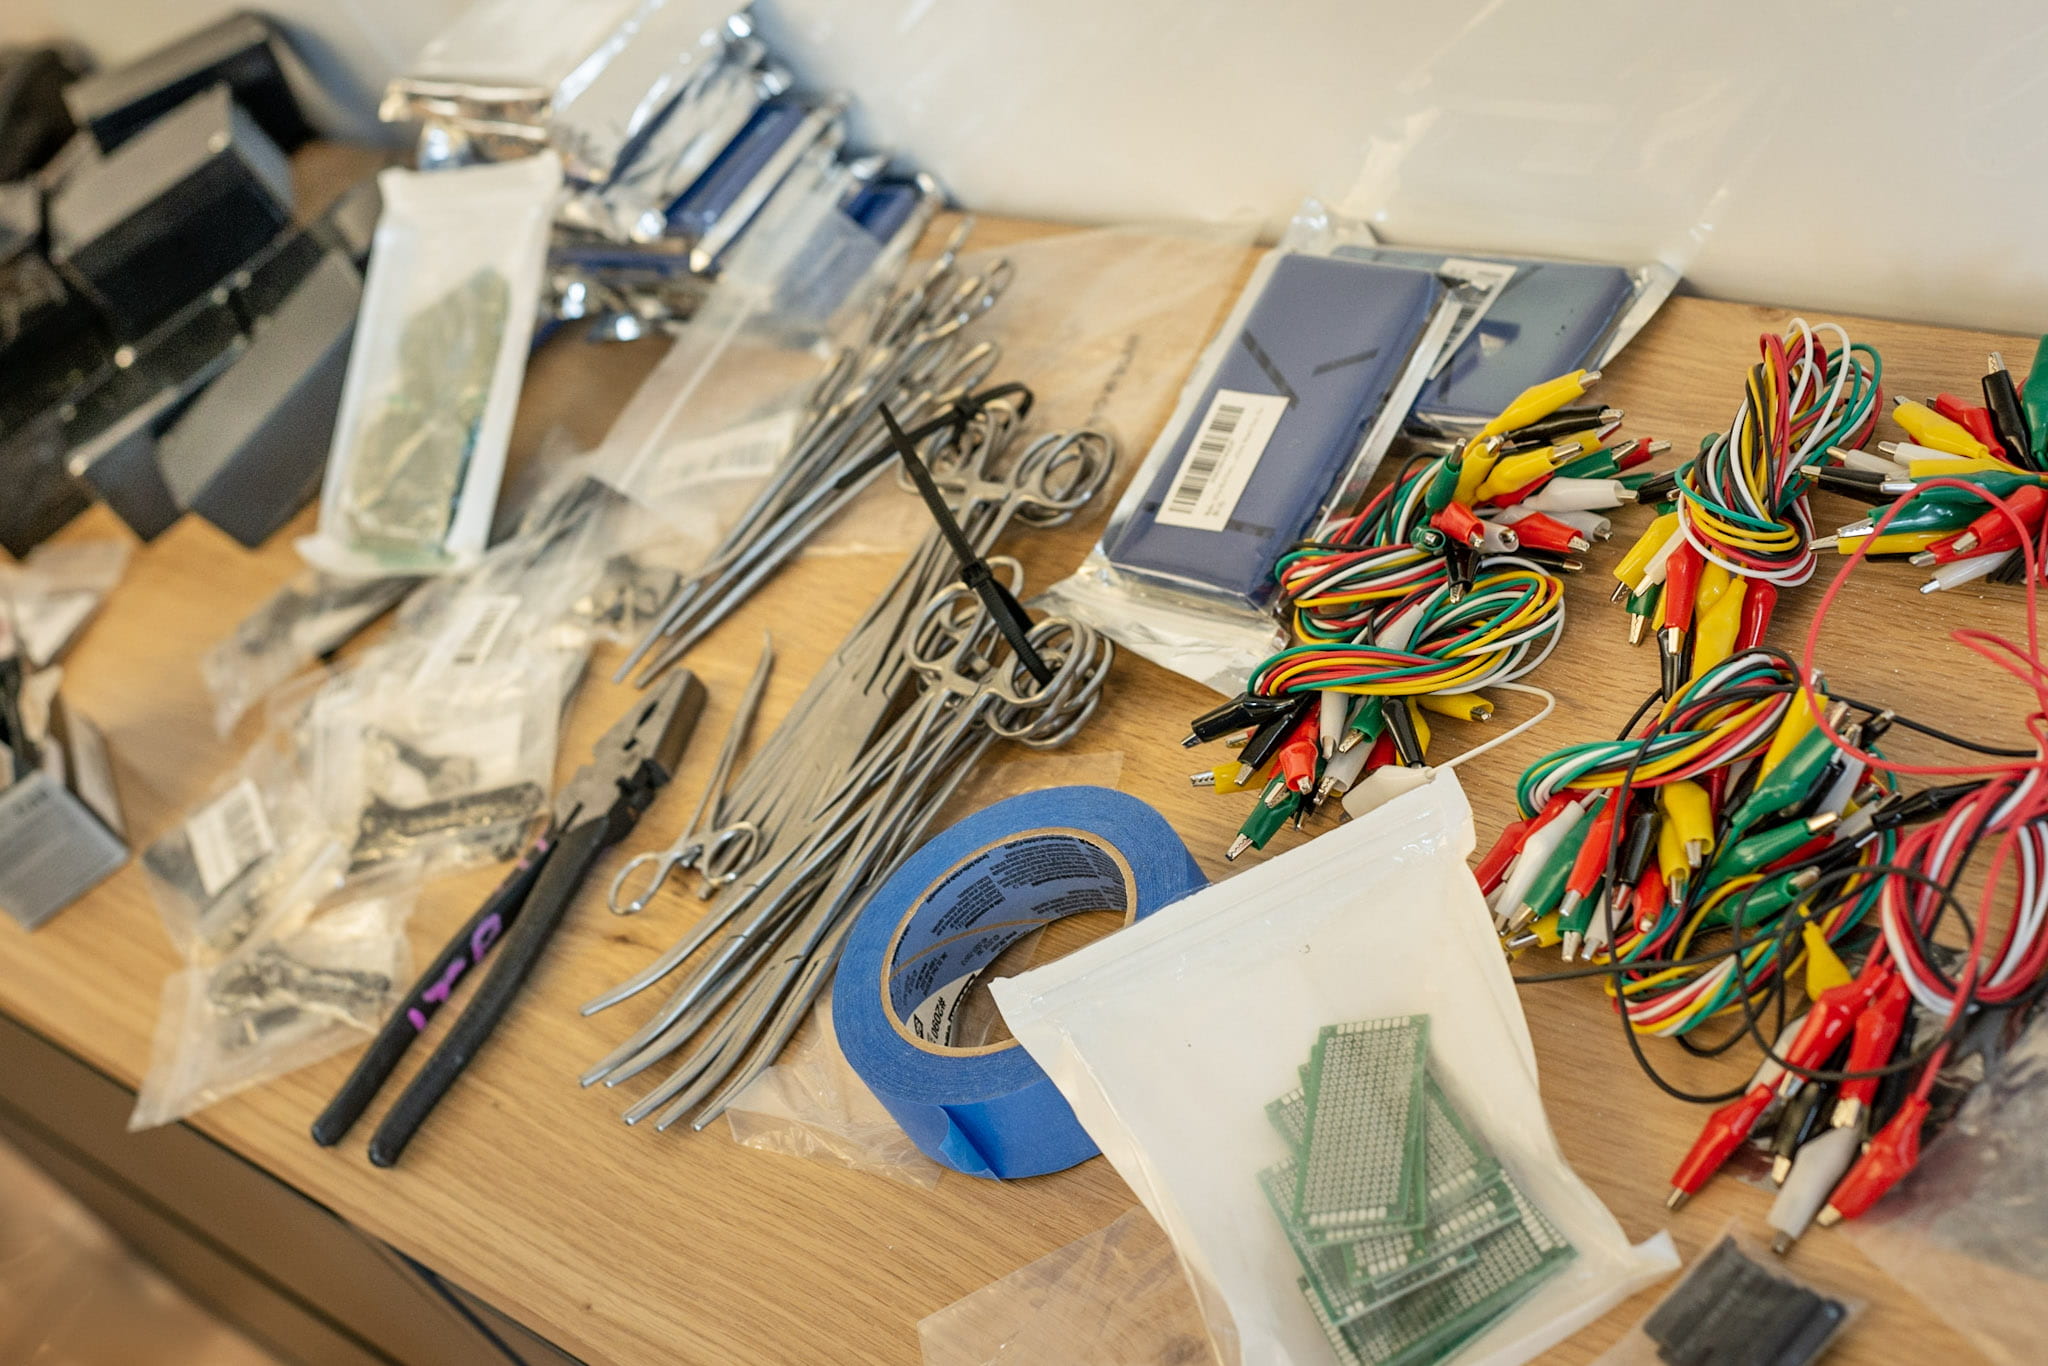
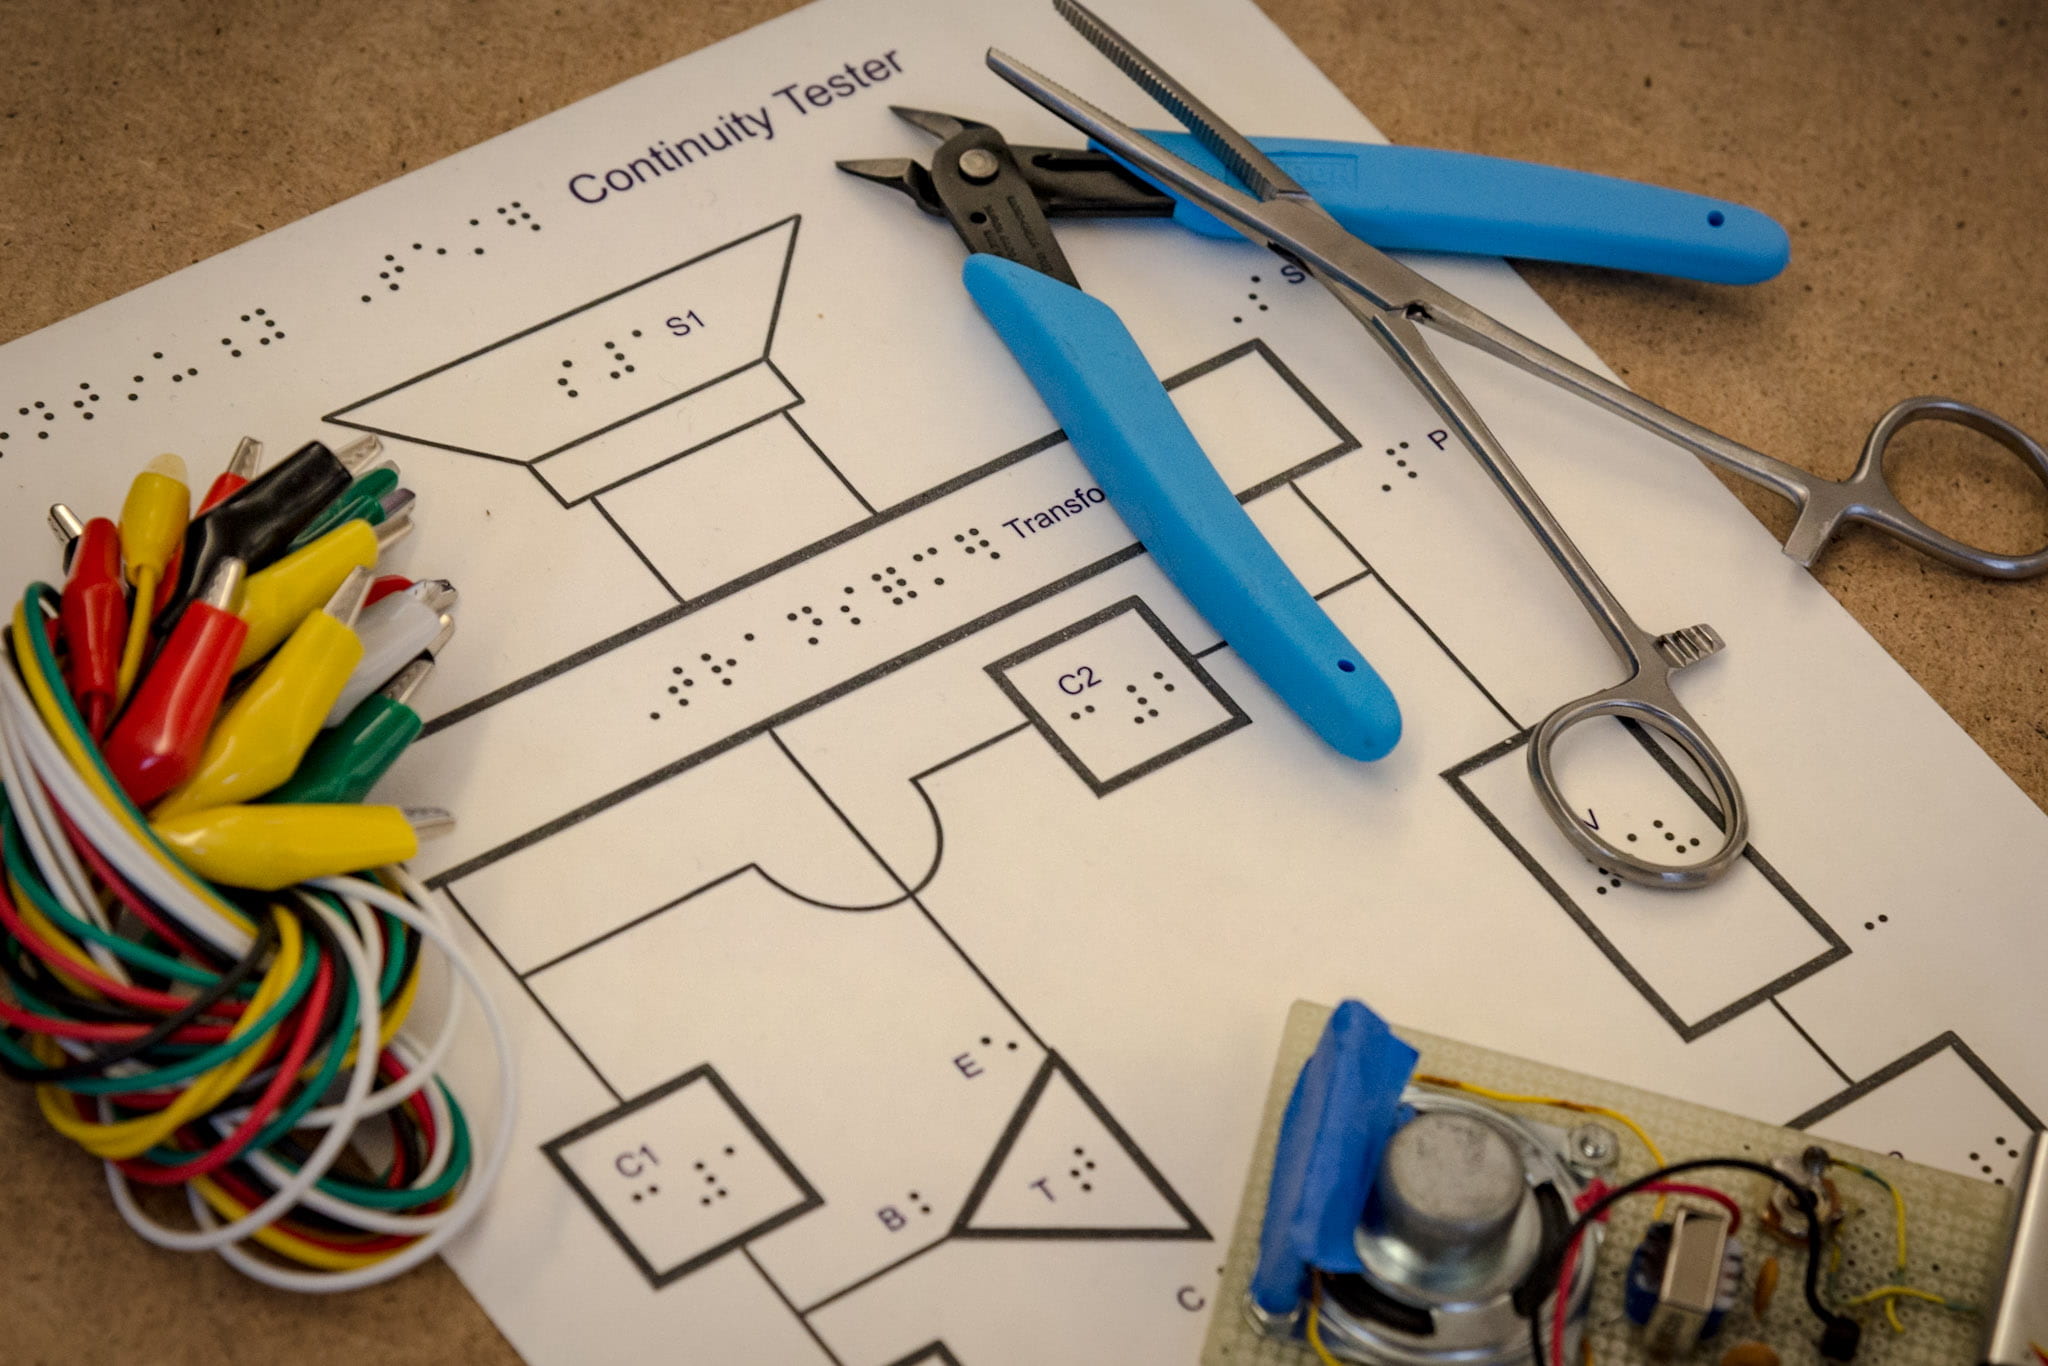
Tools
- Insulated Silicone Soldering Mat
- Wire Stripper/Cutter
- Forceps Varying sizes, bent and straight locking
- Flush Cutter
- Test Leads with Alligator Clips
- Small wrenches and screwdrivers
- Vice
- Soldering Station
- Copper wire for point-to-point soldering
- 60/40 rosin-core solder
Components
- Capacitors
- 22k-ohm Resistors
- Audio Transformer
- Transistor
- 9v Battery Clips
- Vector Board
- Project Enclosure
- ⅛” Mono Plug
- ⅛” Mono Jack
- 3” 8-ohm speaker
- 9v batteries
- 1” machine screws and nuts

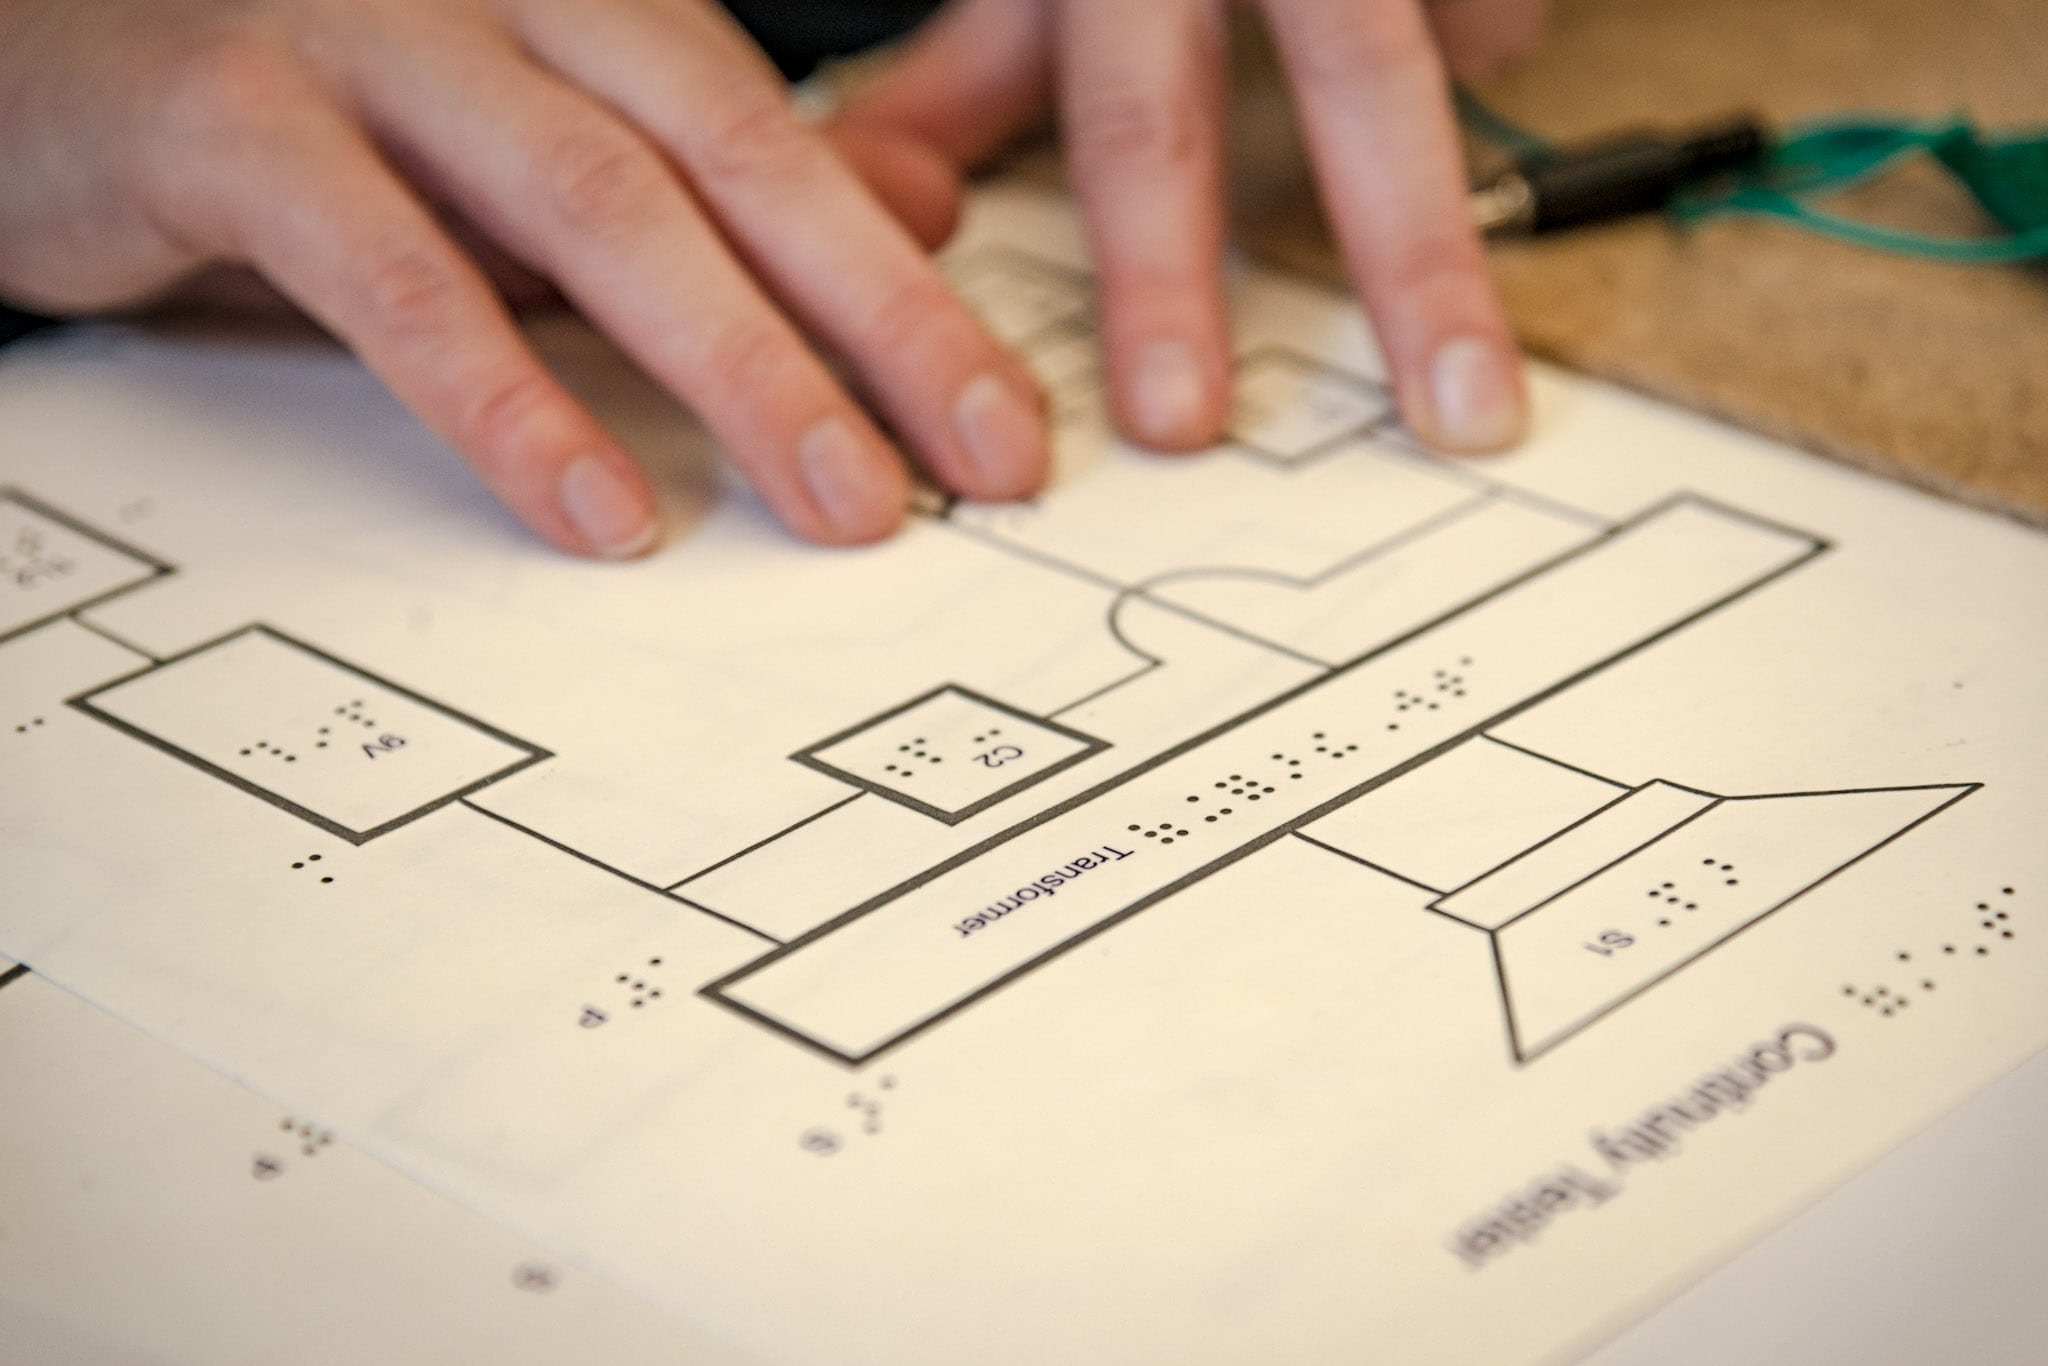
Circuit Diagram
- Tactile Schematic
- Guide (with templates) for how to make Tactile Schematics
- Textual Description (for screen readers)
- The center tap of the transformer’s primary connects to the emitter of the transistor, and the collector of the transistor connects to ground. One end of the transformer’s primary connects to a 0.022uF capacitor, which connects in turn to the base of the transistor. A 22 KW resistor also connects to the base of the transistor. The other end of the resistor connects to the positive test lead. The positive end of the battery connects to the other end of the transformer’s primary. The negative side of the battery connects to ground. The negative test lead connects to ground. One more 0.022 uF capacitor connects across the primary of the transformer. The 8W speaker connects across the secondary of the transformer.
Background Reading
We sent reading material, specifically designed for the workshop, in advance. We clarified that there was no expectation to memorize or even to understand everything in the articles. Their purpose was to set the stage for the tools and techniques that would be used and taught. We expected attendees to have more questions about blind soldering than they did before reading them, but we anticipated it. We suggested reading through them a few times to pick up bits that were missed on earlier passes.
- An updated article from the Smith-Kettlewell Technical File (Soldering Part II: Metallurgy, landmarking, and handling of soldering irons)
- A blog post about the continuity tester and its various uses for blind makers. Although it is ostensibly about building a quick and dirty continuity tester with an Arduino, the article has good content, as well as links to other resources regarding variations on the basic theme of accessible continuity testers.
Volunteer Training
- We set norms and expectations for working with BLV learners by offering an introduction to blind culture techniques for BLV travel and communications to the volunteers.
- We put volunteers on alert for potential biases, explaining the importance of hearing and respecting the number of ways people identify in terms of their disability.
- If needed, volunteers would re-iterate instructions, while offering assistance and collaboration to attendees.
Nonvisual Soldering Curriculum
Electronics Basics
- Circuits, current flow, voltage
- Continuity tester components
Our Project: The Continuity Tester
[Video Description: Josh Miele guides an attendee through a tactile schematic of a continuity tester]
- Explanation of the circuit with textual description and tactile schematic and fabrication
- Uses of the Continuity Tester in accessible making
Wayfinding
- Building a mental map of the elements on the circuit board
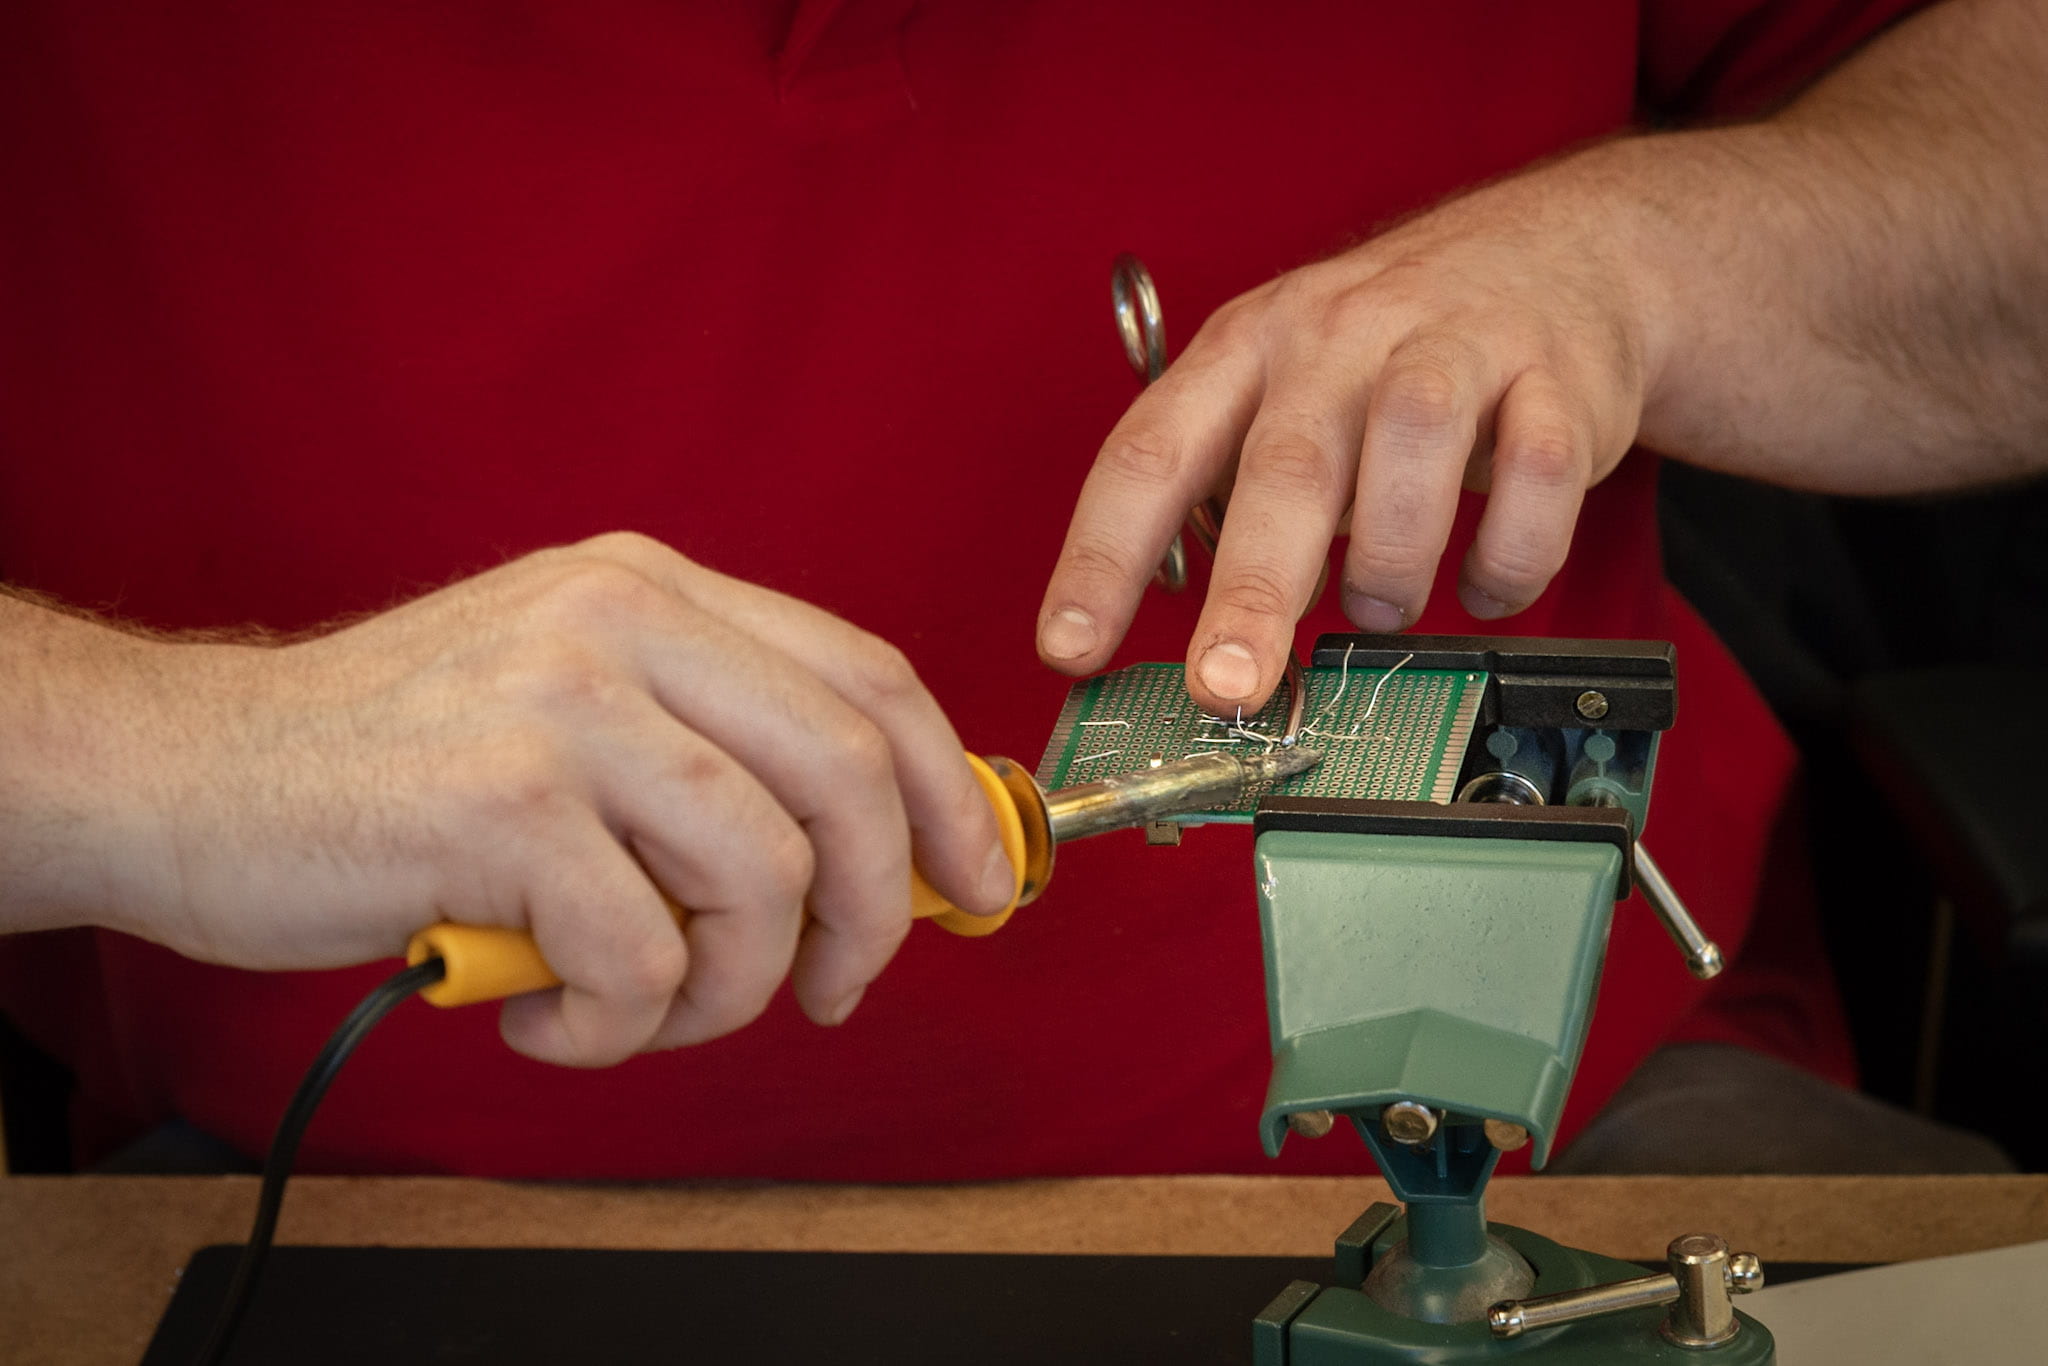
- Practice with a cold soldering iron
[Video Description: Josh Miele doubles up a line of solder and places it on the circuit board while demonstrating how to practice using a cold soldering iron]
- Using soldering tip like white cane for feedback
[Video Description: An attendee uses a soldering iron like a white cane to line it up with the end of the landmarking forceps]
- Landmarking techniques (Permanent orientation cues)
- Using existing features for landmarking like circuit board, components and wires on the board
- Using optional landmarks
- Edge of the vice
[Video Description: An attendee secures his circuit board in his vice, allowing about 1/3 to jut out to the side to leave room to lock a pair of forceps onto it]
-
-
- Edge of locking forceps
-
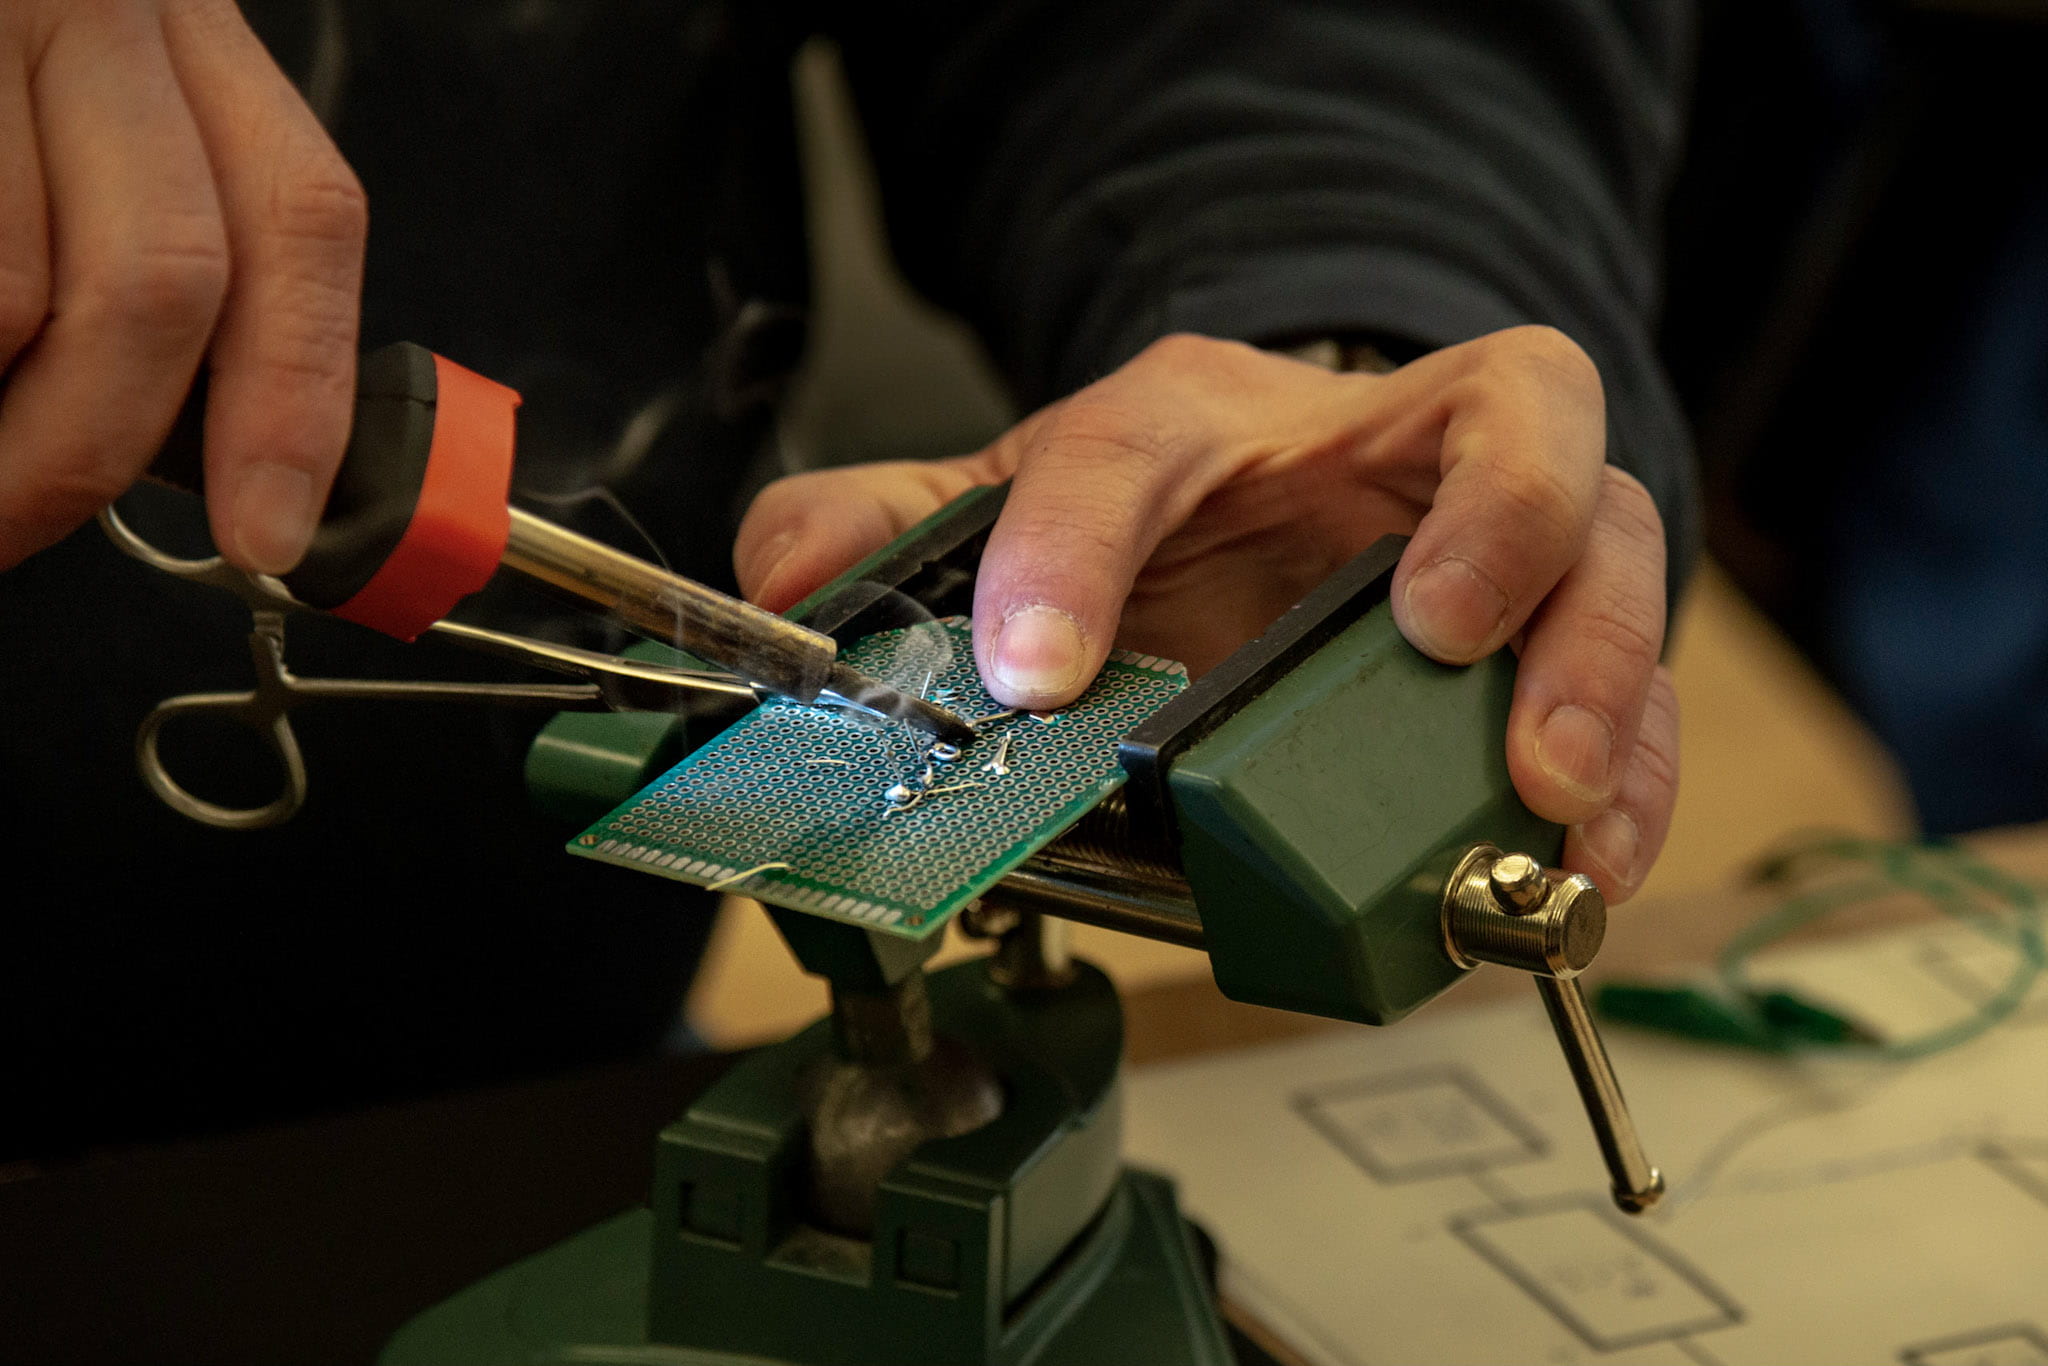 [Video Description: An attendee uses a pair of locking forceps to indicate where to place the tip of the soldering iron]
Stability
- Vice for holding the circuit board in place
 [Video Description: An attendee adjusts their vice to secure their circuit board in place]
- Personalizing workspace for easy access to materials
- Resting elbow on table to brace the arms
[Video Description: Josh Miele holds the solder leash at the end of the forceps and demonstrates how to rest an elbow on the table for stability]
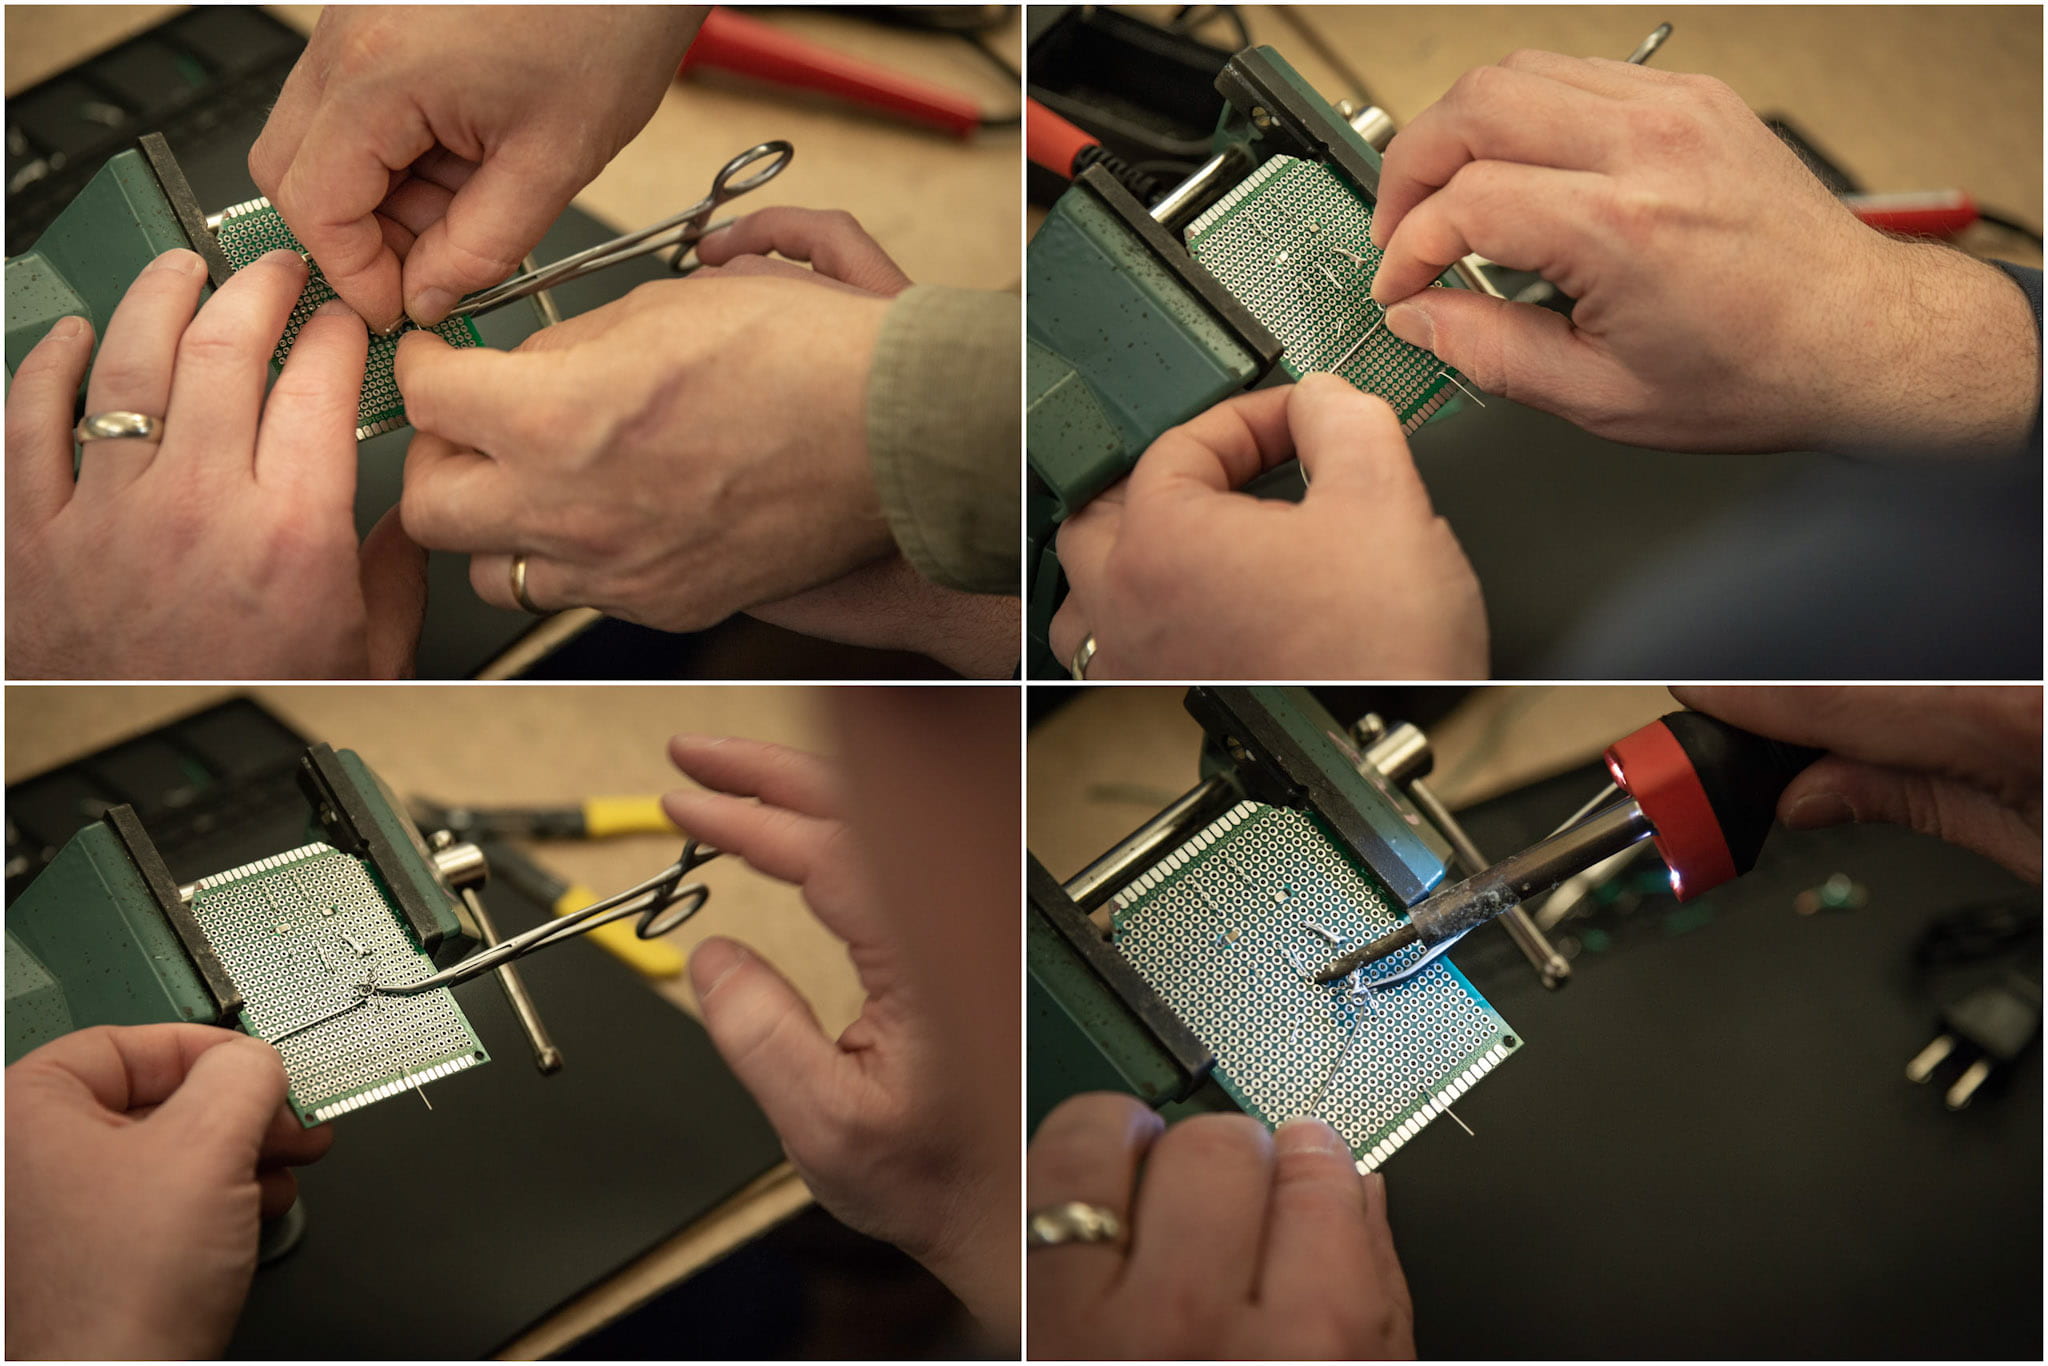
Sensing Techniques
When achieving alloy temperature:
- Smell the smoke from the melting solder
[Video Description: An attendee guides their soldering iron to the juncture of the end of the landmarking forceps and the leash of solder they’re holding with their left hand]
[Video Description: An attendee holds their soldering iron onto a leash of solder as plumes of solder begin to waft upwards towards their face]
- Feel the wires attached to the circuit heating up
- Feel of stickiness of the iron tip that comes from the rosin
- Use a solder leash and feel it break
- Wrap solder around a component.
[Video Description: An attendee’s circuit board, held by a vice, displays solder wrapped around the individual components]
-
- Extend a leash, or a line of solder from the solder that’s wrapped around a component.
[Video Description: An attendee holds a leash of solder in their left hand and guides their soldering iron tip to the juncture of where it meets the forceps]
-
- Hold it in one hand and keep tension on it. Use the other hand to place the soldering iron tip at the base of the leash. When it breaks, the solder has melted.
Schedule
Friday:
1:00 PM: Volunteer orientation 2:00 PM: Students arrive; Workshop begins
- Introductions
- Building orientation and safety
- Lab orientation and course structure
- Consider the Continuity Tester
2:54 PM: Hands-on soldering
- Intro to the tools of Soldering: Irons, solder guides, strippers, cutters, vises, forcipes,
- Care and feeding of the soldering iron
- Arranging your tools
- Basics of solder, alloying, flux, and oxides
3:45 PM: Break 4:00 PM: Hands-On Soldering
- Tinning wire
- Soldering lugs
- Point-to-point soldering
5:00 PM: Done for the day!
Saturday:
9:30 AM: Begin Building the Continuity Tester
- Tin wires and solder to lugs, jacks, plugs, and speaker
12 PM: Lunch 1:00 PM: Soldering on the board
- Emitter to center tap
- Capacitor from transformer to base
- One side of capacitor across primary
- Resistor to base
2:30 PM: Break 3:00 PM: Connect wire components to board
- Speaker to transformer secondary
- Battery connector and plug negative to primary and collector (ground)
- Positive plug to resistor
5:00 PM: Happy Hour
Sunday:
9:30 AM: Morning session – troubleshooting and putting it in the box
- Troubleshooting
- Putting it in the box
11:30 AM: Lab Cleanup 12:00 PM: Closing Discussion 12:30 PM: Farewell!
Documentation
What We Learned
- Provide tactile and textual procedural instruction for screen reader access
- Helps attendees who need additional time or want to work ahead
- Allows attendees to practice at home or share skills
- Informs future instructors who develop their own curriculum
- Standardize workshop materials
- Train volunteers on building the continuity tester in advance
- Provide consistent types of soldering irons
- Give participants identical soldering irons
- Specifically a temperature-controlled, chisel tip soldering irons
- Pair with an analog station featuring a tactile temperature knob and power switch
- Try cold soldering or resistance soldering
- Create accessible online video documentation of nonvisual soldering lessons as a scalable way to teach and practice skills
Resources
- Meryl Alper. 2013. Making space in the Makerspace: Building a mixed-ability Maker culture. Proceedings of the Interaction Design and Children (IDC-13), New York, NY, USA, 24-27.
- Cynthia L. Bennett, Abigale Stangl, Alexa F. Siu, and Joshua A. Miele. 2019. Making Nonvisually: Lessons from the Field. In The 21st International ACM SIGACCESS Conference on Computers and Accessibility (ASSETS ’19). Association for Computing Machinery, New York, NY, USA, 279–285. DOI:https://doi.org/10.1145/3308561.3355619
- Tara Brady, Camille Salas, Ayah Nuriddin, Walter Rodgers & Mega Subramaniam (2014) MakeAbility: Creating Accessible Makerspace Events in a Public Library, Public Library Quarterly, 33:4, 330-347, DOI: 10.1080/01616846.2014.970425
- William Gerrey. 1980. Soldering I. The Smith-Kettlewell Technical File: A Quarterly Publication of The Smith-Kettlewell Eye Research Institute’s Rehabilitation Engineering Research Center. Retrieved from https://www.ski.org/sktf-fall-1980#soldering. Accessed June 2020.
- William Gerrey. 1982. Continuity Tester Circuits–Old & New. The Smith-Kettlewell Technical File: A Quarterly Publication of The Smith-Kettlewell Eye Research Institute’s Rehabilitation Engineering Research Center. Retrieved from https://www.ski.org/sktf-fall-1982#tester. Accessed June 2020.
- William Gerrey. 1984. Soldering Part VII Resistance Soldering. The Smith-Kettlewell Technical File: A Quarterly Publication of The Smith-Kettlewell Eye Research Institute’s Rehabilitation Engineering Research Center. Retrieved from https://www.ski.org/sktf-fall-1984#soldering. Accessed June 2020.
- Amy Hurst and Shaun Kane. 2013. Making “making” accessible. In Proceedings of the 12th International Conference on Interaction Design and Children (IDC ’13). Association for Computing Machinery, New York, NY, USA, 635–638. DOI:https://doi.org/10.1145/2485760.2485883
- Joshua Miele. 2017. Teaching Teachers and Making Makers: What the Maker Movement Can Teach the World about Accessibility and Design. In Proceedings of the 2017 Conference on Interaction Design and Children (IDC ’17). Association for Computing Machinery, New York, NY, USA, 5–6. DOI:https://doi.org/10.1145/3078072.3078073
- Lauren Race, Chancey Fleet, Joshua A. Miele, Tom Igoe, and Amy Hurst. 2019. Designing Tactile Schematics: Improving Electronic Circuit Accessibility. In The 21st International ACM SIGACCESS Conference on Computers and Accessibility (ASSETS ’19). Association for Computing Machinery, New York, NY, USA, 581–583. DOI:https://doi.org/10.1145/3308561.3354610
- Lauren Race, Claire Kearney-Volpe, Chancey Fleet, Joshua A. Miele, Tom Igoe, and Amy Hurst. 2020. Designing Educational Materials for a Blind Arduino Workshop. In Extended Abstracts of the 2020 CHI Conference on Human Factors in Computing Systems (CHI EA ’20). Association for Computing Machinery, New York, NY, USA, 1–7. DOI:https://doi.org/10.1145/3334480.3383055
- Cary A. Supalo, Mick D. Isaacson, and Michael V. Lombardi. 2014. Making Hands-On Science Learning Accessible for Students Who Are Blind or Have Low Vision. Journal of Chemical Education. 91, 2, 195-199. DOI:https://doi.org/10.1021/ed3000765
- Valerie Taylor and Richard Ladner. 2011. Data trends on minorities and people with disabilities in computing. Commun. ACM 54, 12 (December 2011), 34–37. DOI:https://doi.org/10.1145/2043174.2043187
- Edward Tilton. 1951. Hammering by the Touch System: A Day with Bob Gunderson, W2JIO. QST. Retrieved from https://4.files.edl.io/5749/04/30/20/155214-91a41314-357e-49e0-afc9-b012a8ded8c6.pdf. Accessed June 2020.
- U.S. Department of Education. 2019. Annual Report to Congress on the Individuals with Disabilities Education Act (IDEA). Office of Special Education and Rehabilitative Services. Retrieved from https://sites.ed.gov/idea/files/41st-arc-for-idea.pdf. Accessed June 2020.
- Merry-Noel Chamberlain. 2015. Sighted/Human Guide One Instructor’s Perspective. National Federation of the Blind: Future Reflections. Retrieved from https://www.nfb.org/sites/www.nfb.org/files/images/nfb/publications/fr/fr34/1/fr340110.htm. Accessed June 2020.
- Barbara Cheadle. 1994. School Uses Technology to Mainstream Blind Students. National Federation of the Blind: Future Reflections. Retrieved from https://www.nfb.org/sites/www.nfb.org/files/images/nfb/publications/fr/fr13/issue3/f130312.html. Accessed June 2020.
- Blind Arduino Project. 2016. Consider the Continuity Tester. Retrieved from http://blarbl.blogspot.com/2016/06/consider-continuity-tester.html. Accessed June 2020.
- Blind Arduino Project. 2019. Retrieved from https://www.ski.org/project/blind-arduino-project. Accessed June 2020.
- ColdHeat. The New Generation ColdHeat Soldering Pen. Retrieved from https://www.coldheat.com/. Accessed June 2020.
- New York Public Library. Dimensions: Community Tools for Making Tactile Graphics & Objects. Retrieved from https://www.nypl.org/about/locations/heiskell/dimensions. Accessed June 2020.
- Twitter. 2020. Retrieved from https://twitter.com/ChanceyFleet/status/1233647580334239744. Accessed June 2020.
- Maker Shed. Books & Magazines. Retrieved from https://www.makershed.com/collections/books-magazines. Accessed June 2020.
- National Federation of the Blind. Retrieved from https://www.nfb.org/. Accessed June 2020.
- Texas School for the Blind and Visually Impaired. 2011. Using Landmarks and Clues to Help Your Student Know Where He is in the World. Retrieved from https://www.tsbvi.edu/deafblindness-items/1896-using-landmarks-and-clues-to-help-your-student-know-where-he-is-in-the-world. Accessed June 2020.
- LightHouse. 2016. Blind Soldering: See Photos from Our First-ever Electrical Workshop. Retrieved from https://lighthouse-sf.org/2016/11/14/blind-soldering-see-photos-from-our-first-ever-electrical-workshop/. Accessed June 2020.
- Makerspaces.com. How To Solder: A Beginner’s Guide. Retrieved from https://www.makerspaces.com/how-to-solder/. Accessed June 2020.
- Bennett, Cynthia. “Accessibility Seminar on Nonvisual Soldering.” Carnegie Mellon University. Remote. 1 Oct. 2020. Lecture. https://www.youtube.com/watch?v=g8B-D0LLxW0&list=PLcDDSMgUocNrCIqOfTW7SHruY1_SH5pbU&index=1